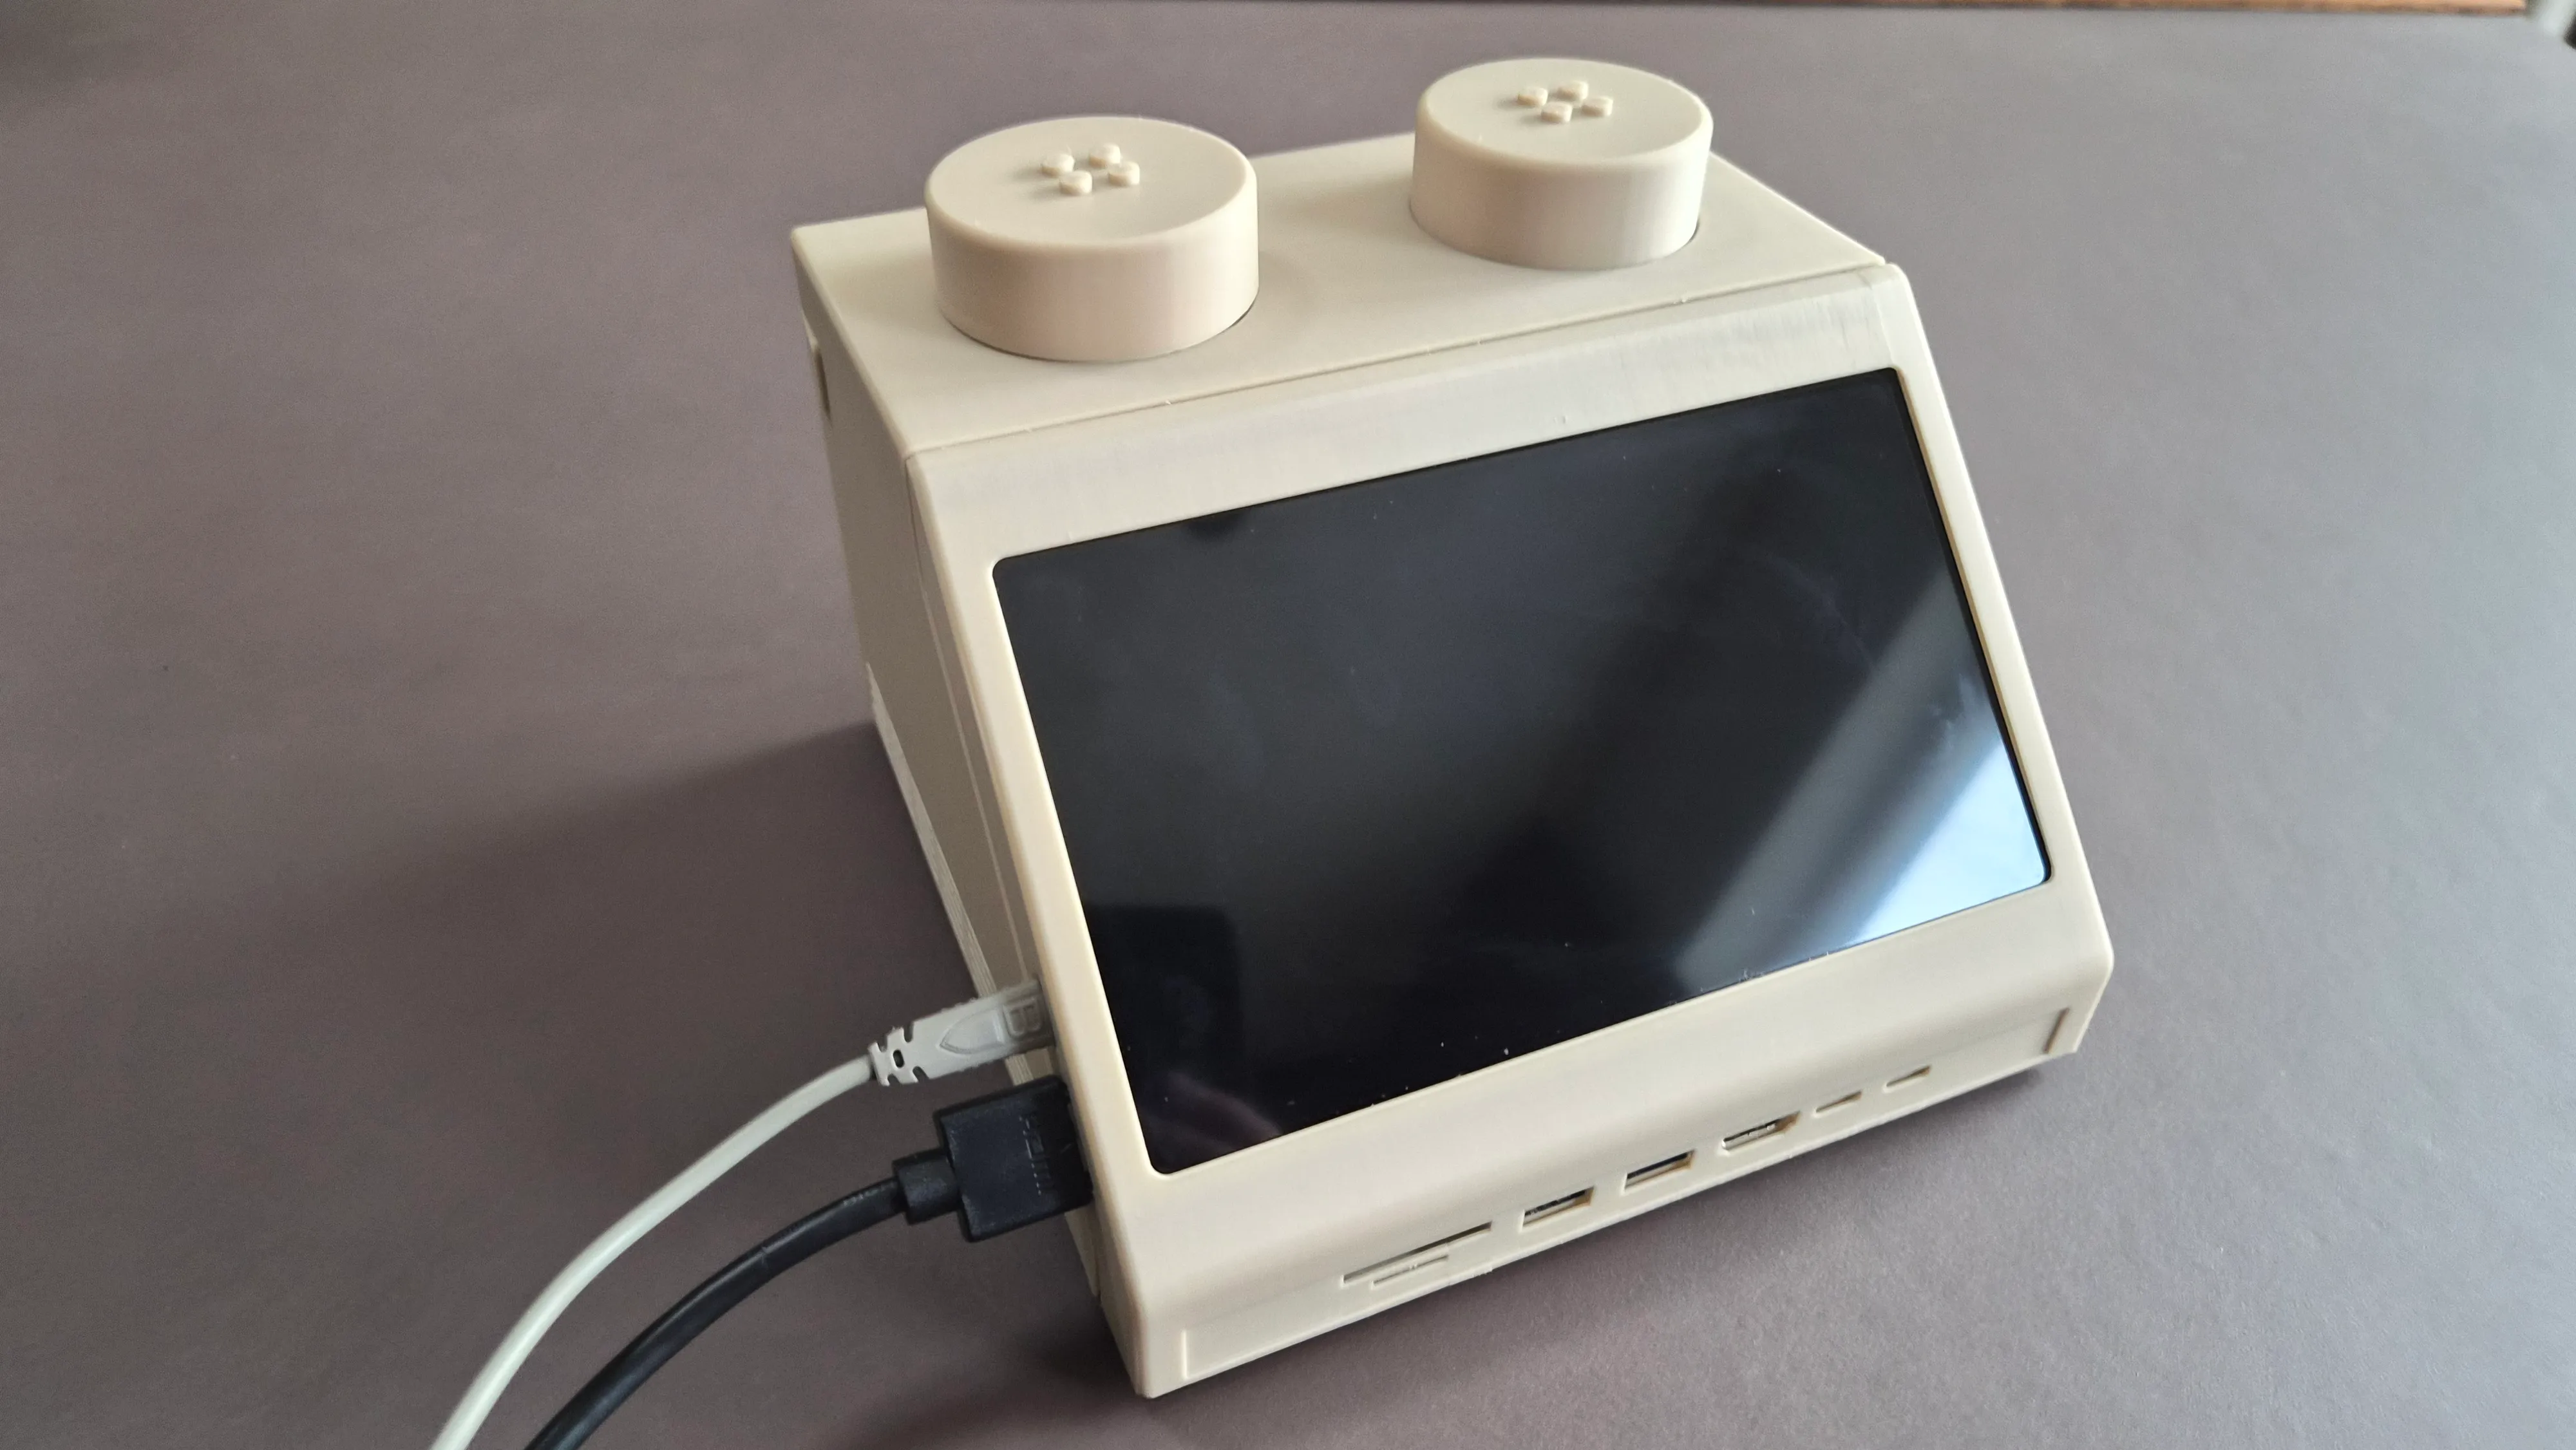
the M2x2
FIG 01. THE M2x2 // March '26
“
What if our tools felt as intentional as a well-crafted instrument, and as playful as the things we built as kids?
”the Vision
The M2x2 is a functional homage to the classic Lego computer brick, upscaled and re-imagined as a high-performance workstation. This project bridges the gap between play and productivity. It's not just a case; it's an enchanted housing that combines the aesthetics and charm of the Macintosh, the playfulness and modularity of the LEGO system, and the power of modern silicon. It demands intention, rewards curiosity, and turns every desktop interaction into a moment of tactile satisfaction.
the Origin
To understand the complete timeline of the M2x2, please refer to the timeline below.
LEGO
Apple
LEGO 
1978
The Artifact
The Lego Space theme is born, featuring the (now) iconic Space minifigure.
LEGO 
1979
The Interface
The original 2x2 sloped computer brick (Part 3039p04) is born, becoming a staple of Classic Space cockpits. It becomes the heart of the Alpha-1 Rocket Base and the legendary Galaxy Explorer.
Apple
1984
The Macintosh
Apple introduces the original Macintosh 128K, popularizing the graphical user interface and forever changing personal computing.
LEGO
1985
The Silicon Bridge
LEGO releases the 1038 Computer Interface, officially connecting the physical brick ecosystem to the Apple II.
Apple
2005
The original Mac mini
Apple introduces the original Mac mini, offering an affordable entry point to the Mac ecosystem inside a compact 6.5-inch square case.
Apple
2024
The Mac mini M4
Apple unveils the completely redesigned Mac mini powered by the M4 chip, packing unprecedented workstation performance into an impossibly small 5x5-inch enclosure.
LEGO
2026
The Miniaturization
In January 2026, LEGO announces the 'Smart Brick' at CES, cramming an ASIC chip and sensors into a standard 2x4 Lego brick.
Watt IV 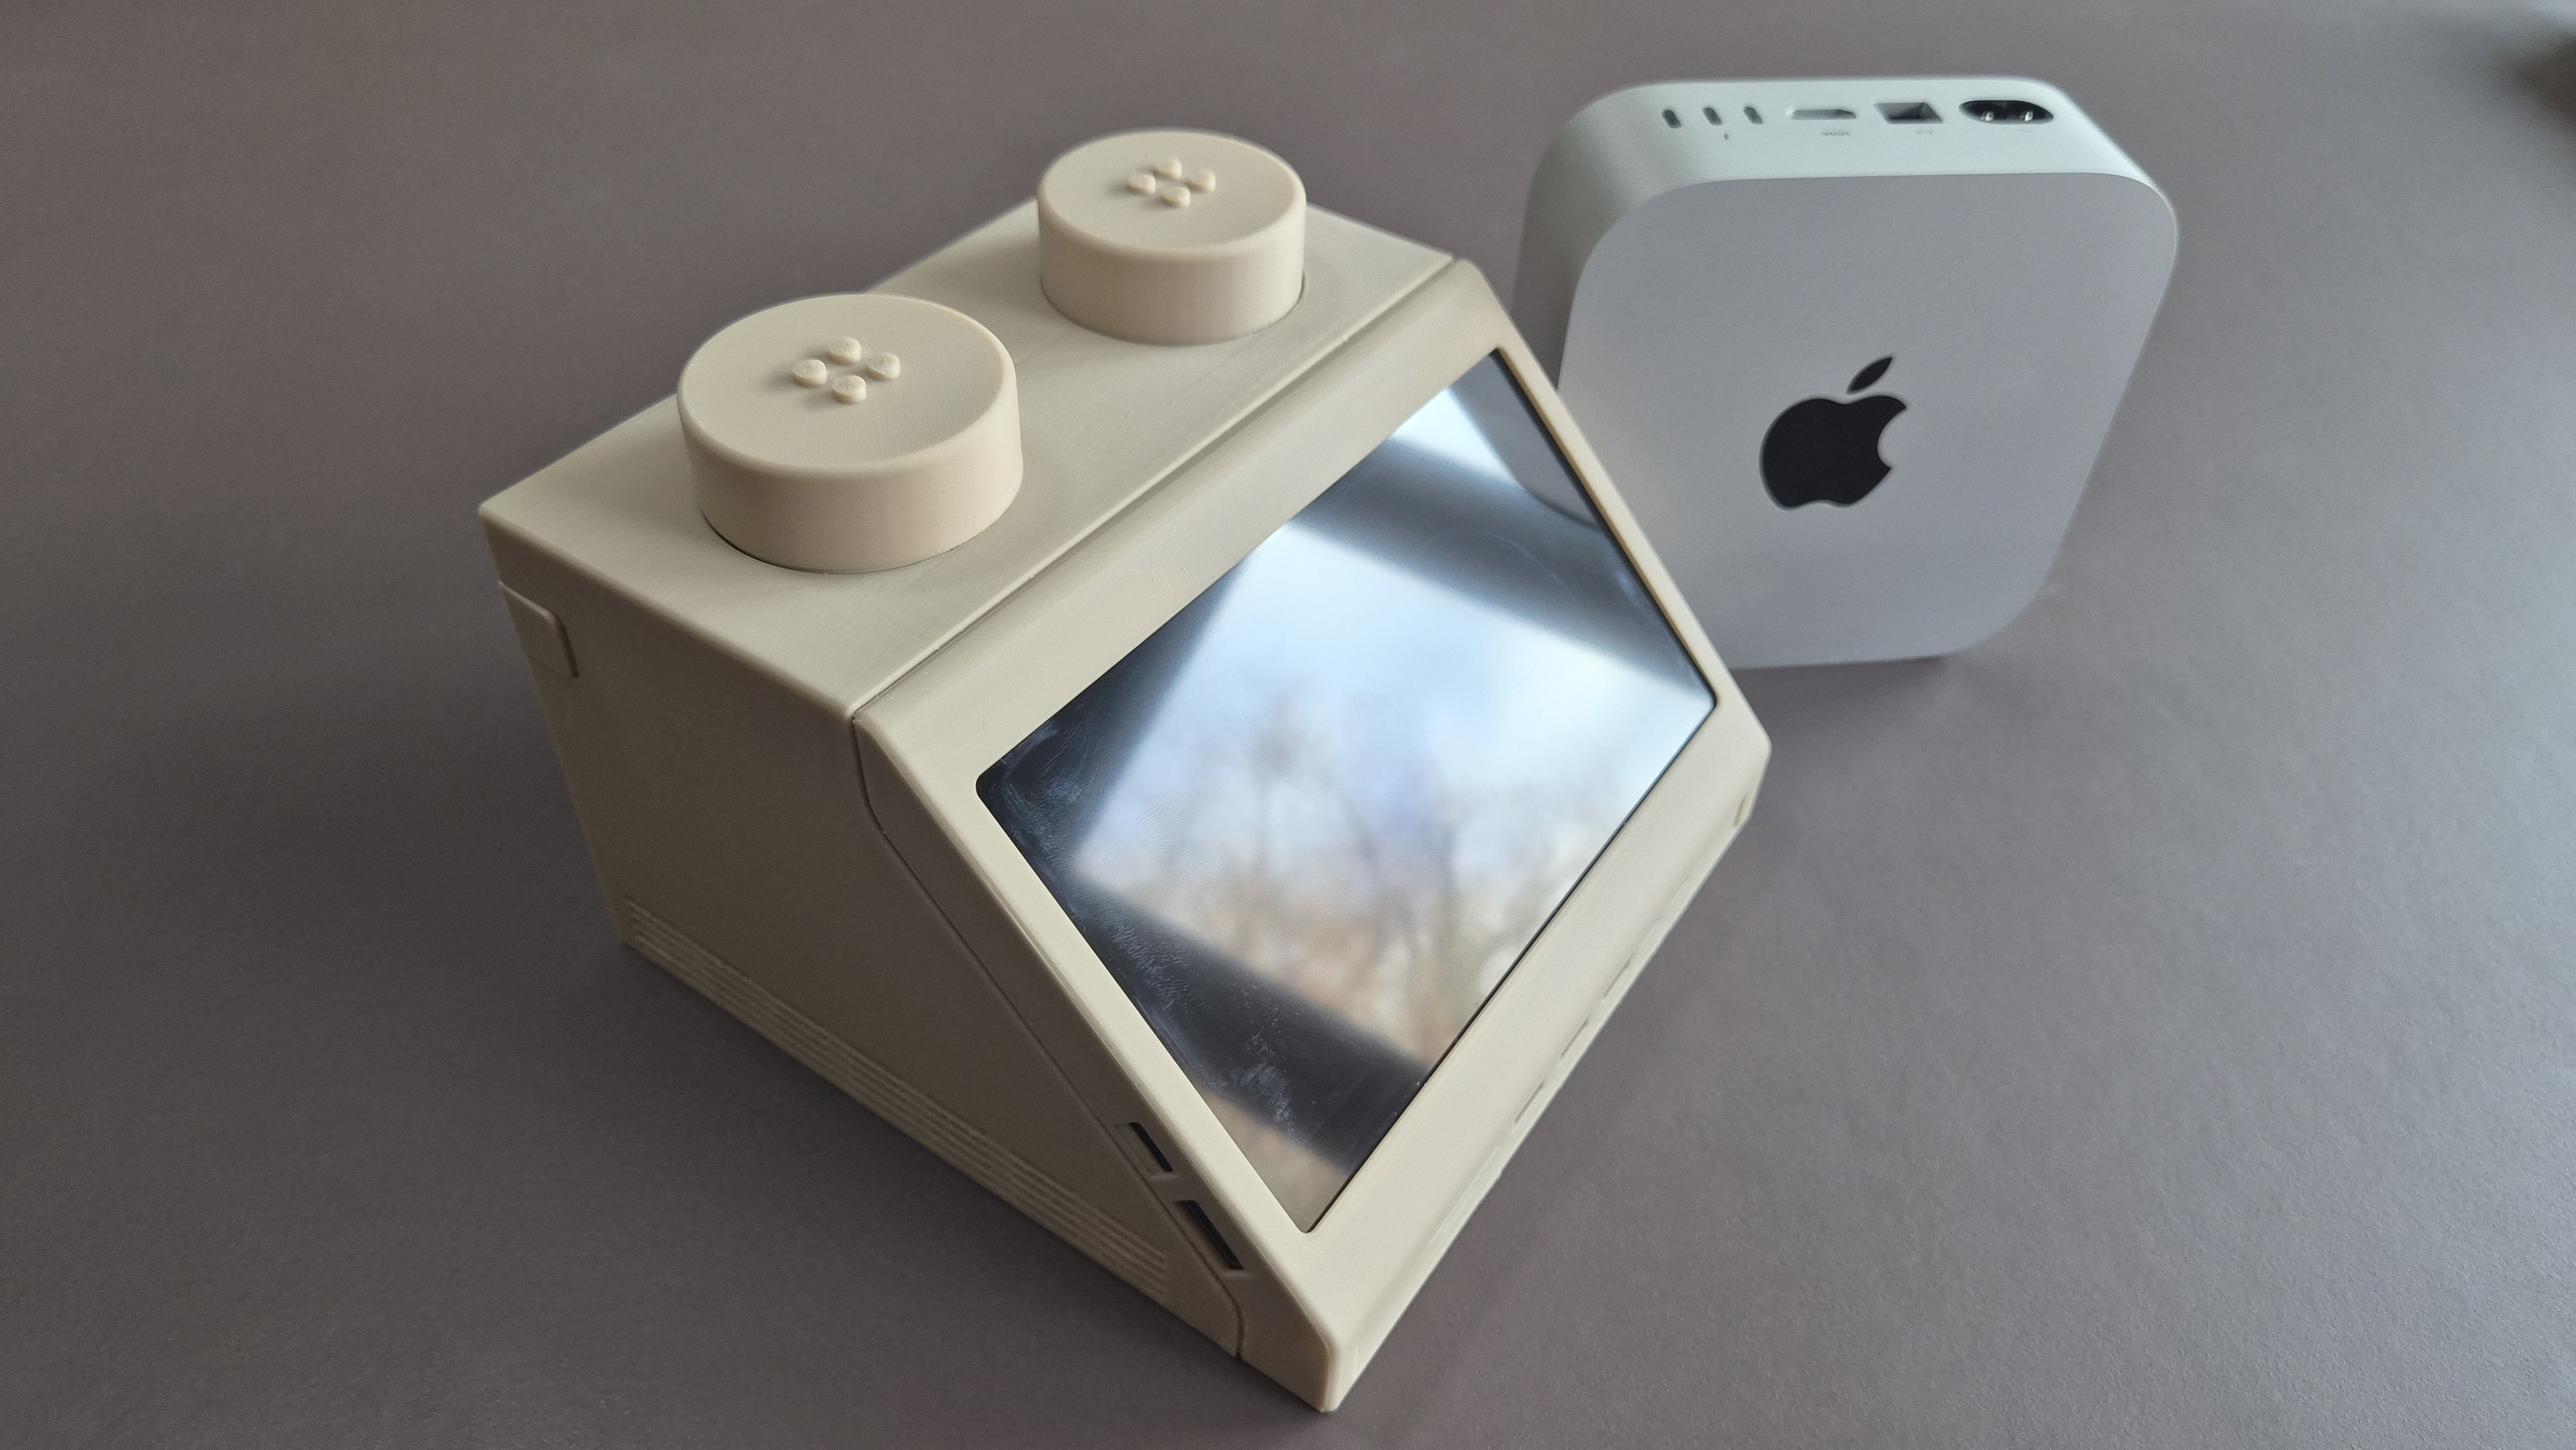
March 2026
The Upscaling
Watt IV unveils the modular 10:1-scale workstation: the M2x2. A functional homage powered by modern M4 silicon.
the Magic
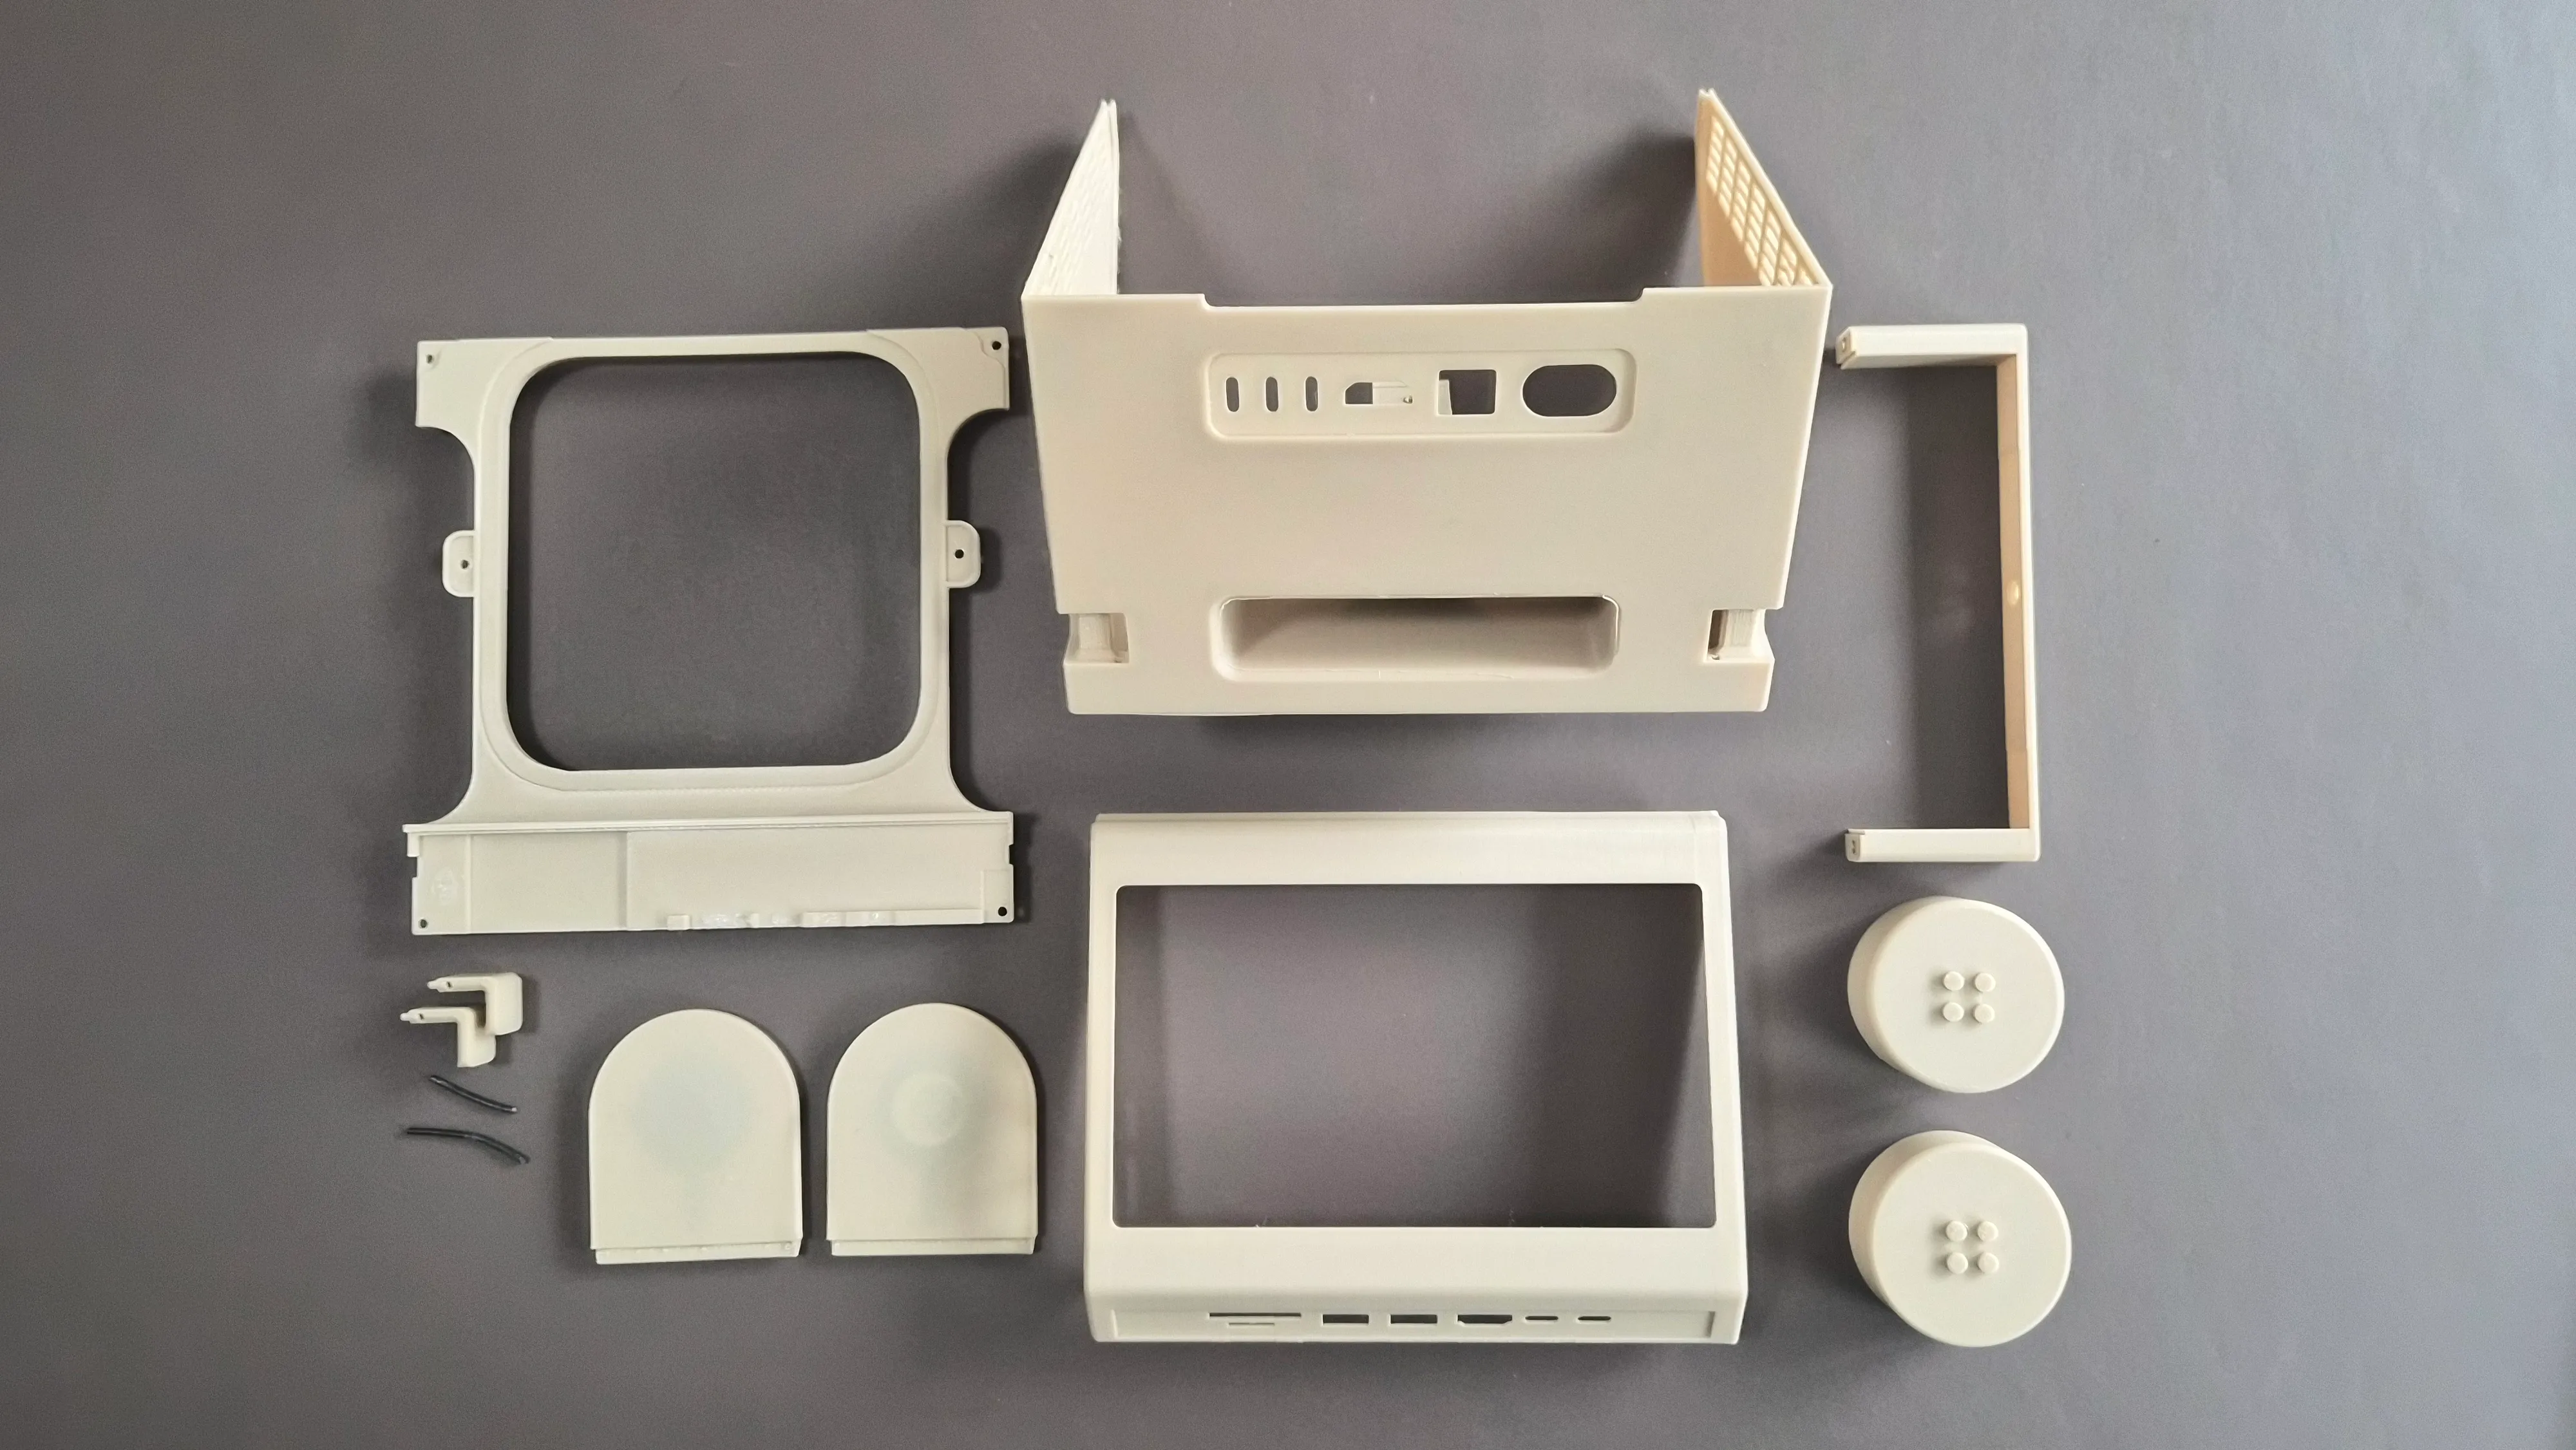
Modeled from scratch in Fusion 360, the M2x2 was engineered for accessibility and modularity. The design consists of multiple 3D-printable parts, allowing anyone to manufacture and assemble their own unit with limited additional hardware, only requiring some heat-set inserts and screws and a bit of glue.
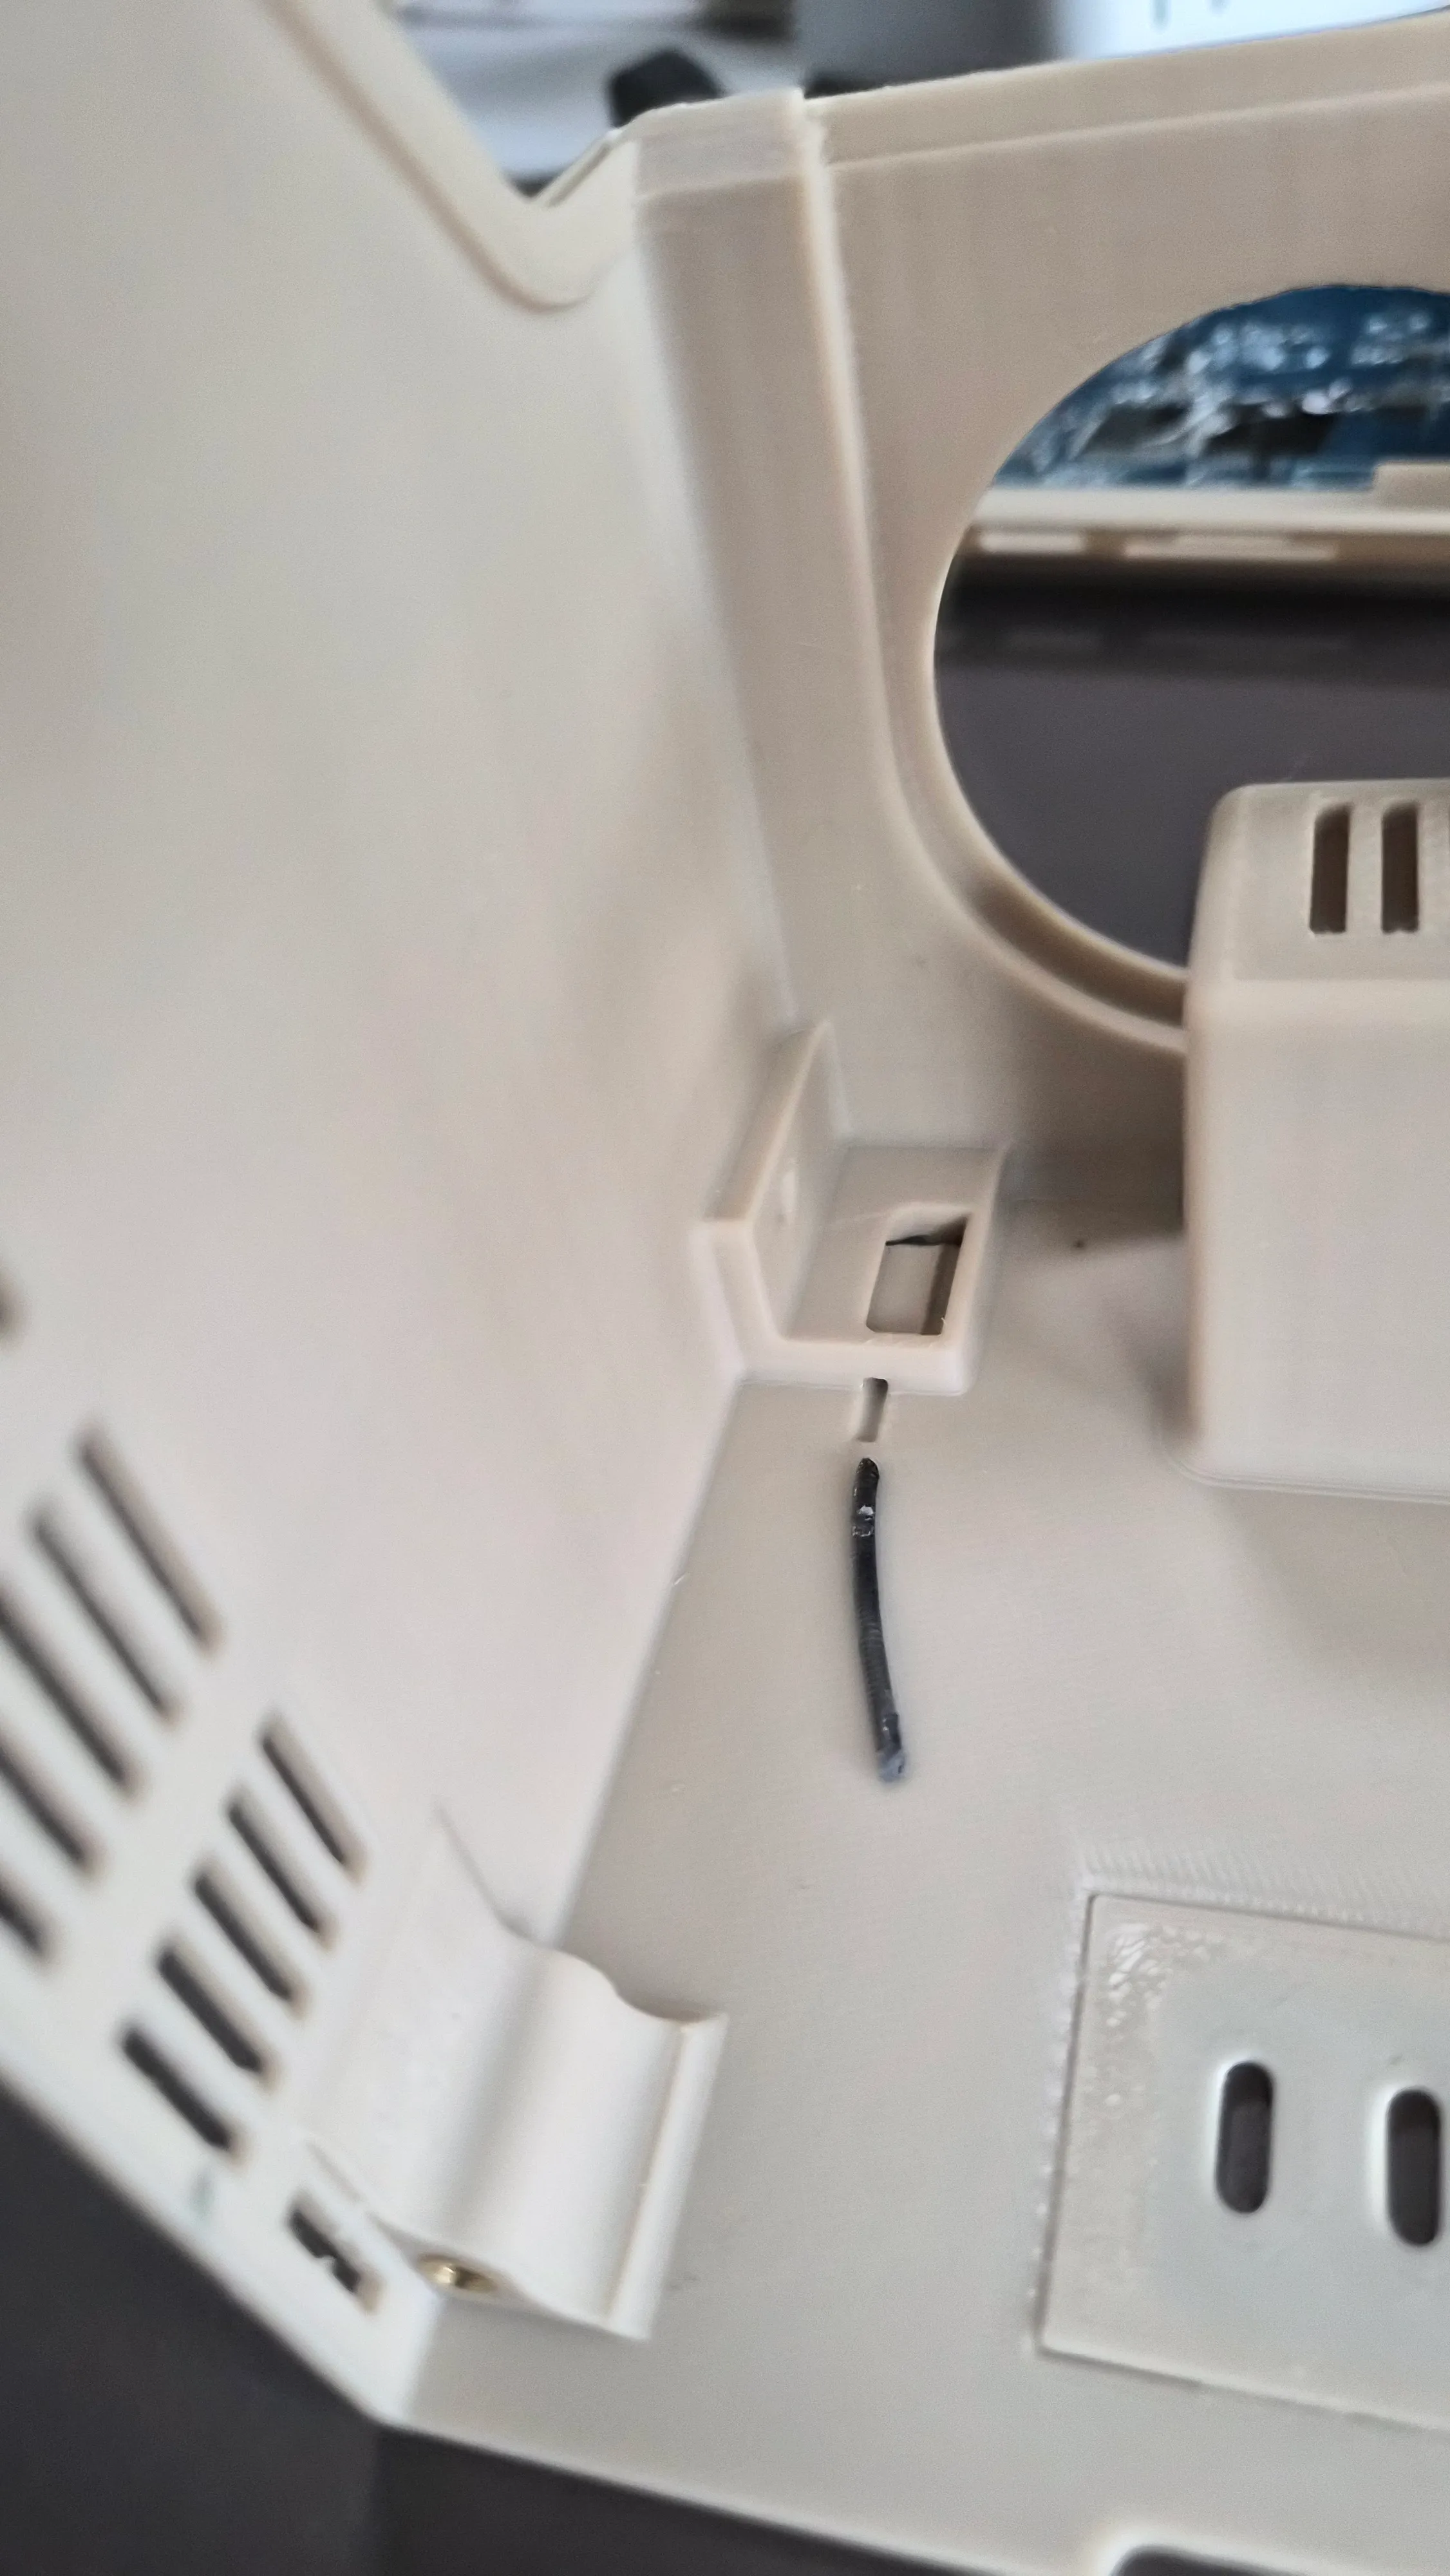
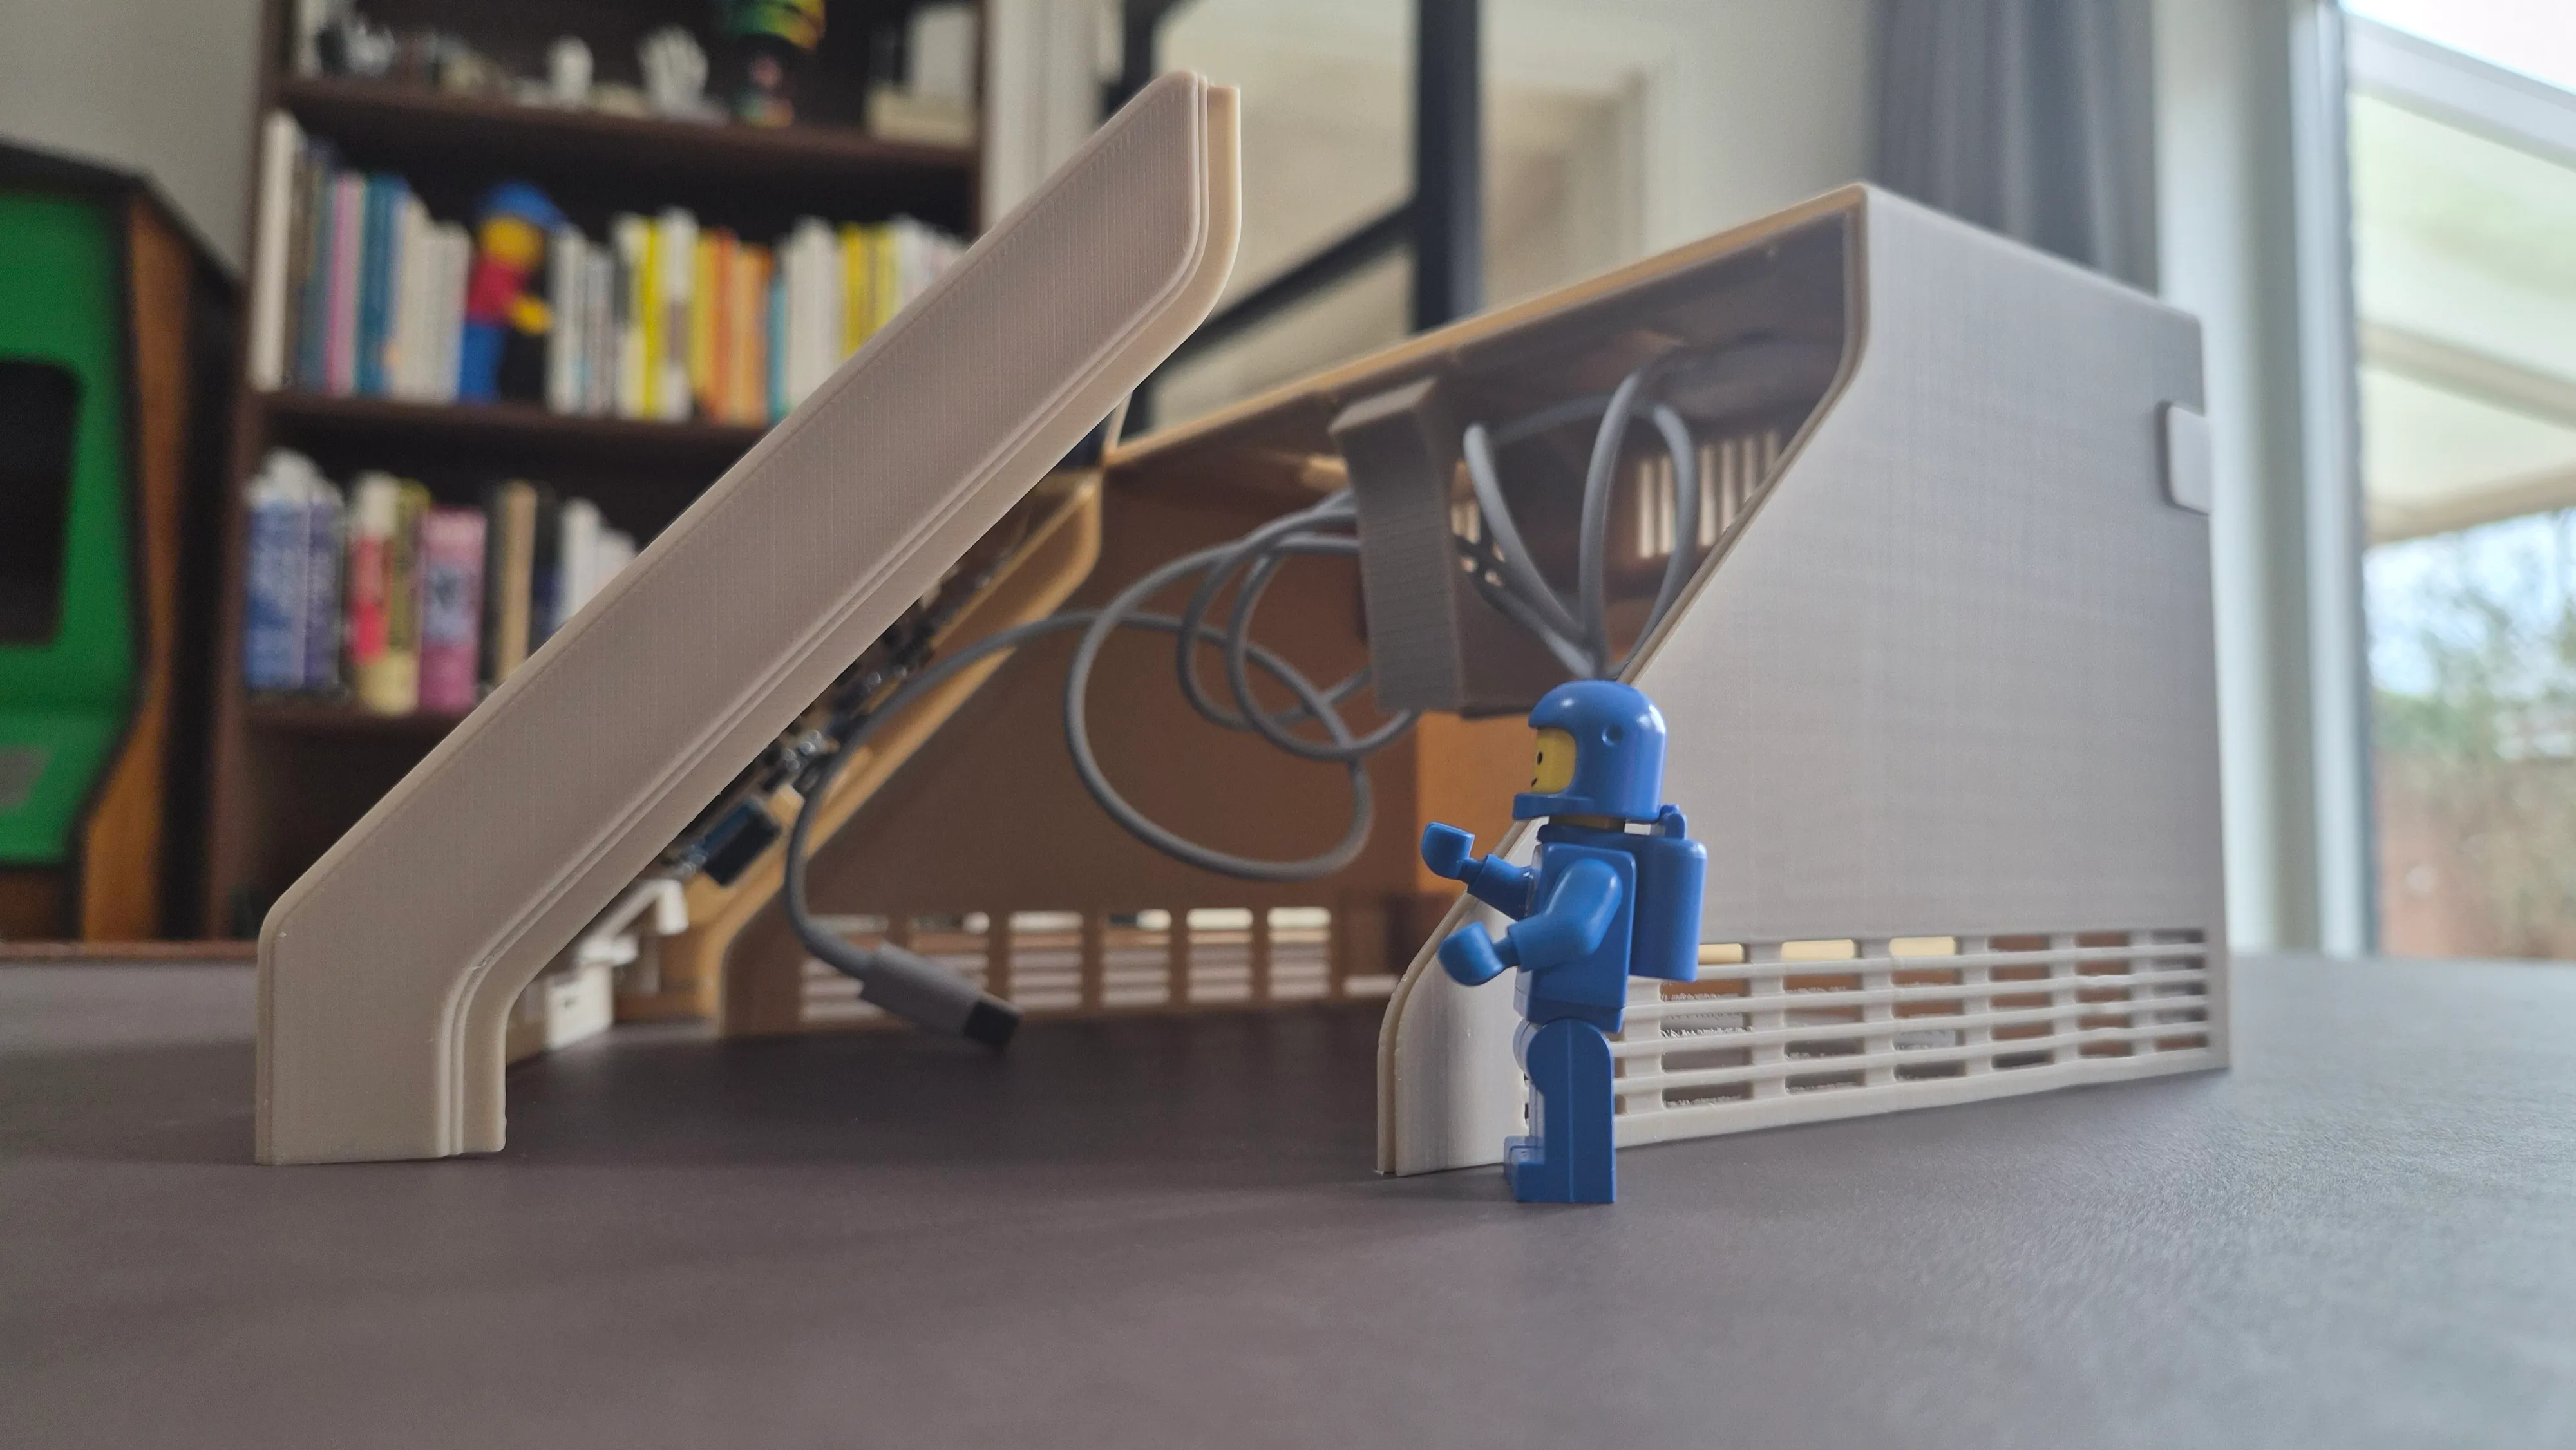
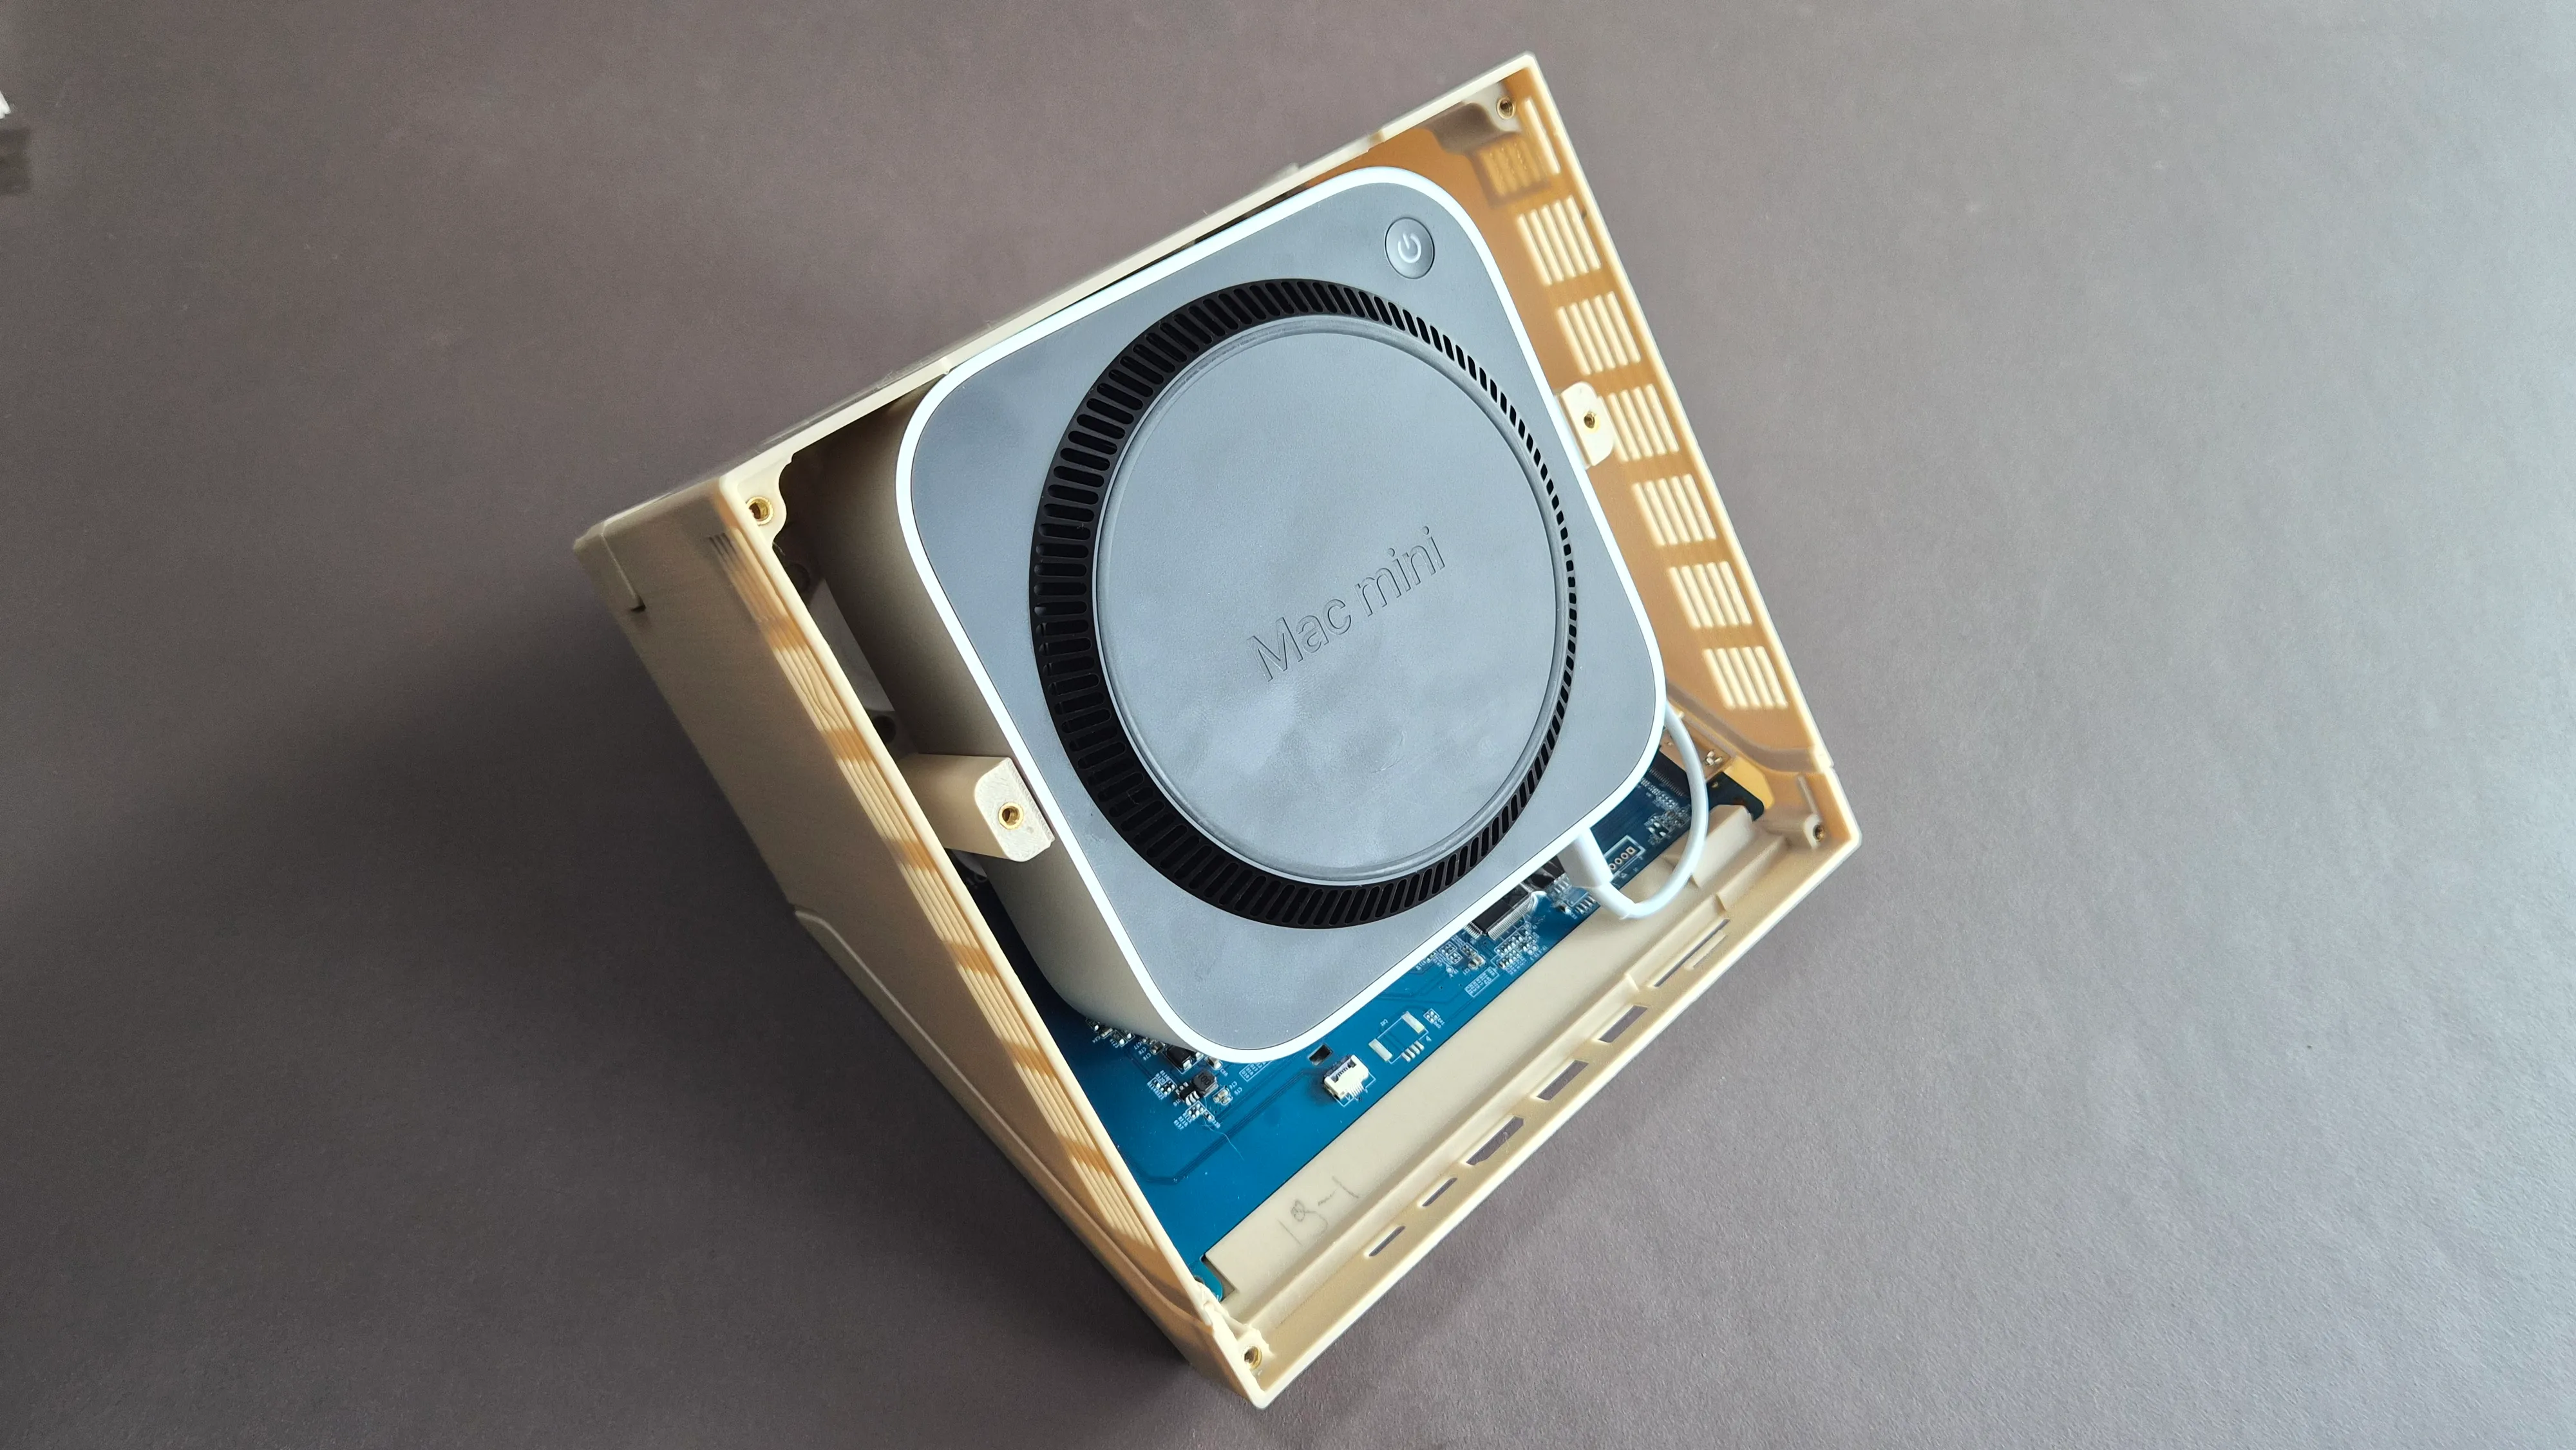
The challenge was in the integration: fitting a full M4 Mac Mini, a 7-inch display, and an array of peripherals into a form factor that remains true to the original brick. Every detail was considered, from the "pocket" in the back that acts as a handle (a nod to the original Mac) to the fold-out "wings" that manage the power cable with classic elegance.
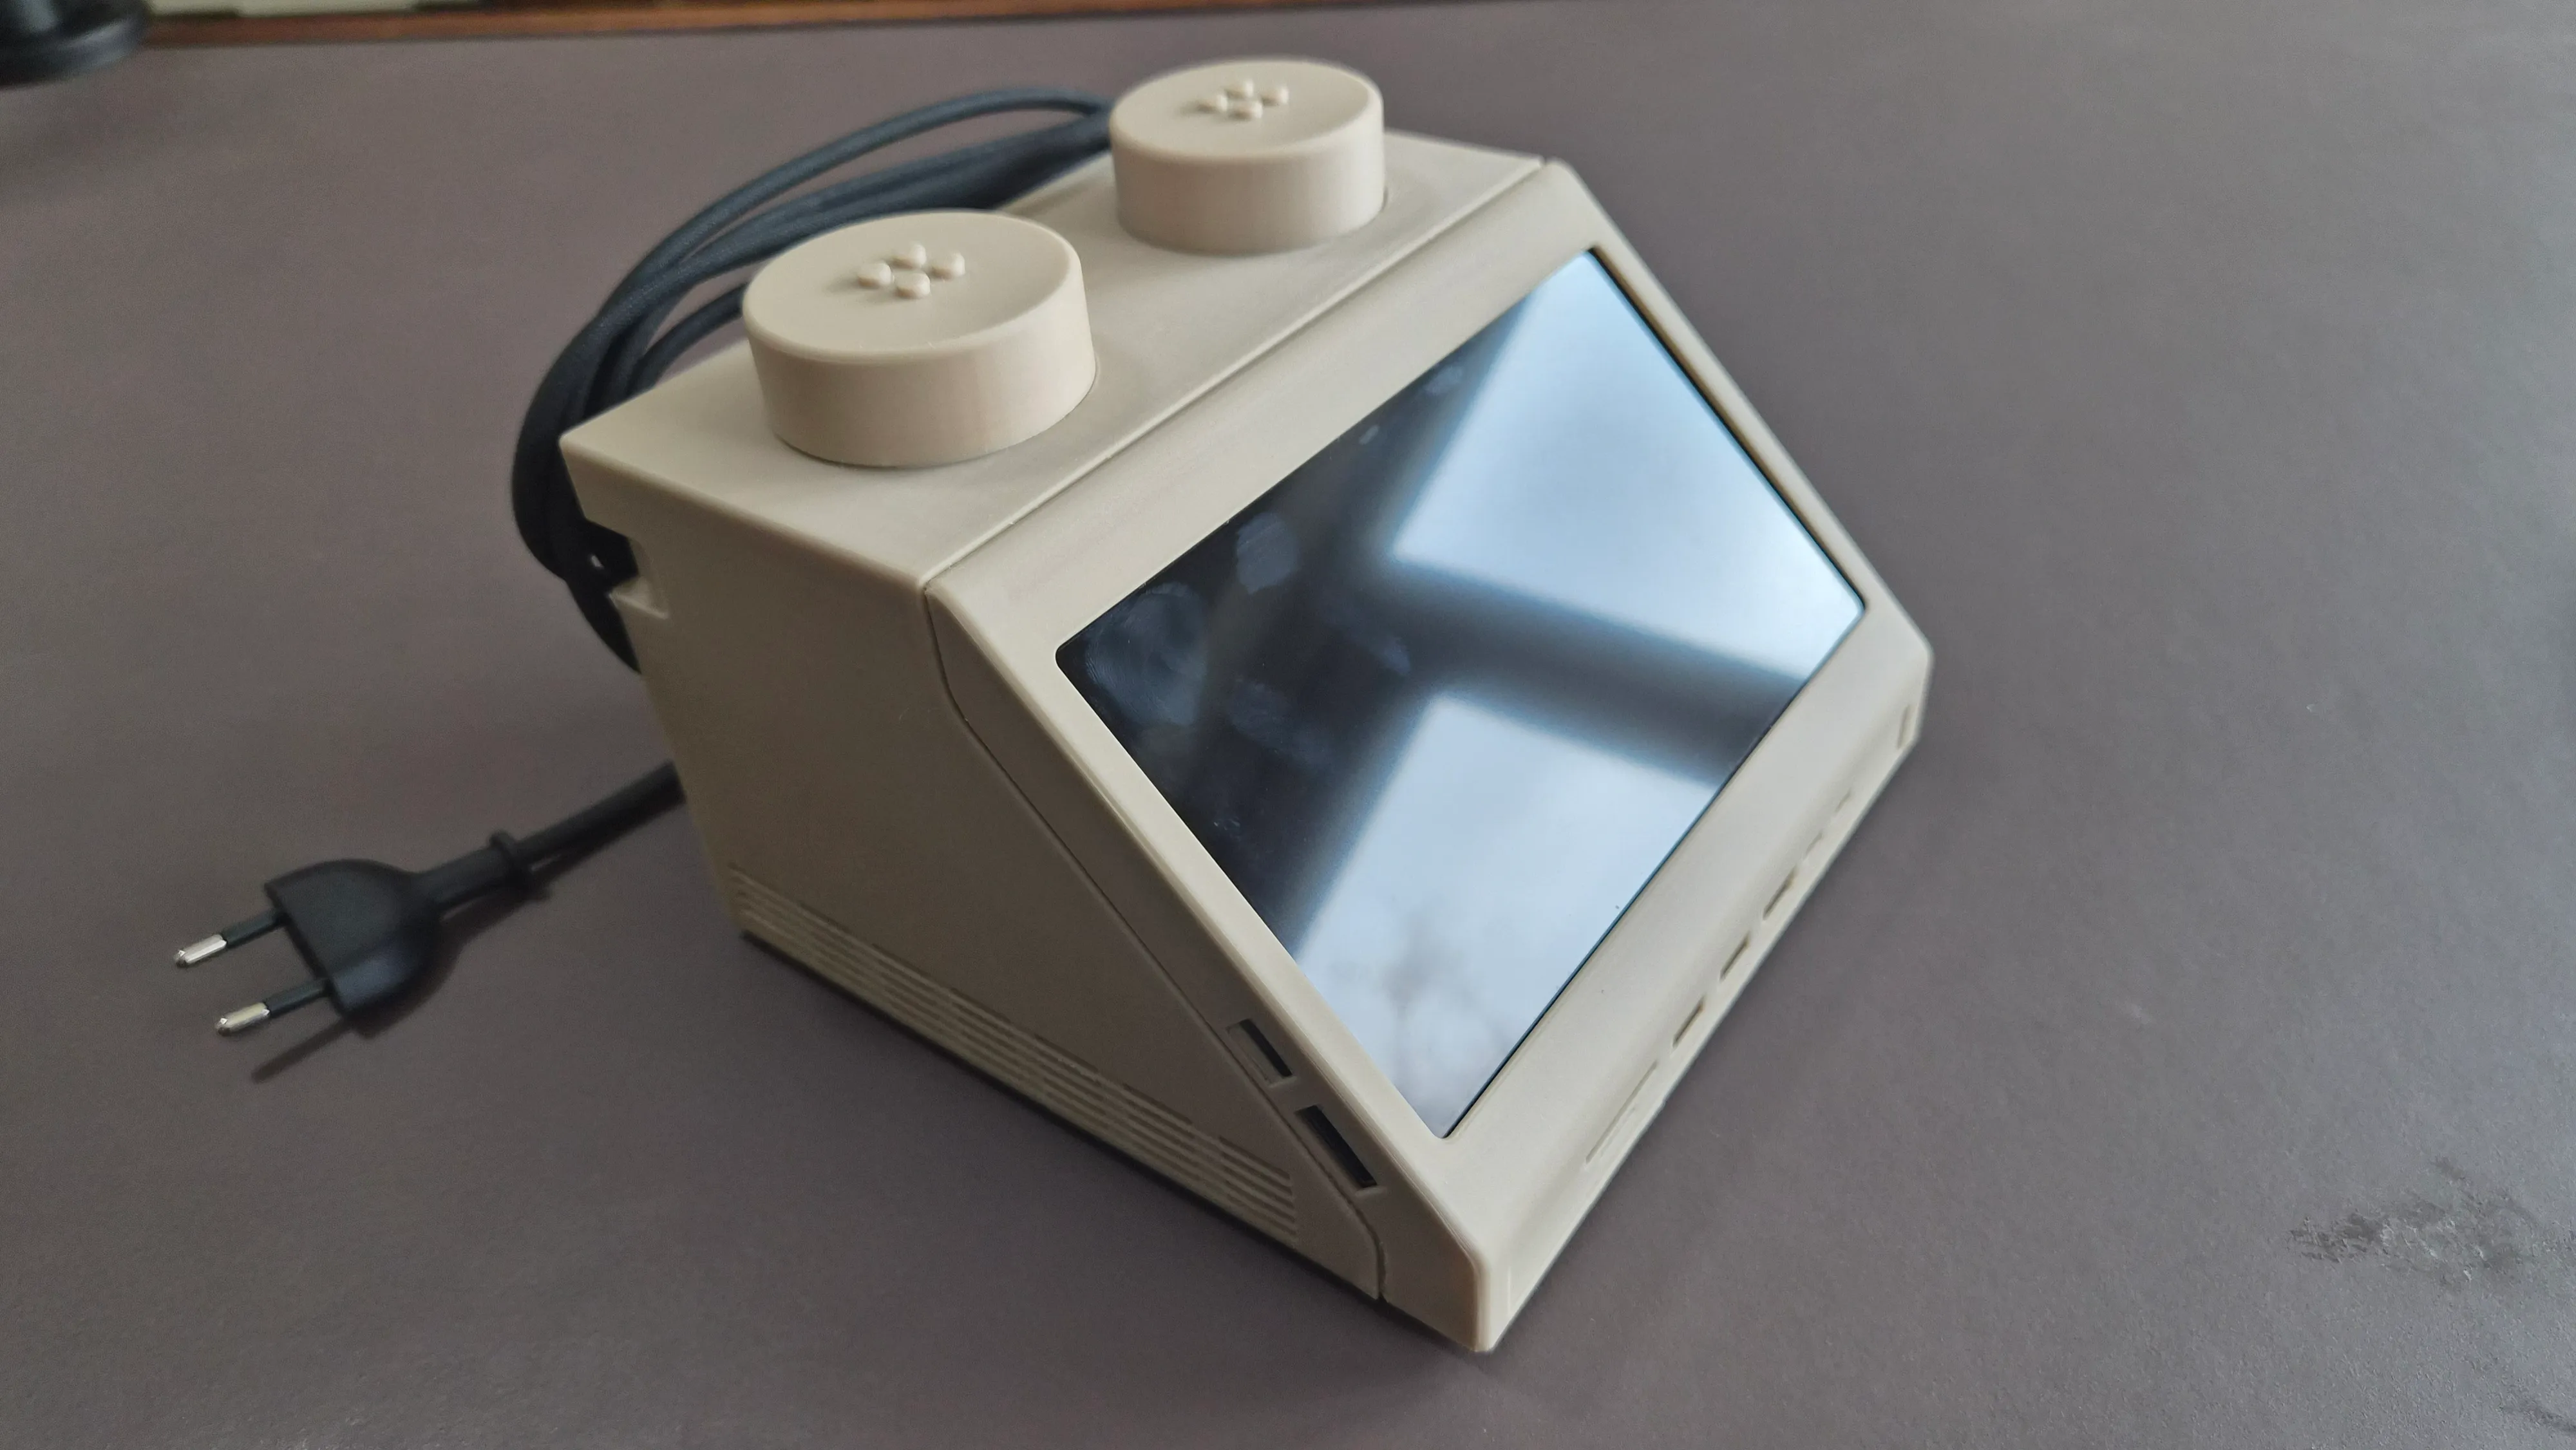
The studs on top of the workstation are not just a nod to the original LEGO brick, but each have their own unique function. One has an integrated media control knob to quickly adjust volume and play/pause music and the other one hides a secret charging bay for charging an Apple Watch or Airpods.
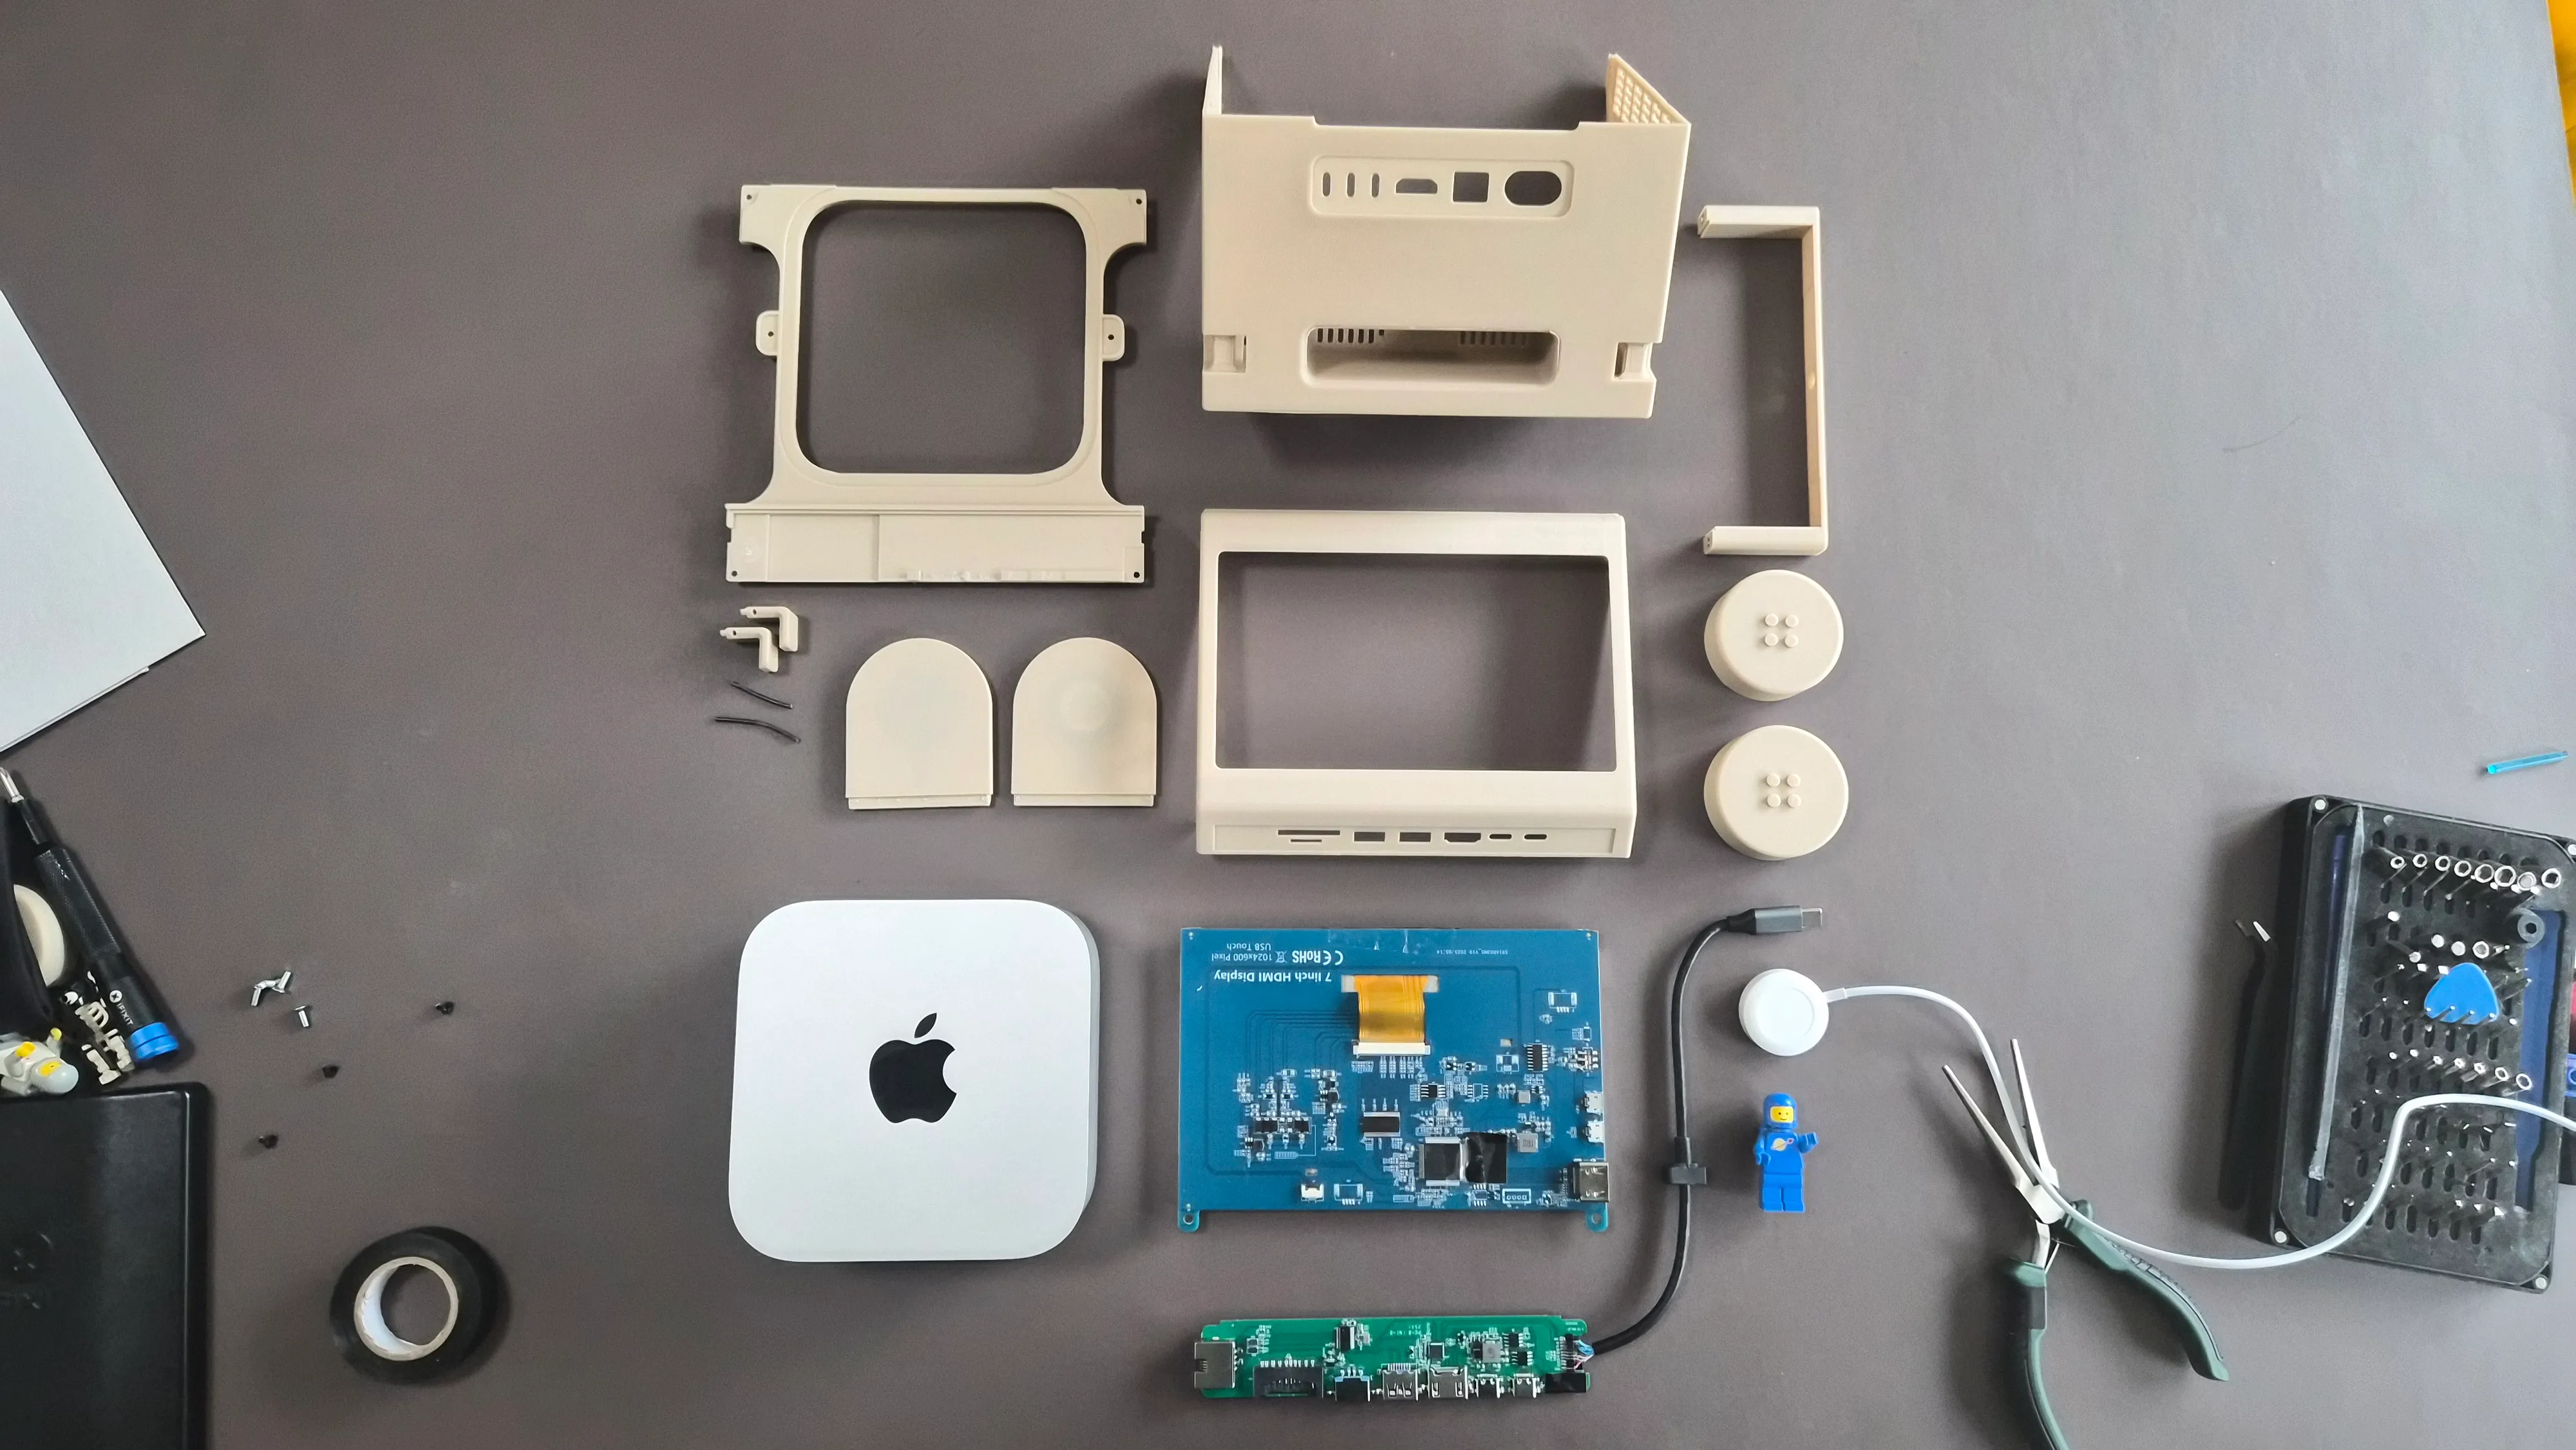
All components of the M2x2.
The fold-out 'wings' in the back allow the power cable to be wrapped around the hooks.
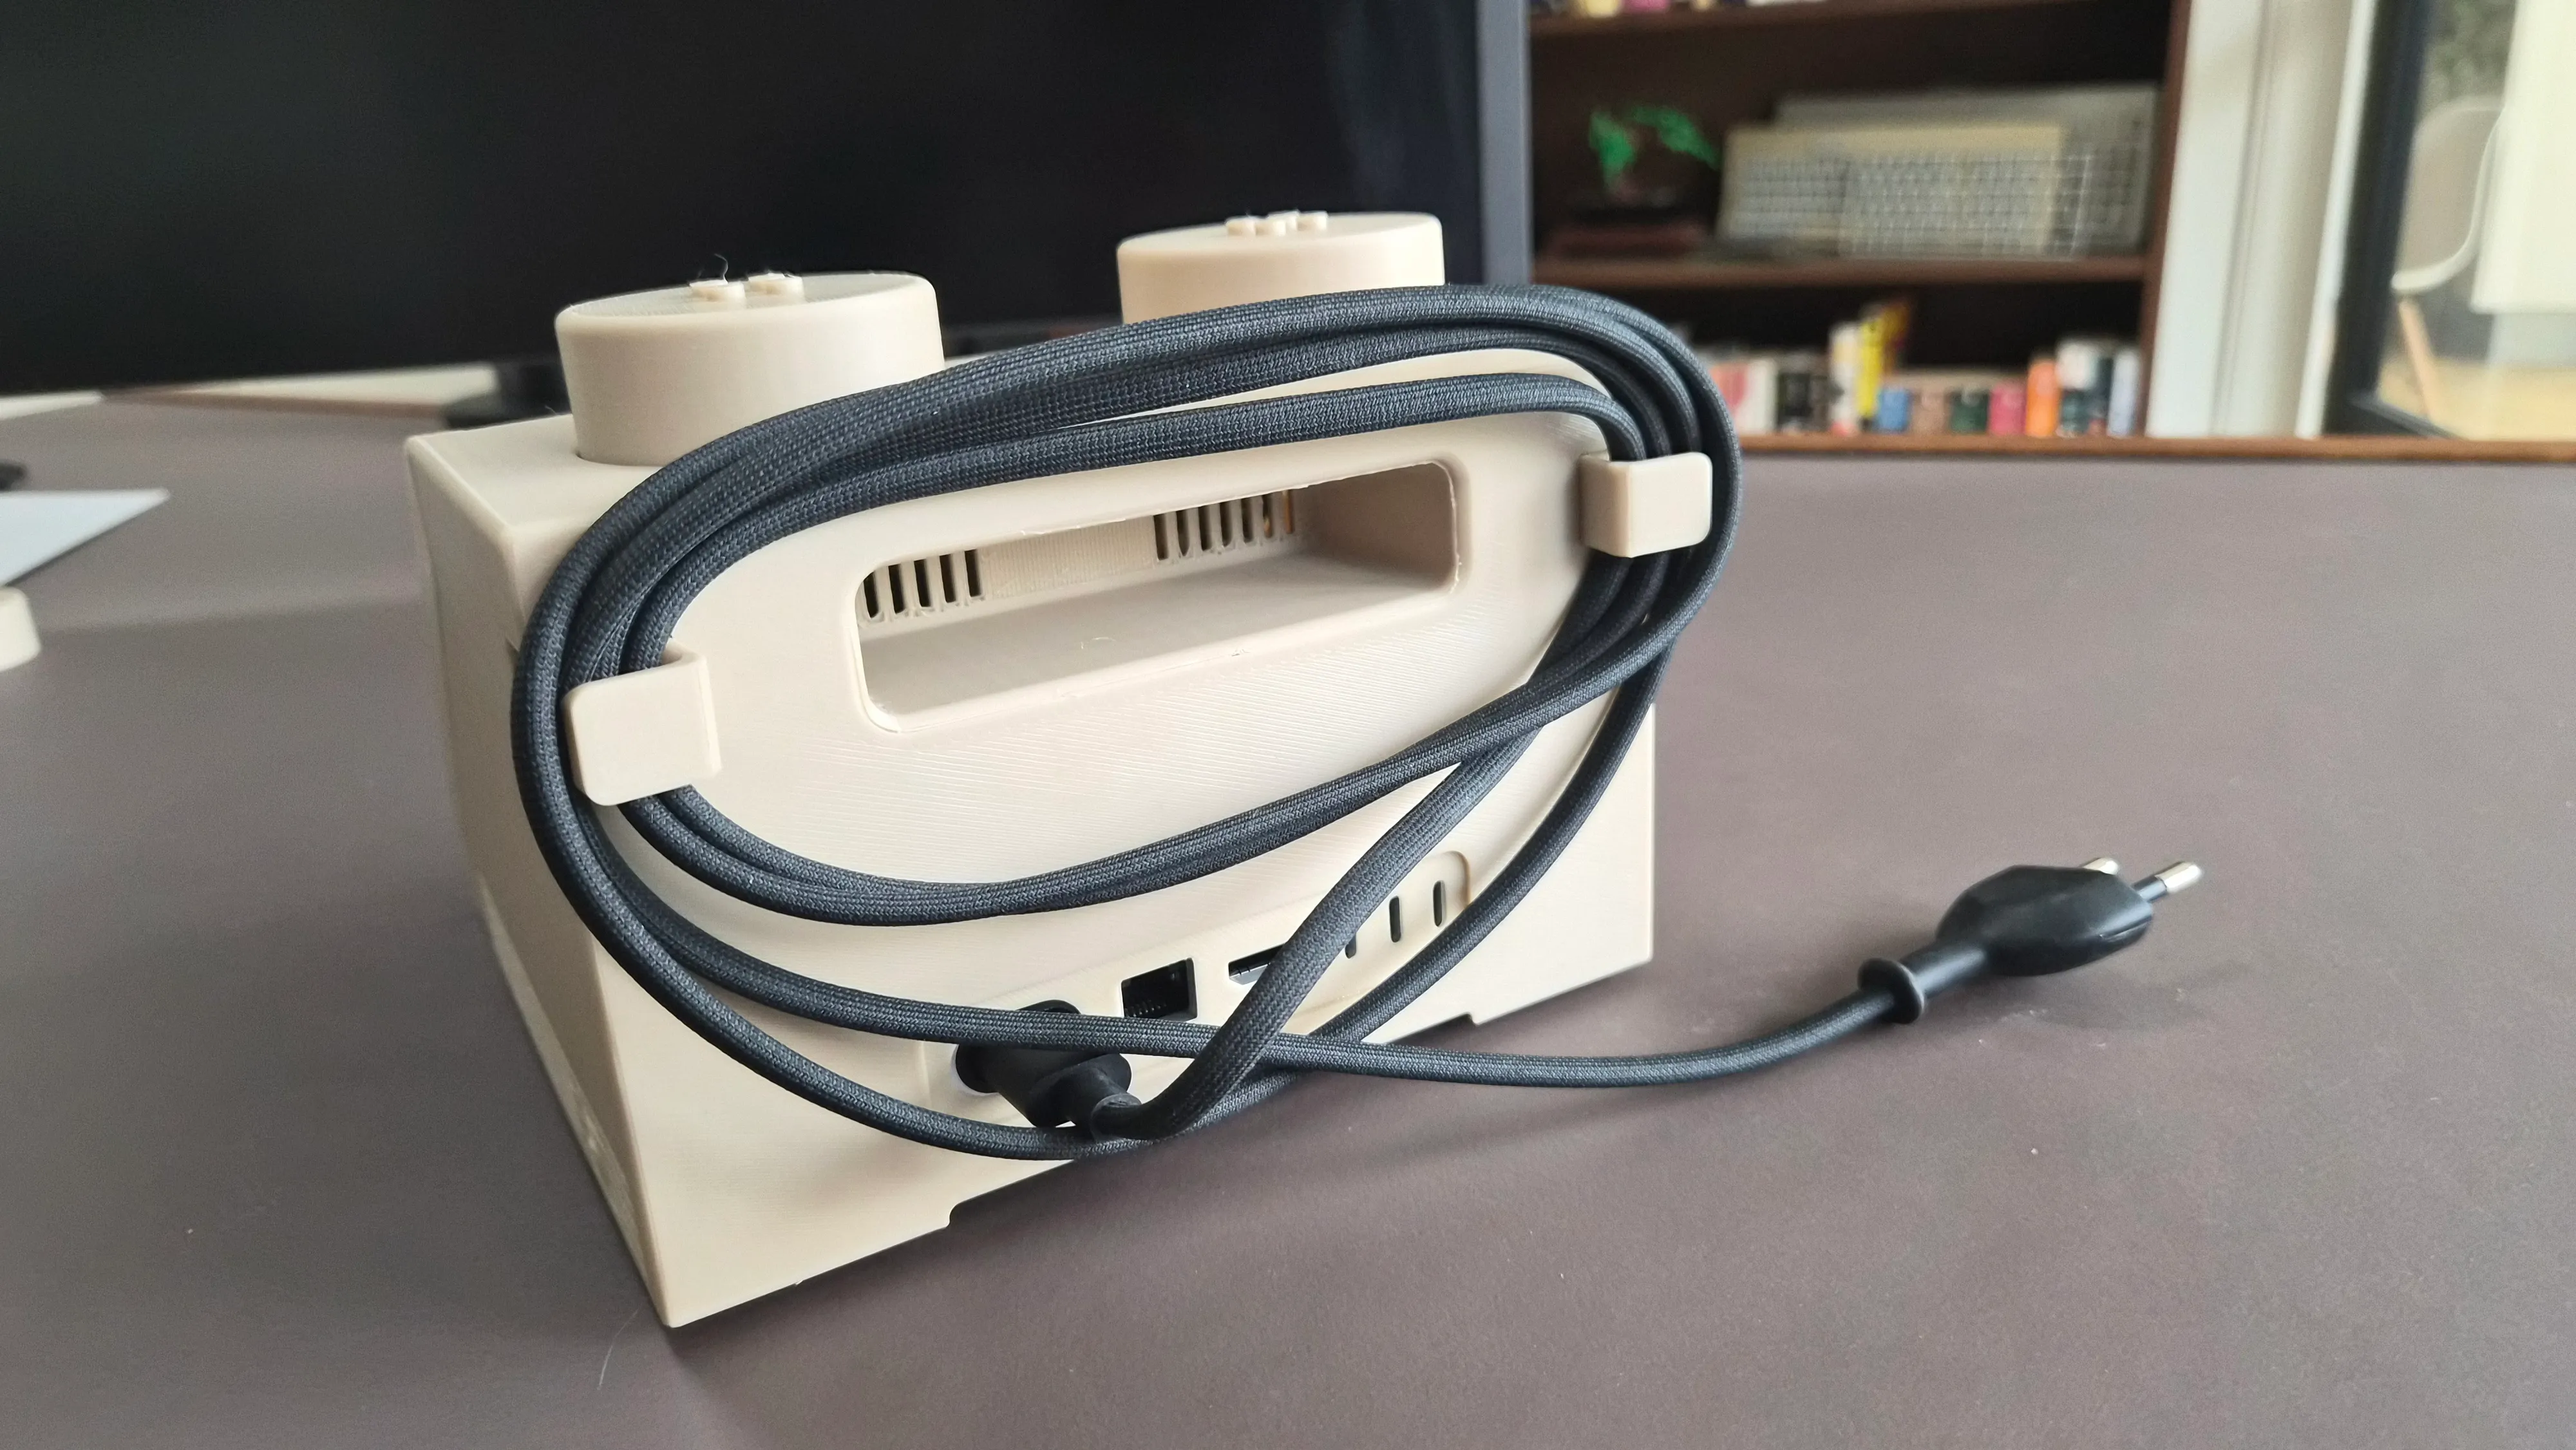
The M2x2 is easy to carry with the integrated handle.
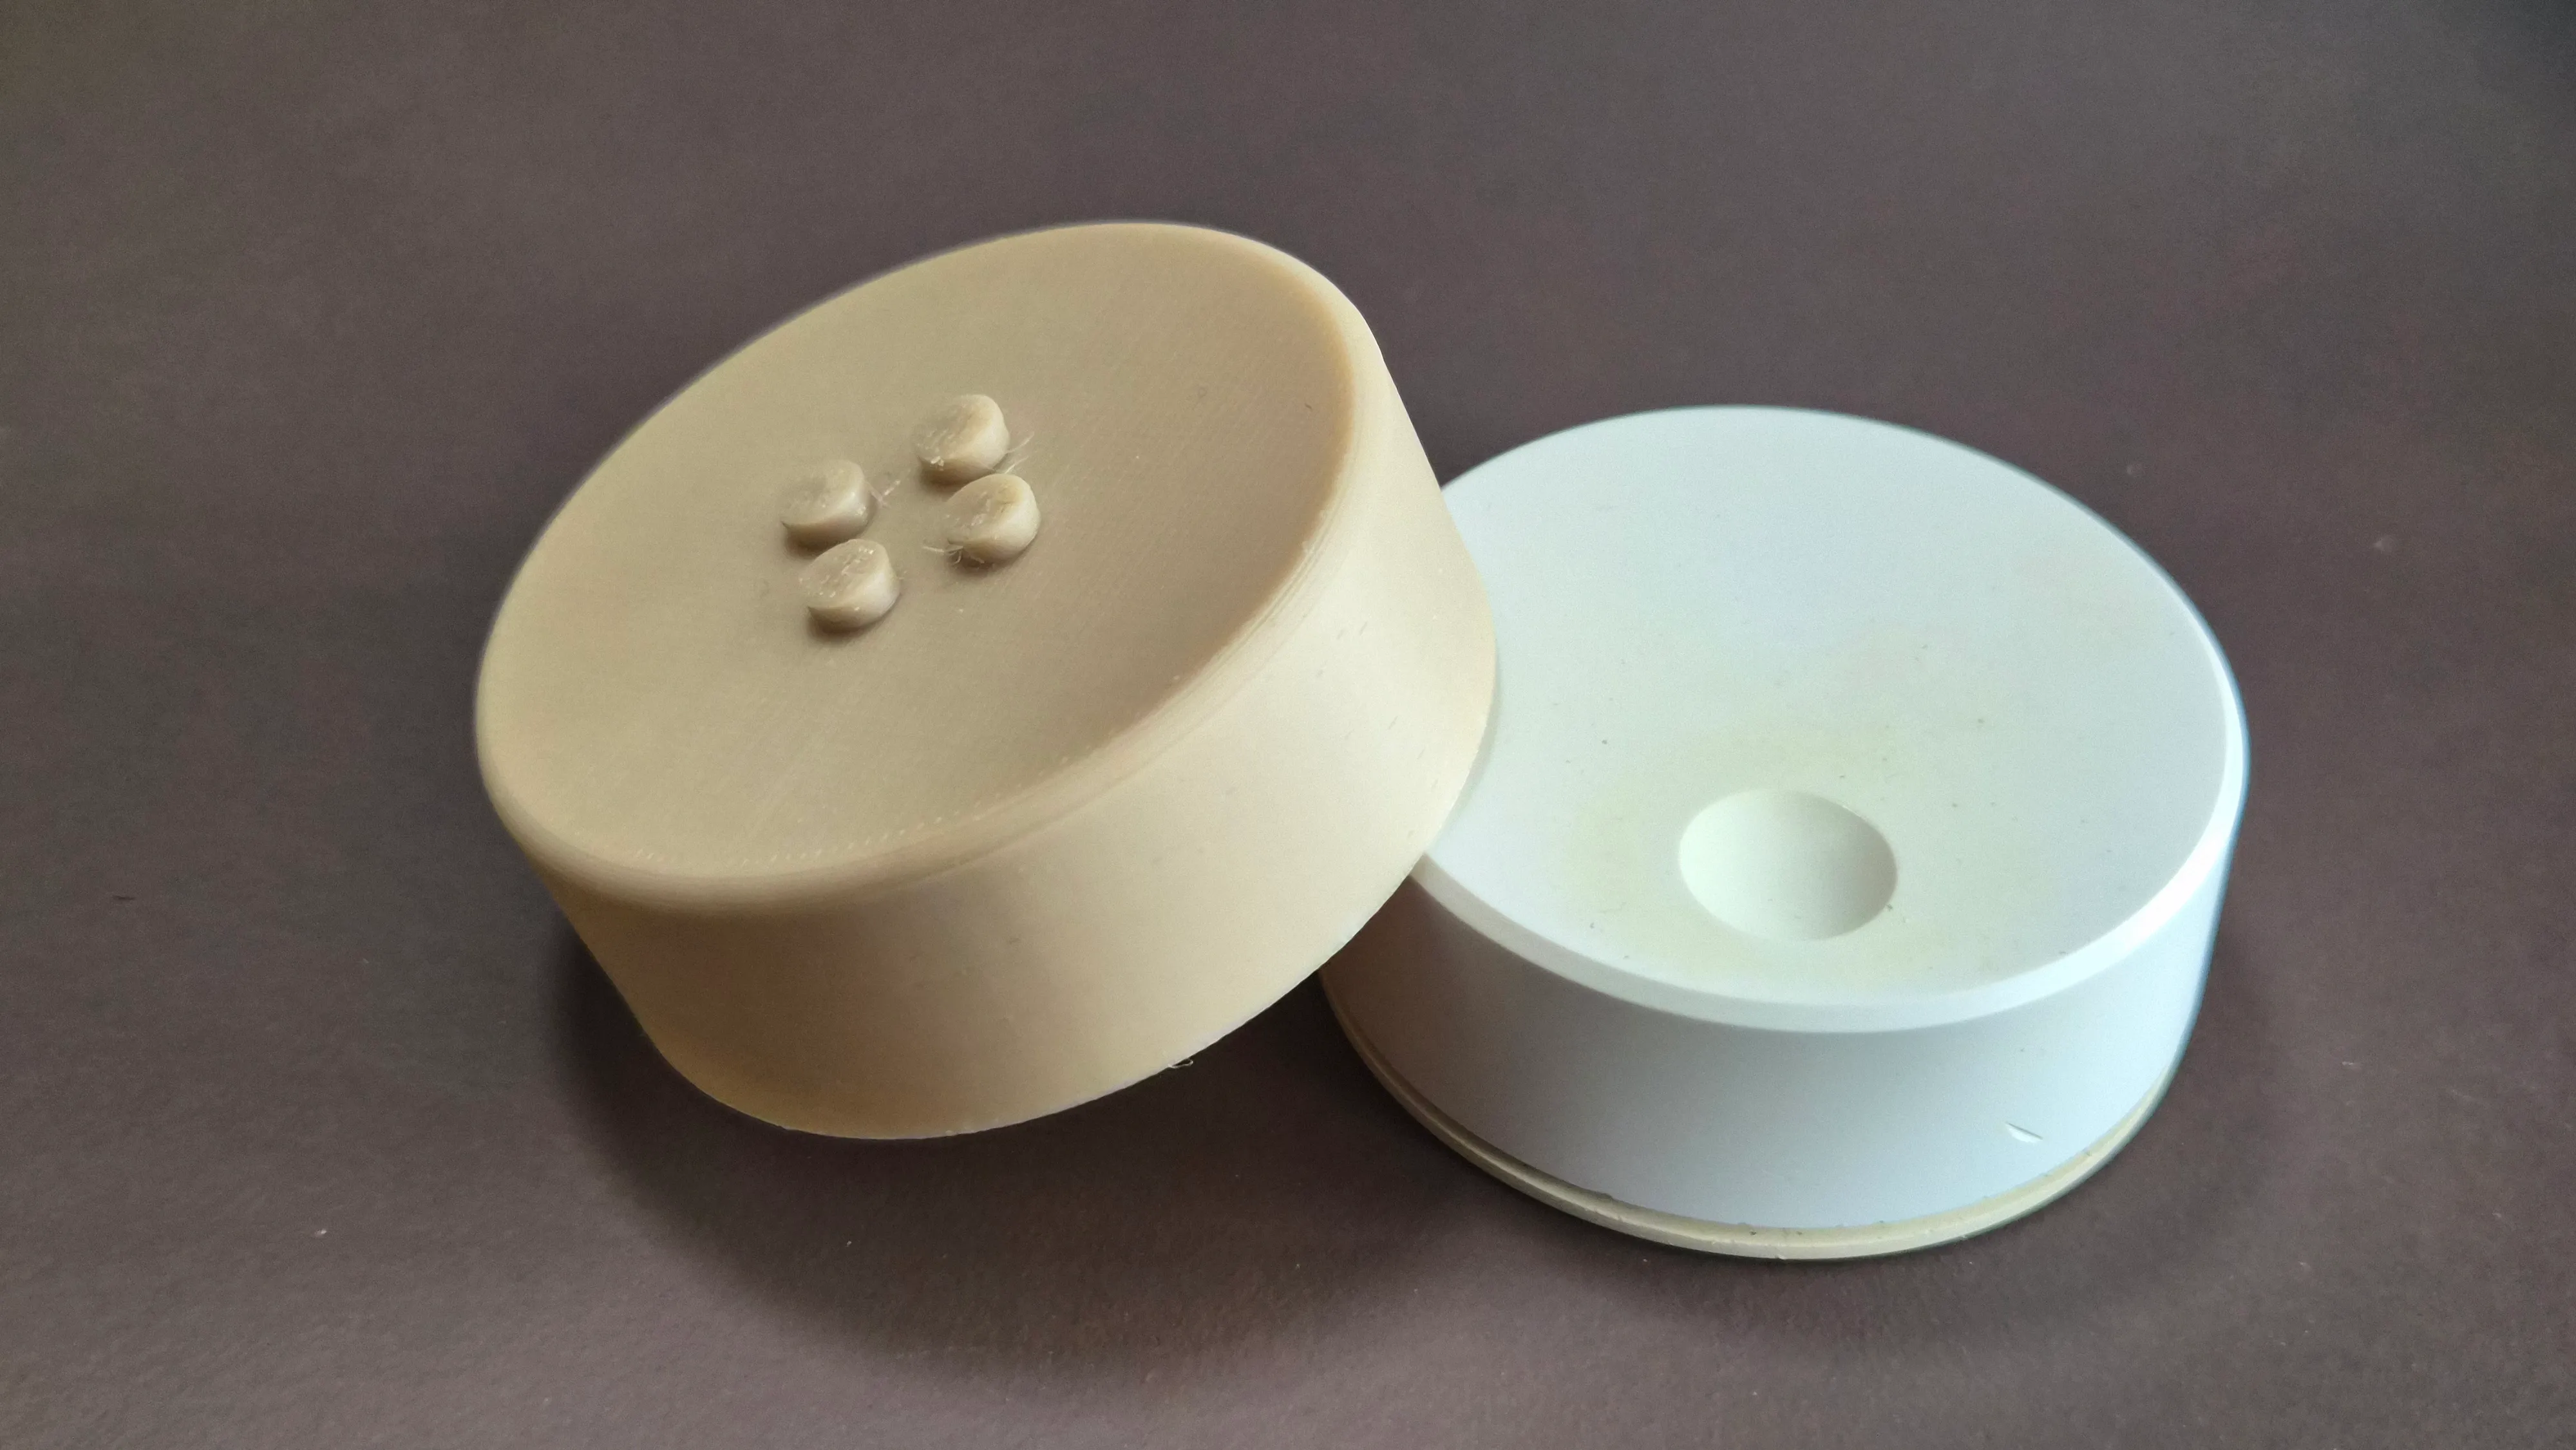
One stud has a media control knob for quick access to volume and play/pause.
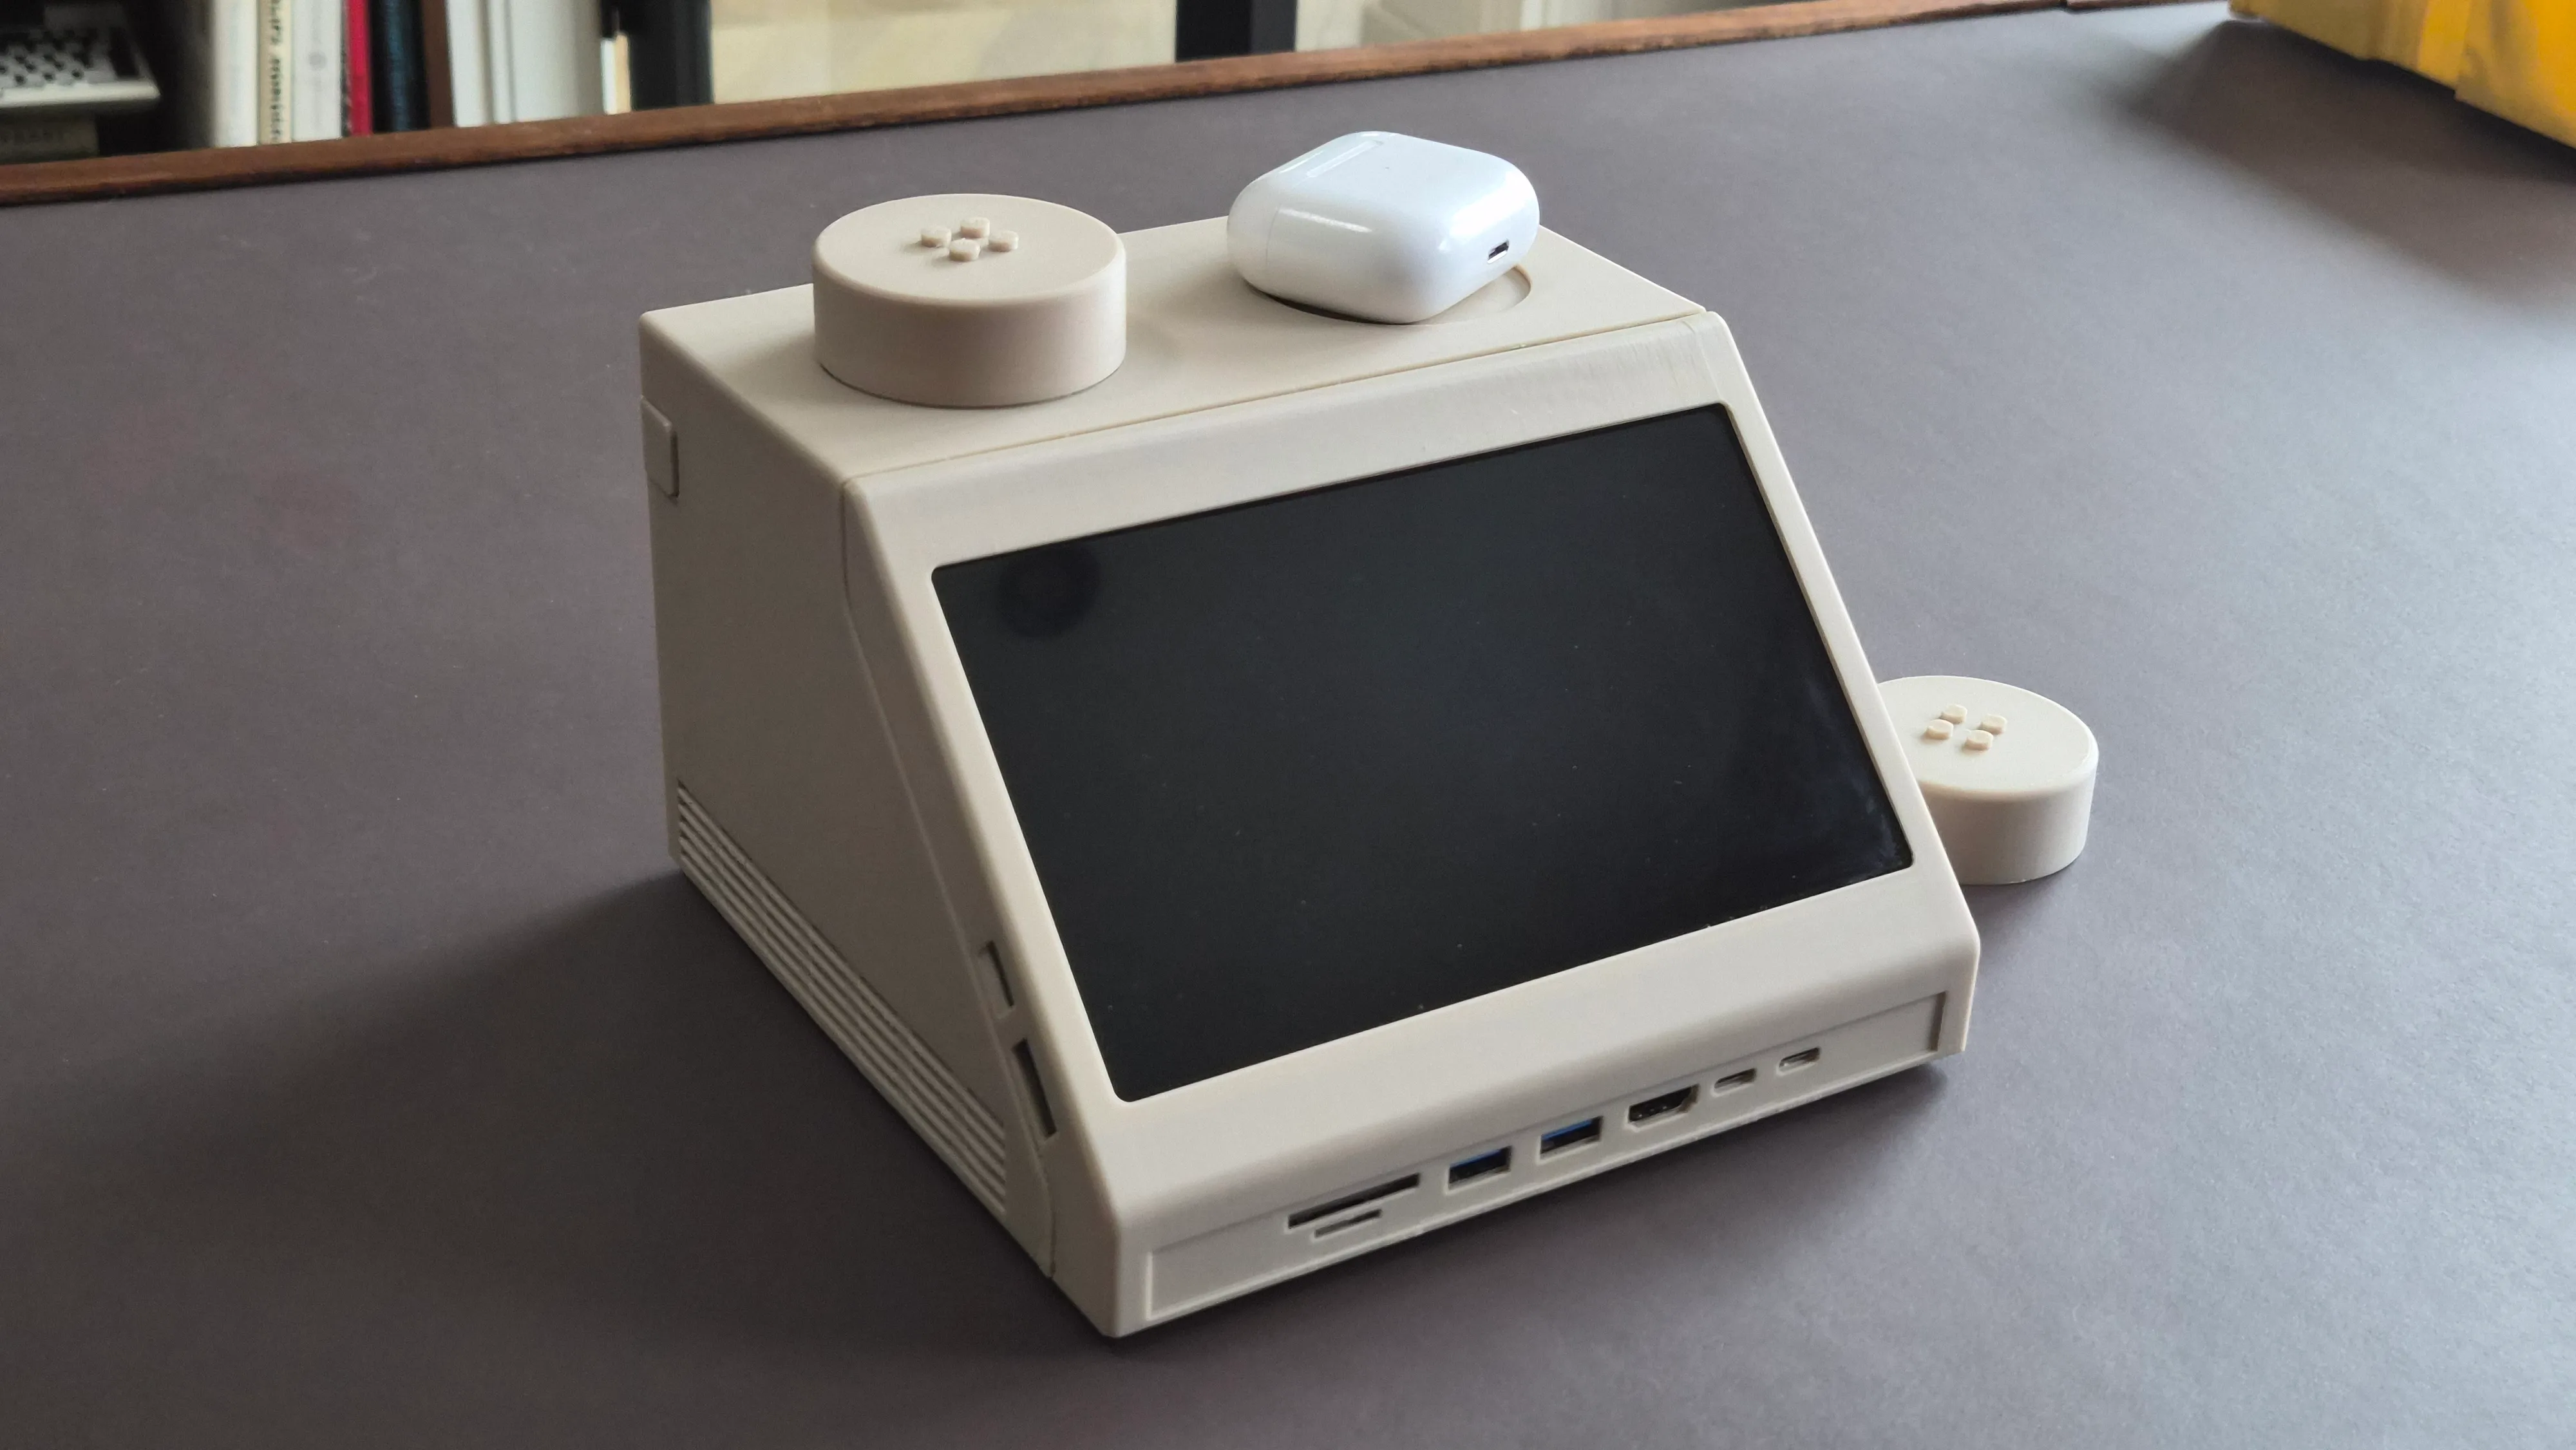
The other stud has a secret charging bay for charging an Apple Watch or Airpods.
×
How I use it
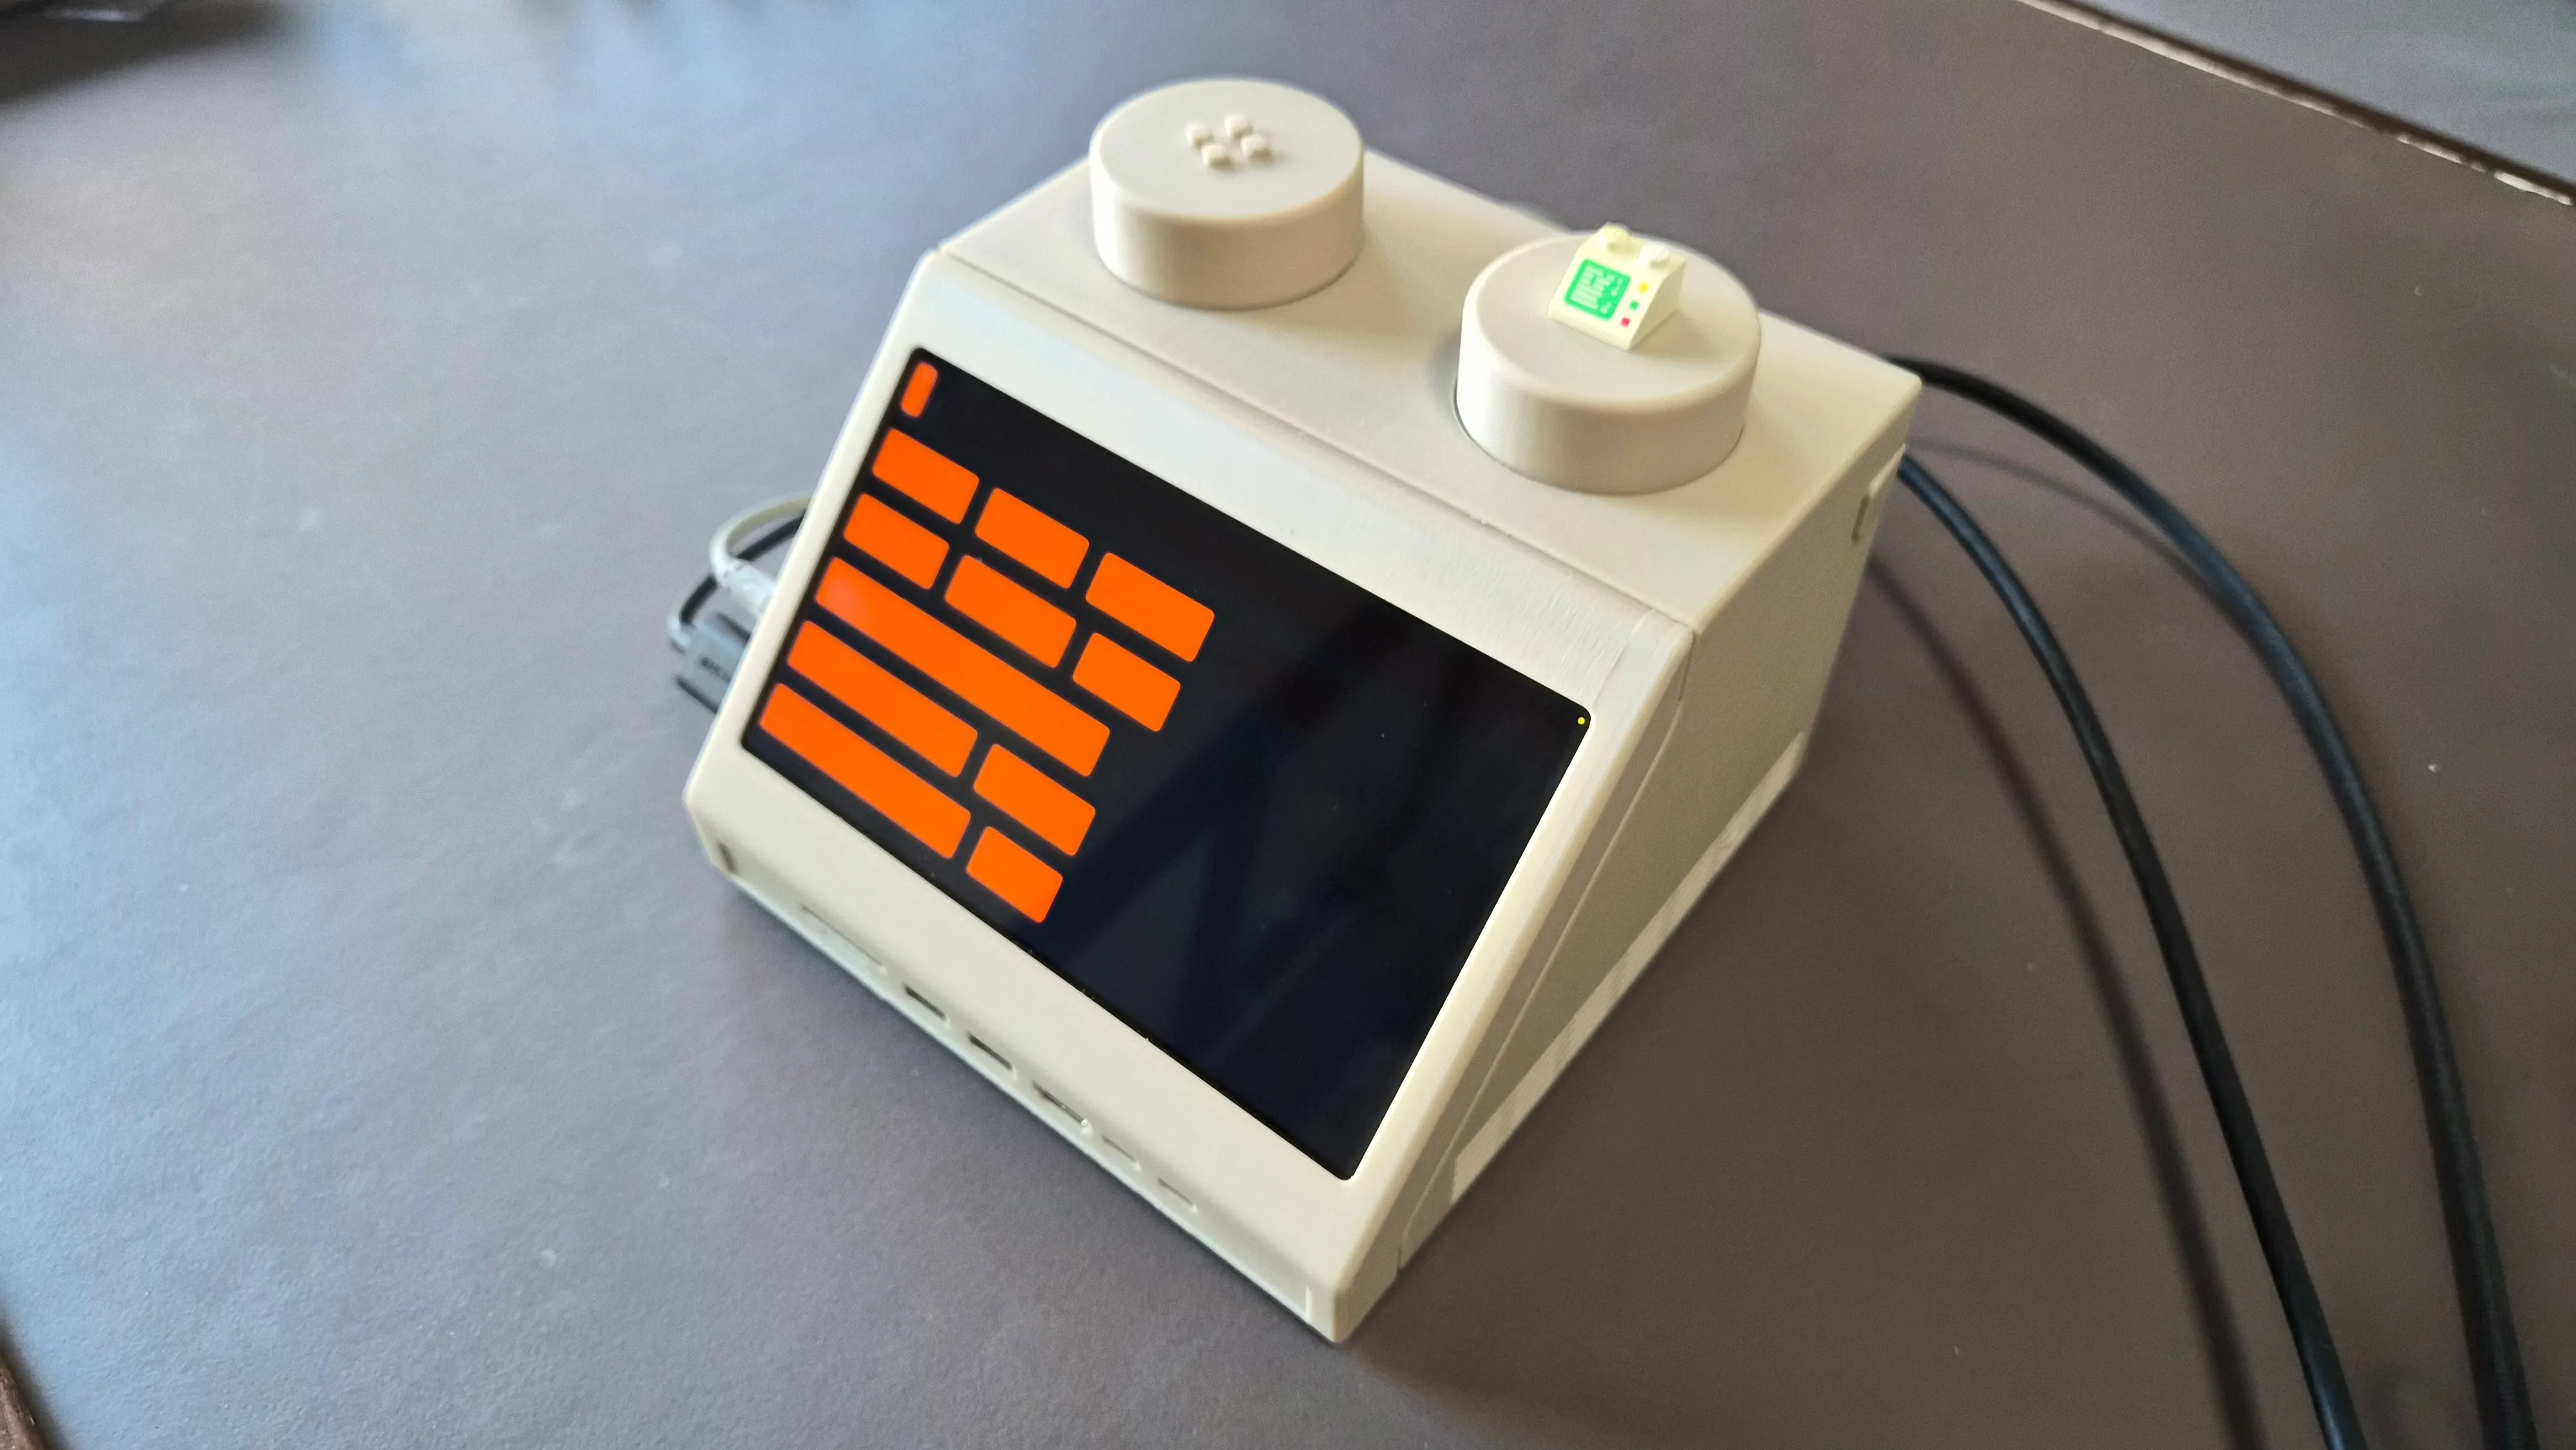
My personal M2x2 is currently my primary computer, hooked up to my main monitor (an LG DualUp). I use the display of the M2x2 as a secondary display, mainly to show my Home Assistant dashboard.
I made a dedicated dashboard that shows me the status of various sensors, like the print progress of my 3D printer and provides quick controls for my smart home devices. The dashboard resembles the look of the 'interface' that the original Lego computer brick had, in which the width of the various rows is a dynamic representation of the current state of the sensors. The dashboard is still in development and nowhere near a level of polish that I would be happy to share, but I might release it in the future.
The ports on the front are mainly used to be able to quickly charge the devices I use at my desk, like my keyboard or phone. The Symfonisk remote that is housed in the left stud on the top controls my Sonos speaker in my office; raising and lowering the volume and being able to quickly stop the music e.g. before joining a video call.
Another use case that I made for fun was an equalizer resembling the voice box from the 80's TV show Knight Rider. This is just a web app (click to try it yourself!) that responds to the incoming audio using an external microphone.
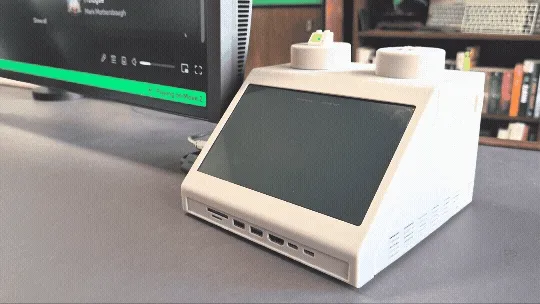
The interface with the spinning globe you see in some of the pictures/gifs was mainly created as a visual asset and is not really functional, but it might be fun to integrate it with the Home Assistant dashboard.
My Home Assistant dashboard built to fit the layout. The bar on top is a representation of the print progress of my 3D printer.
Controlling the volume with the integrated Symfonisk remote.
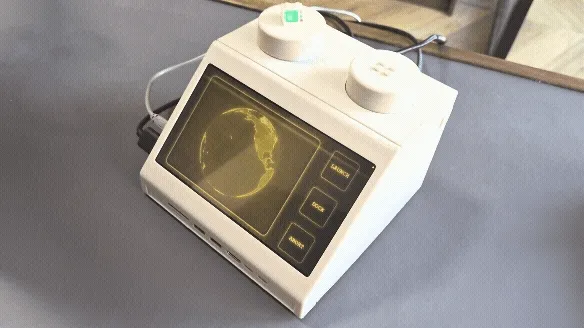
Just for fun: a spinning globe visualization.
×
the Build
I created the M2x2 to be relatively cost-effective and easy to put together; by 3D printing the main parts and using minimal off-the-shelf hardware (e.g. screws and heat-set inserts) you should be able to put one together for less than € 100,- (excluding the Mac Mini).
If you want to create your own, head on over to Makerworld to download the main parts and print them yourself or find a local maker to print them for you. Assembly should be relatively straightforward, but below you can find step-by-step instructions to create your very own M2x2.
Depending on your configuration, you may need to adjust the design slightly to accommodate. As for the other components, if you want to replicate the build you see in the pictures, you can find a shopping list below the instructions. The list contains (non-affiliate) links to the parts I used.
I.
Print all the parts of the M2x2.
II.
Connect the 'wings' to the main body with a short piece of filament, acting as a hinge. Use some needle-nose pliers to push the filament through the holes.
III.
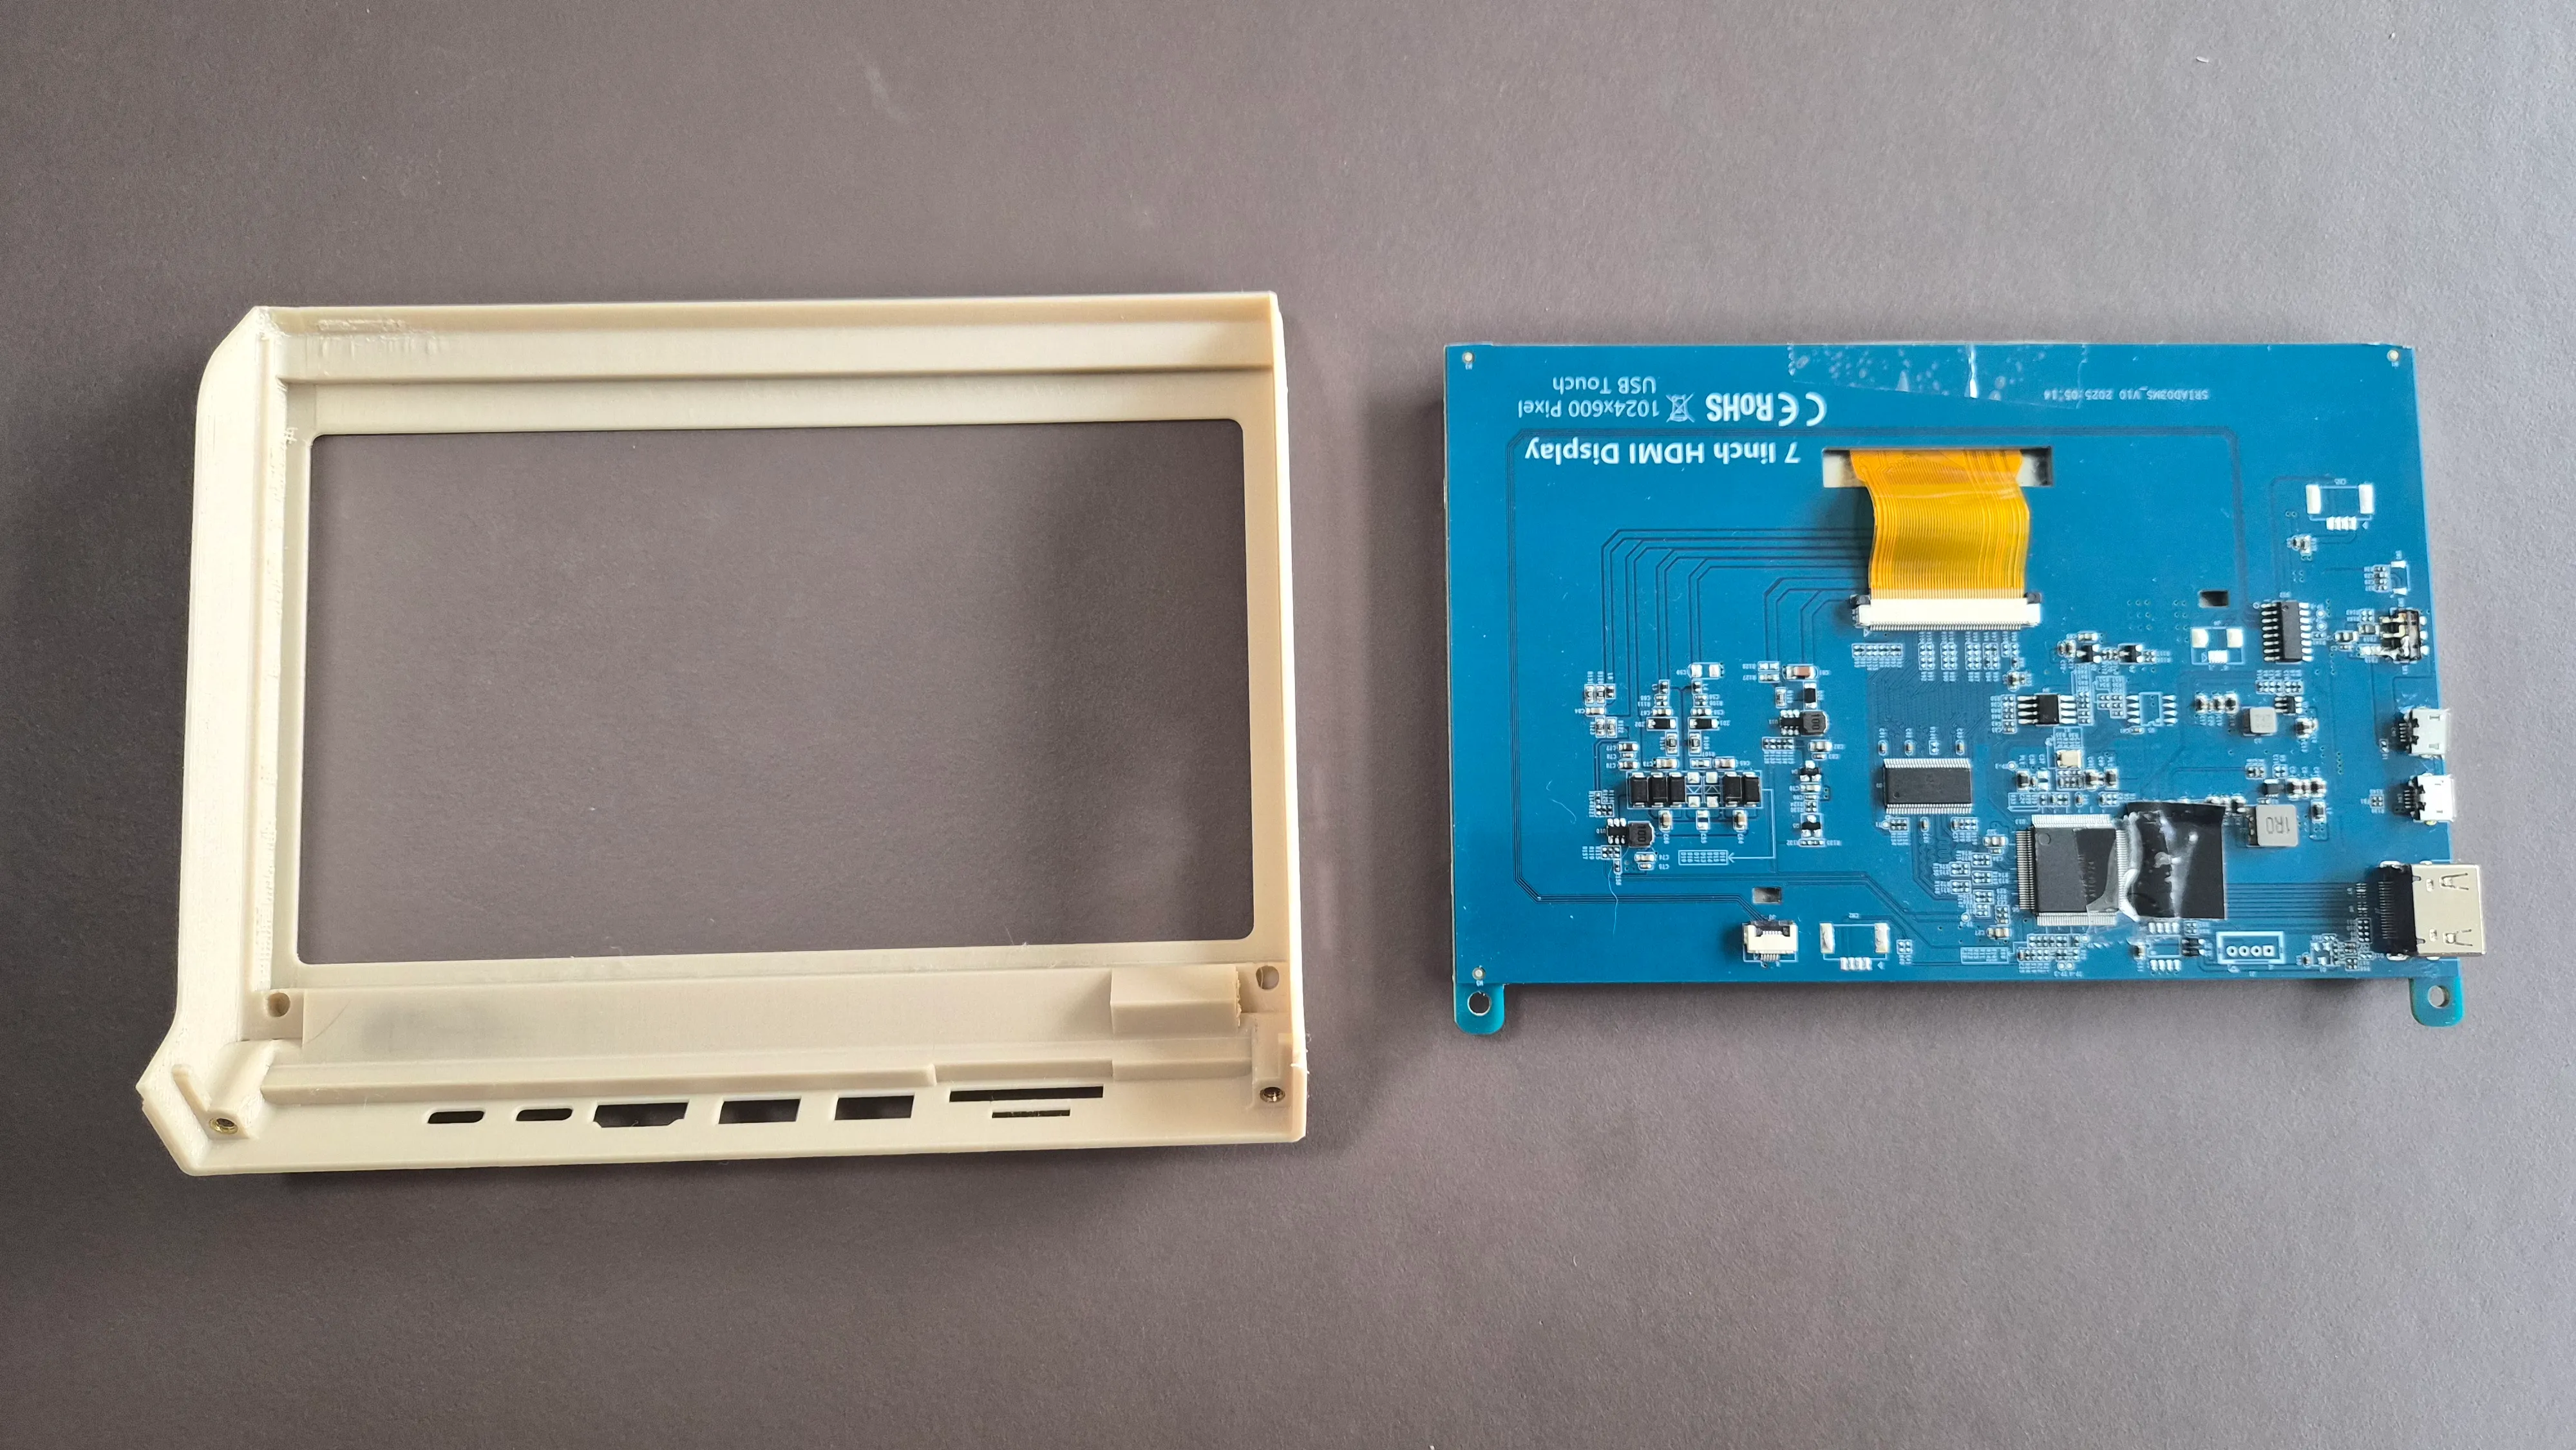
Insert the display into the faceplate. It should be a frictionfit, but optionally you can use heat-set inserts and some screws to secure it.
IV.
Use a bit of glue to attach the cover for the I/O on the back of the main body.

V.
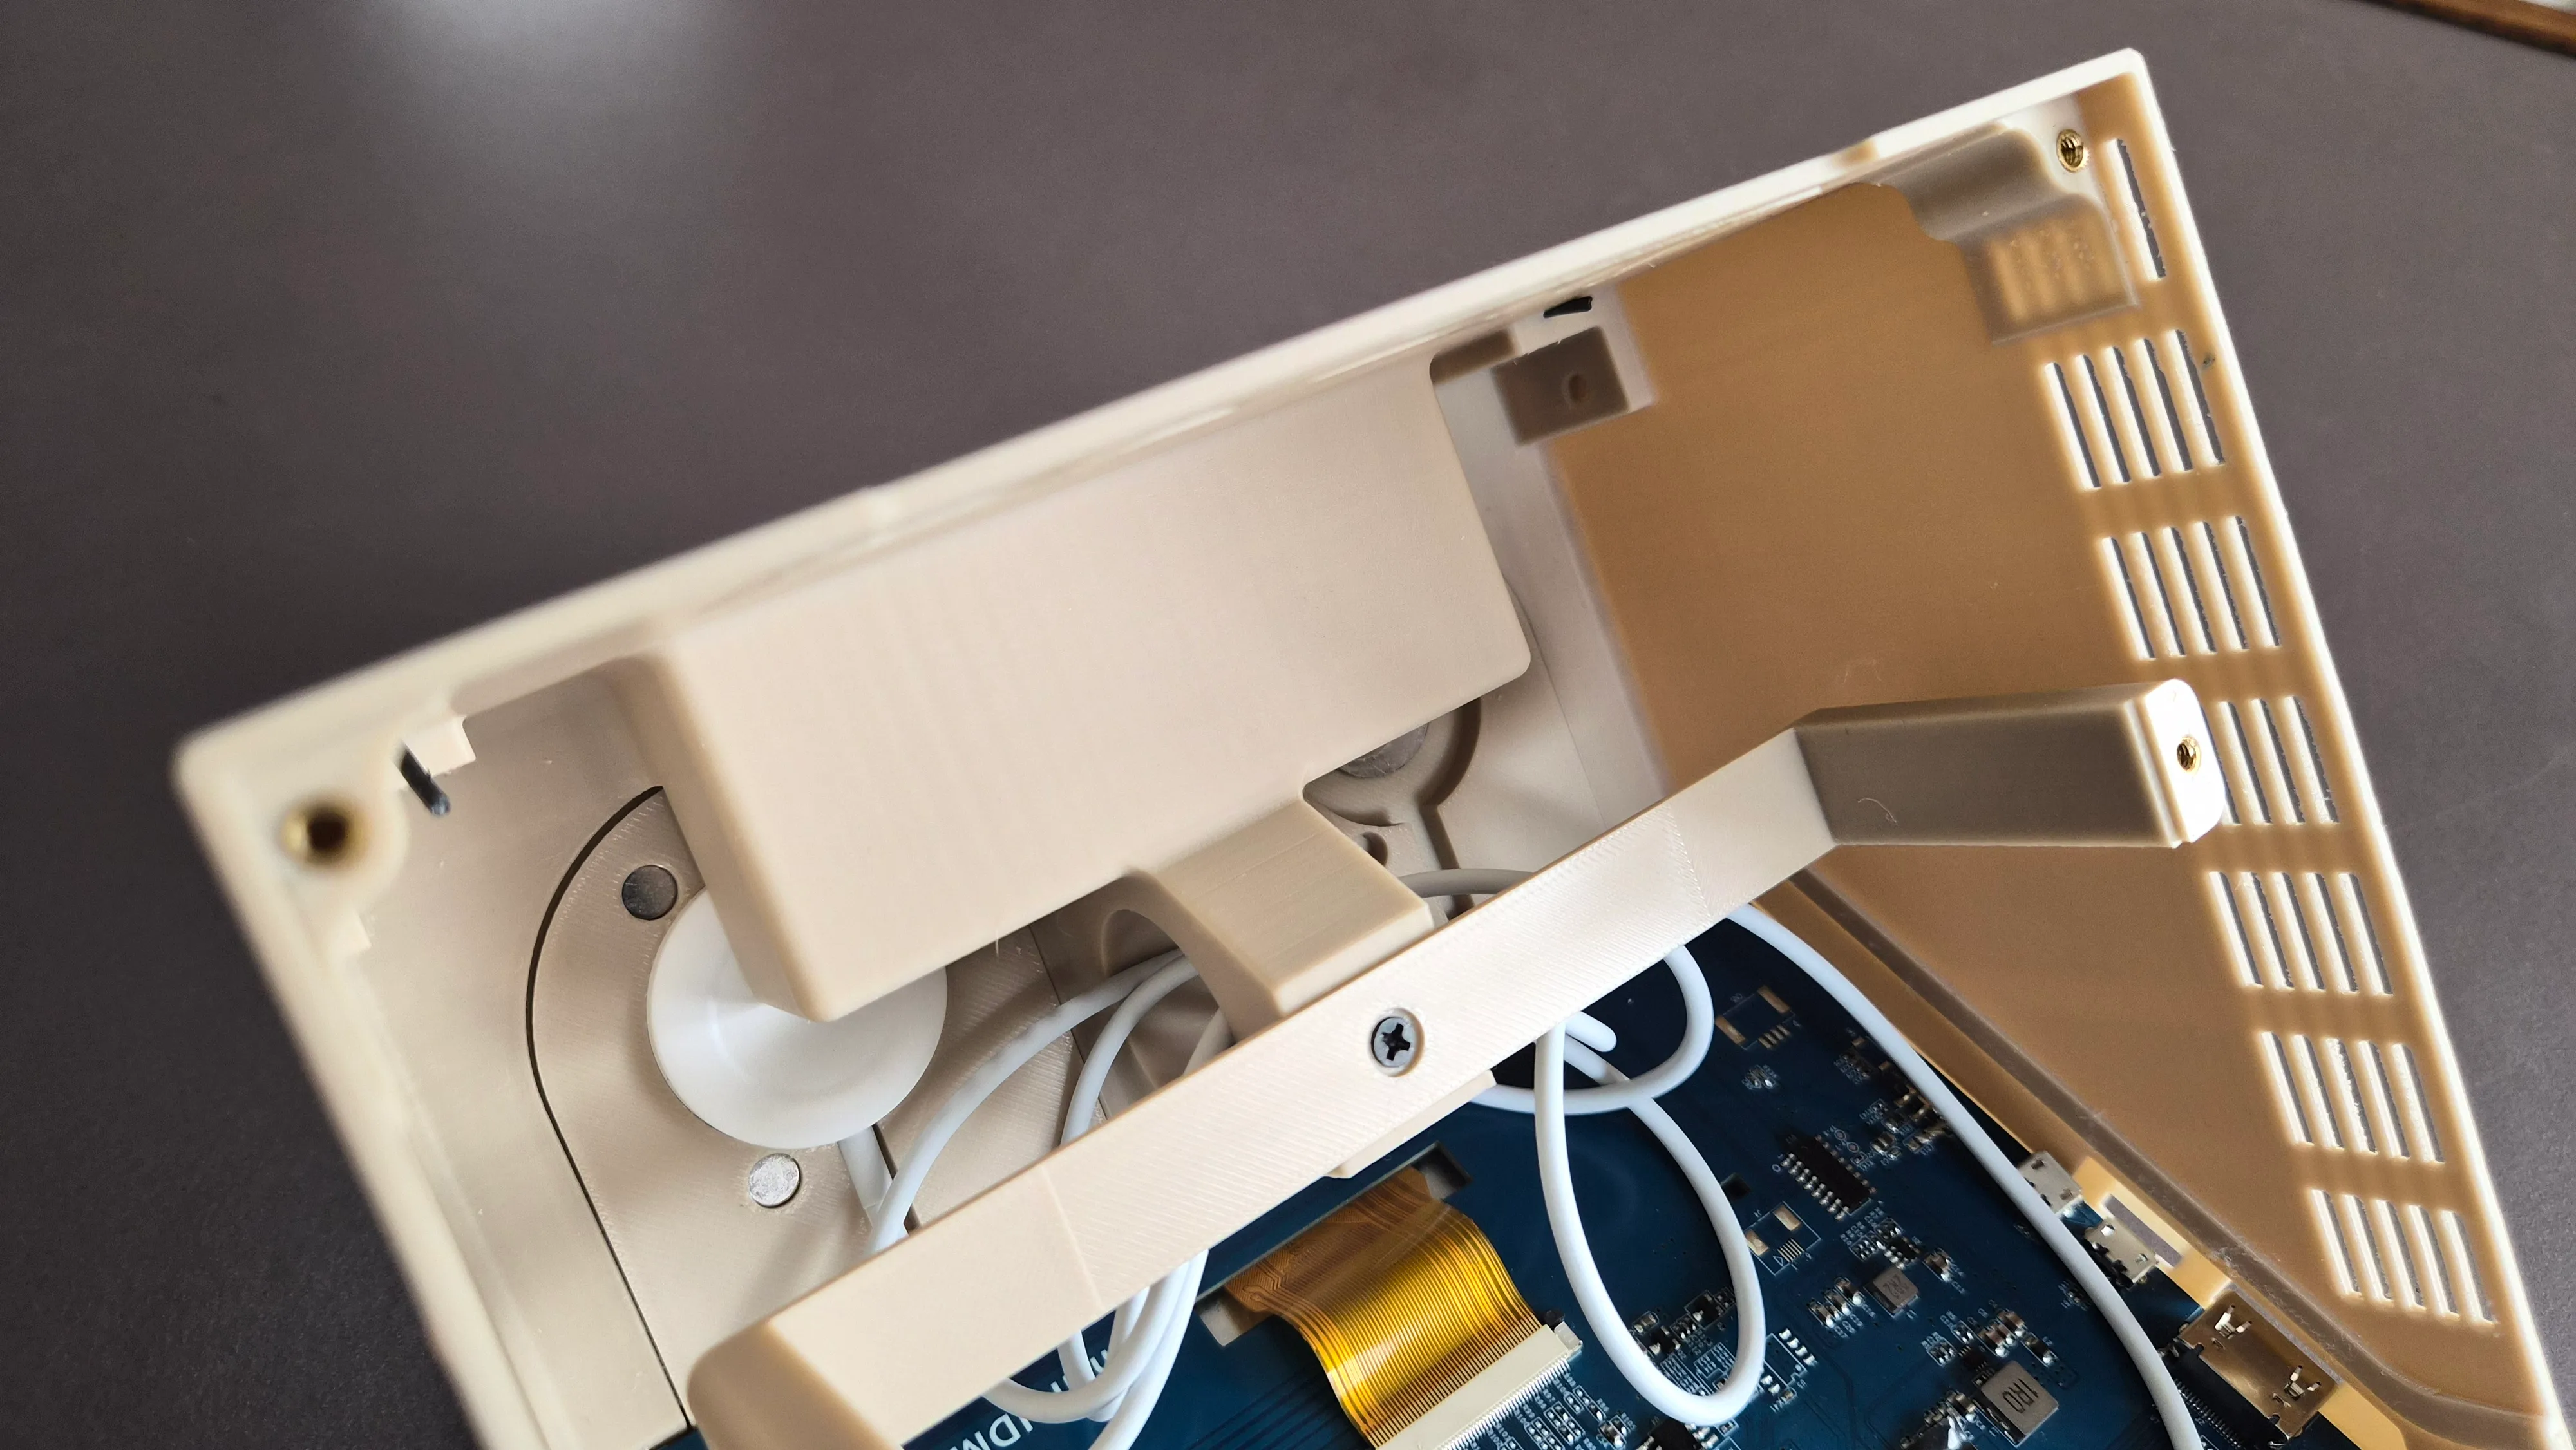
Choose which stud-shelves that you intend to use and slide them into the slots on the main body. Depending on your configuration, place the magnets/Qi-charger in the shelves. They should be friction-fit, but optionally you can use some glue for them.
VI.
Use a soldering iron to place the heat-set inserts in the dedicated holes
- 4 for the display (optional)
- 3 for the U-shaped bracket
- 4 for the bottom plate
VII.
Attach the U-bracket to the center of the body.
VIII.
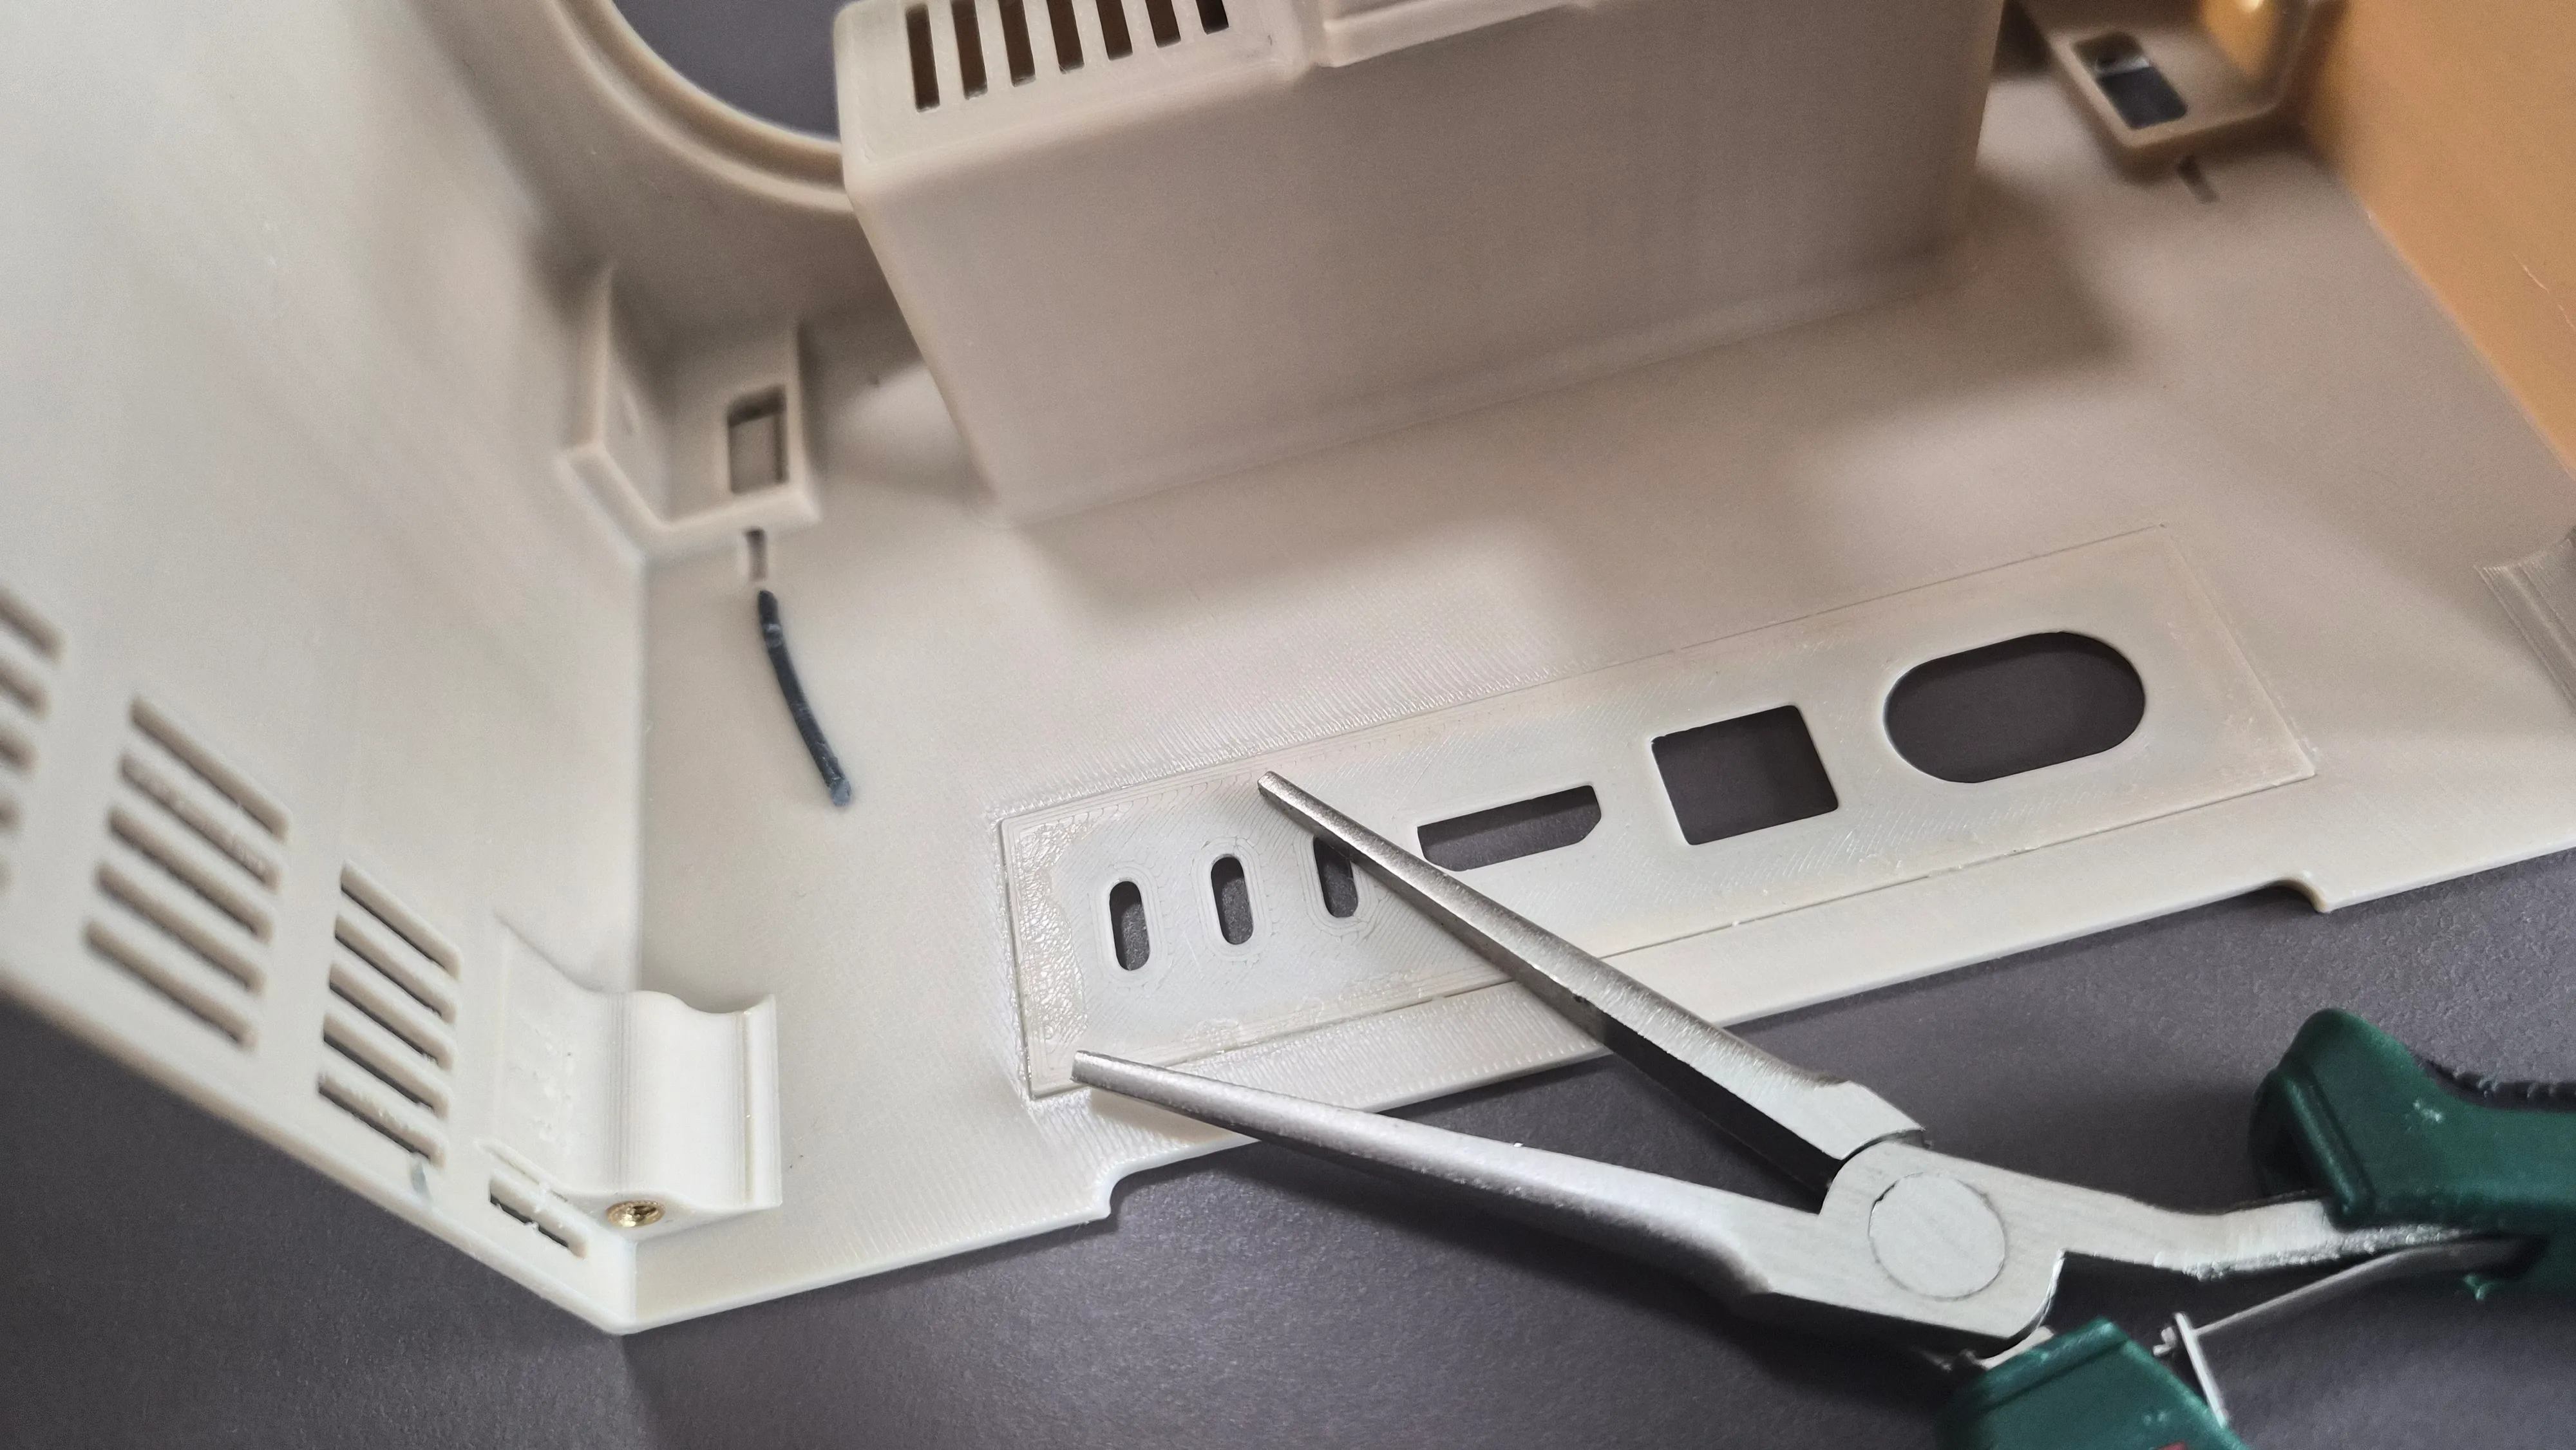
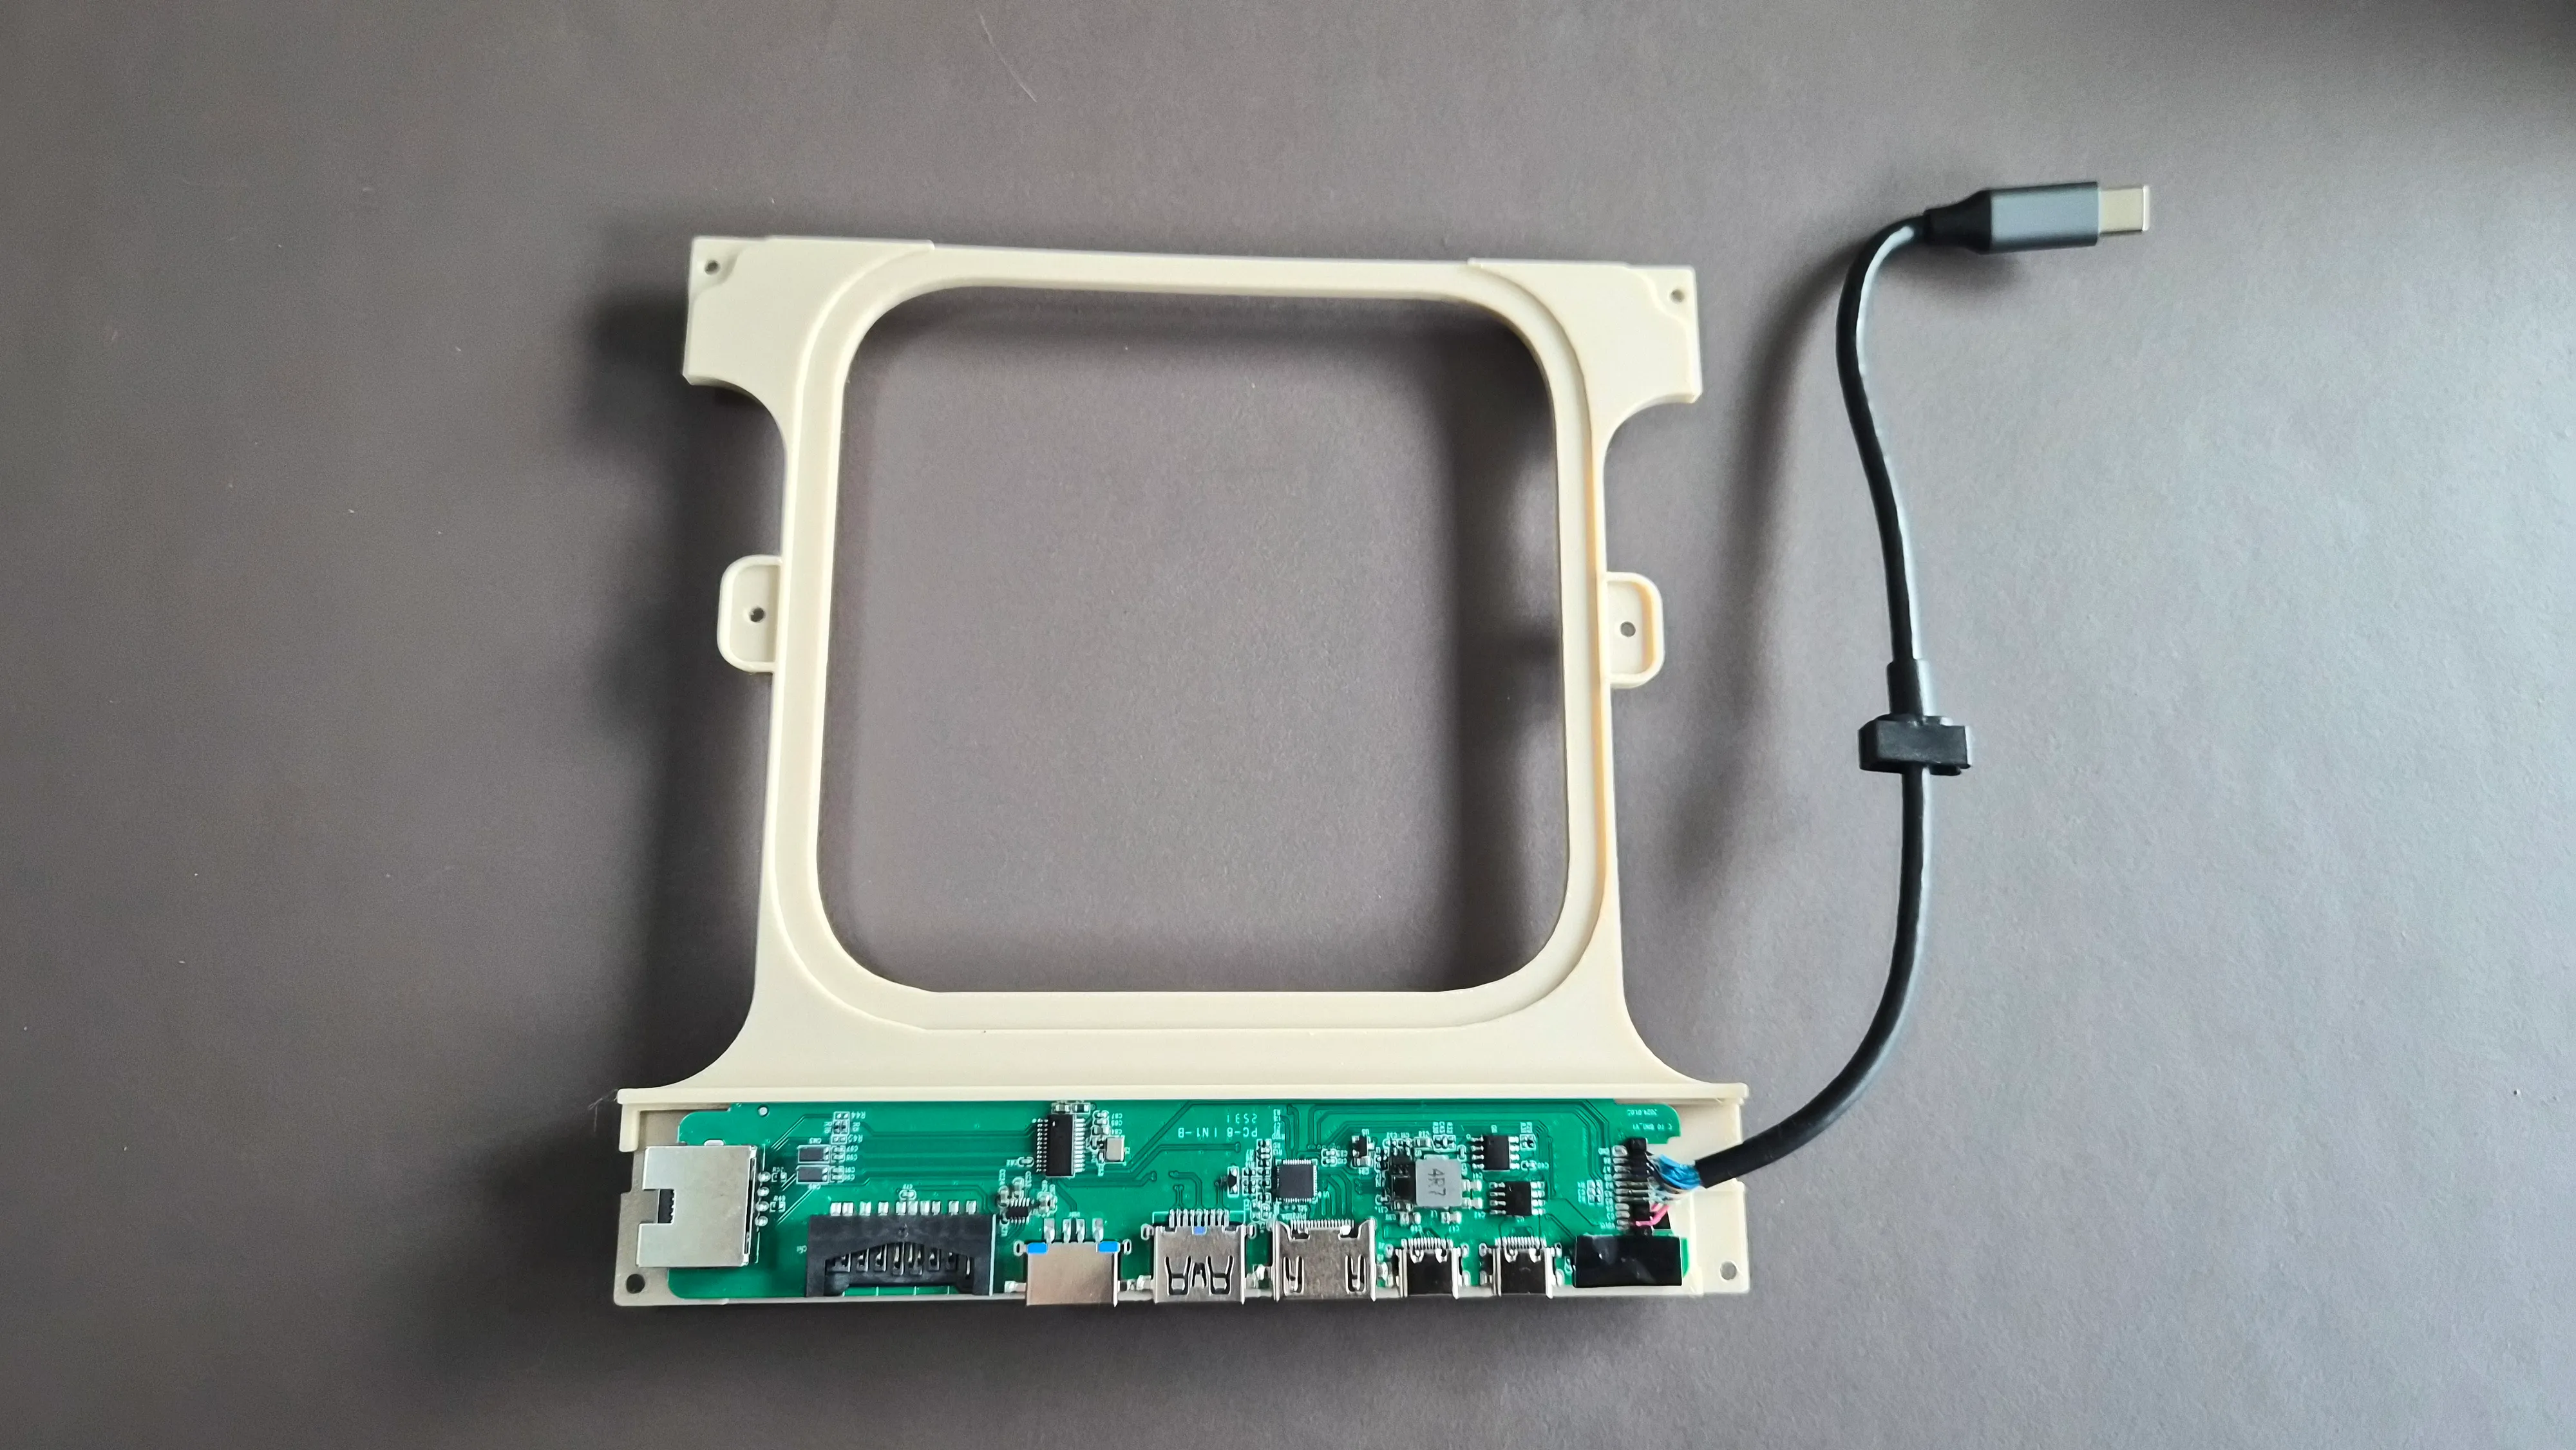
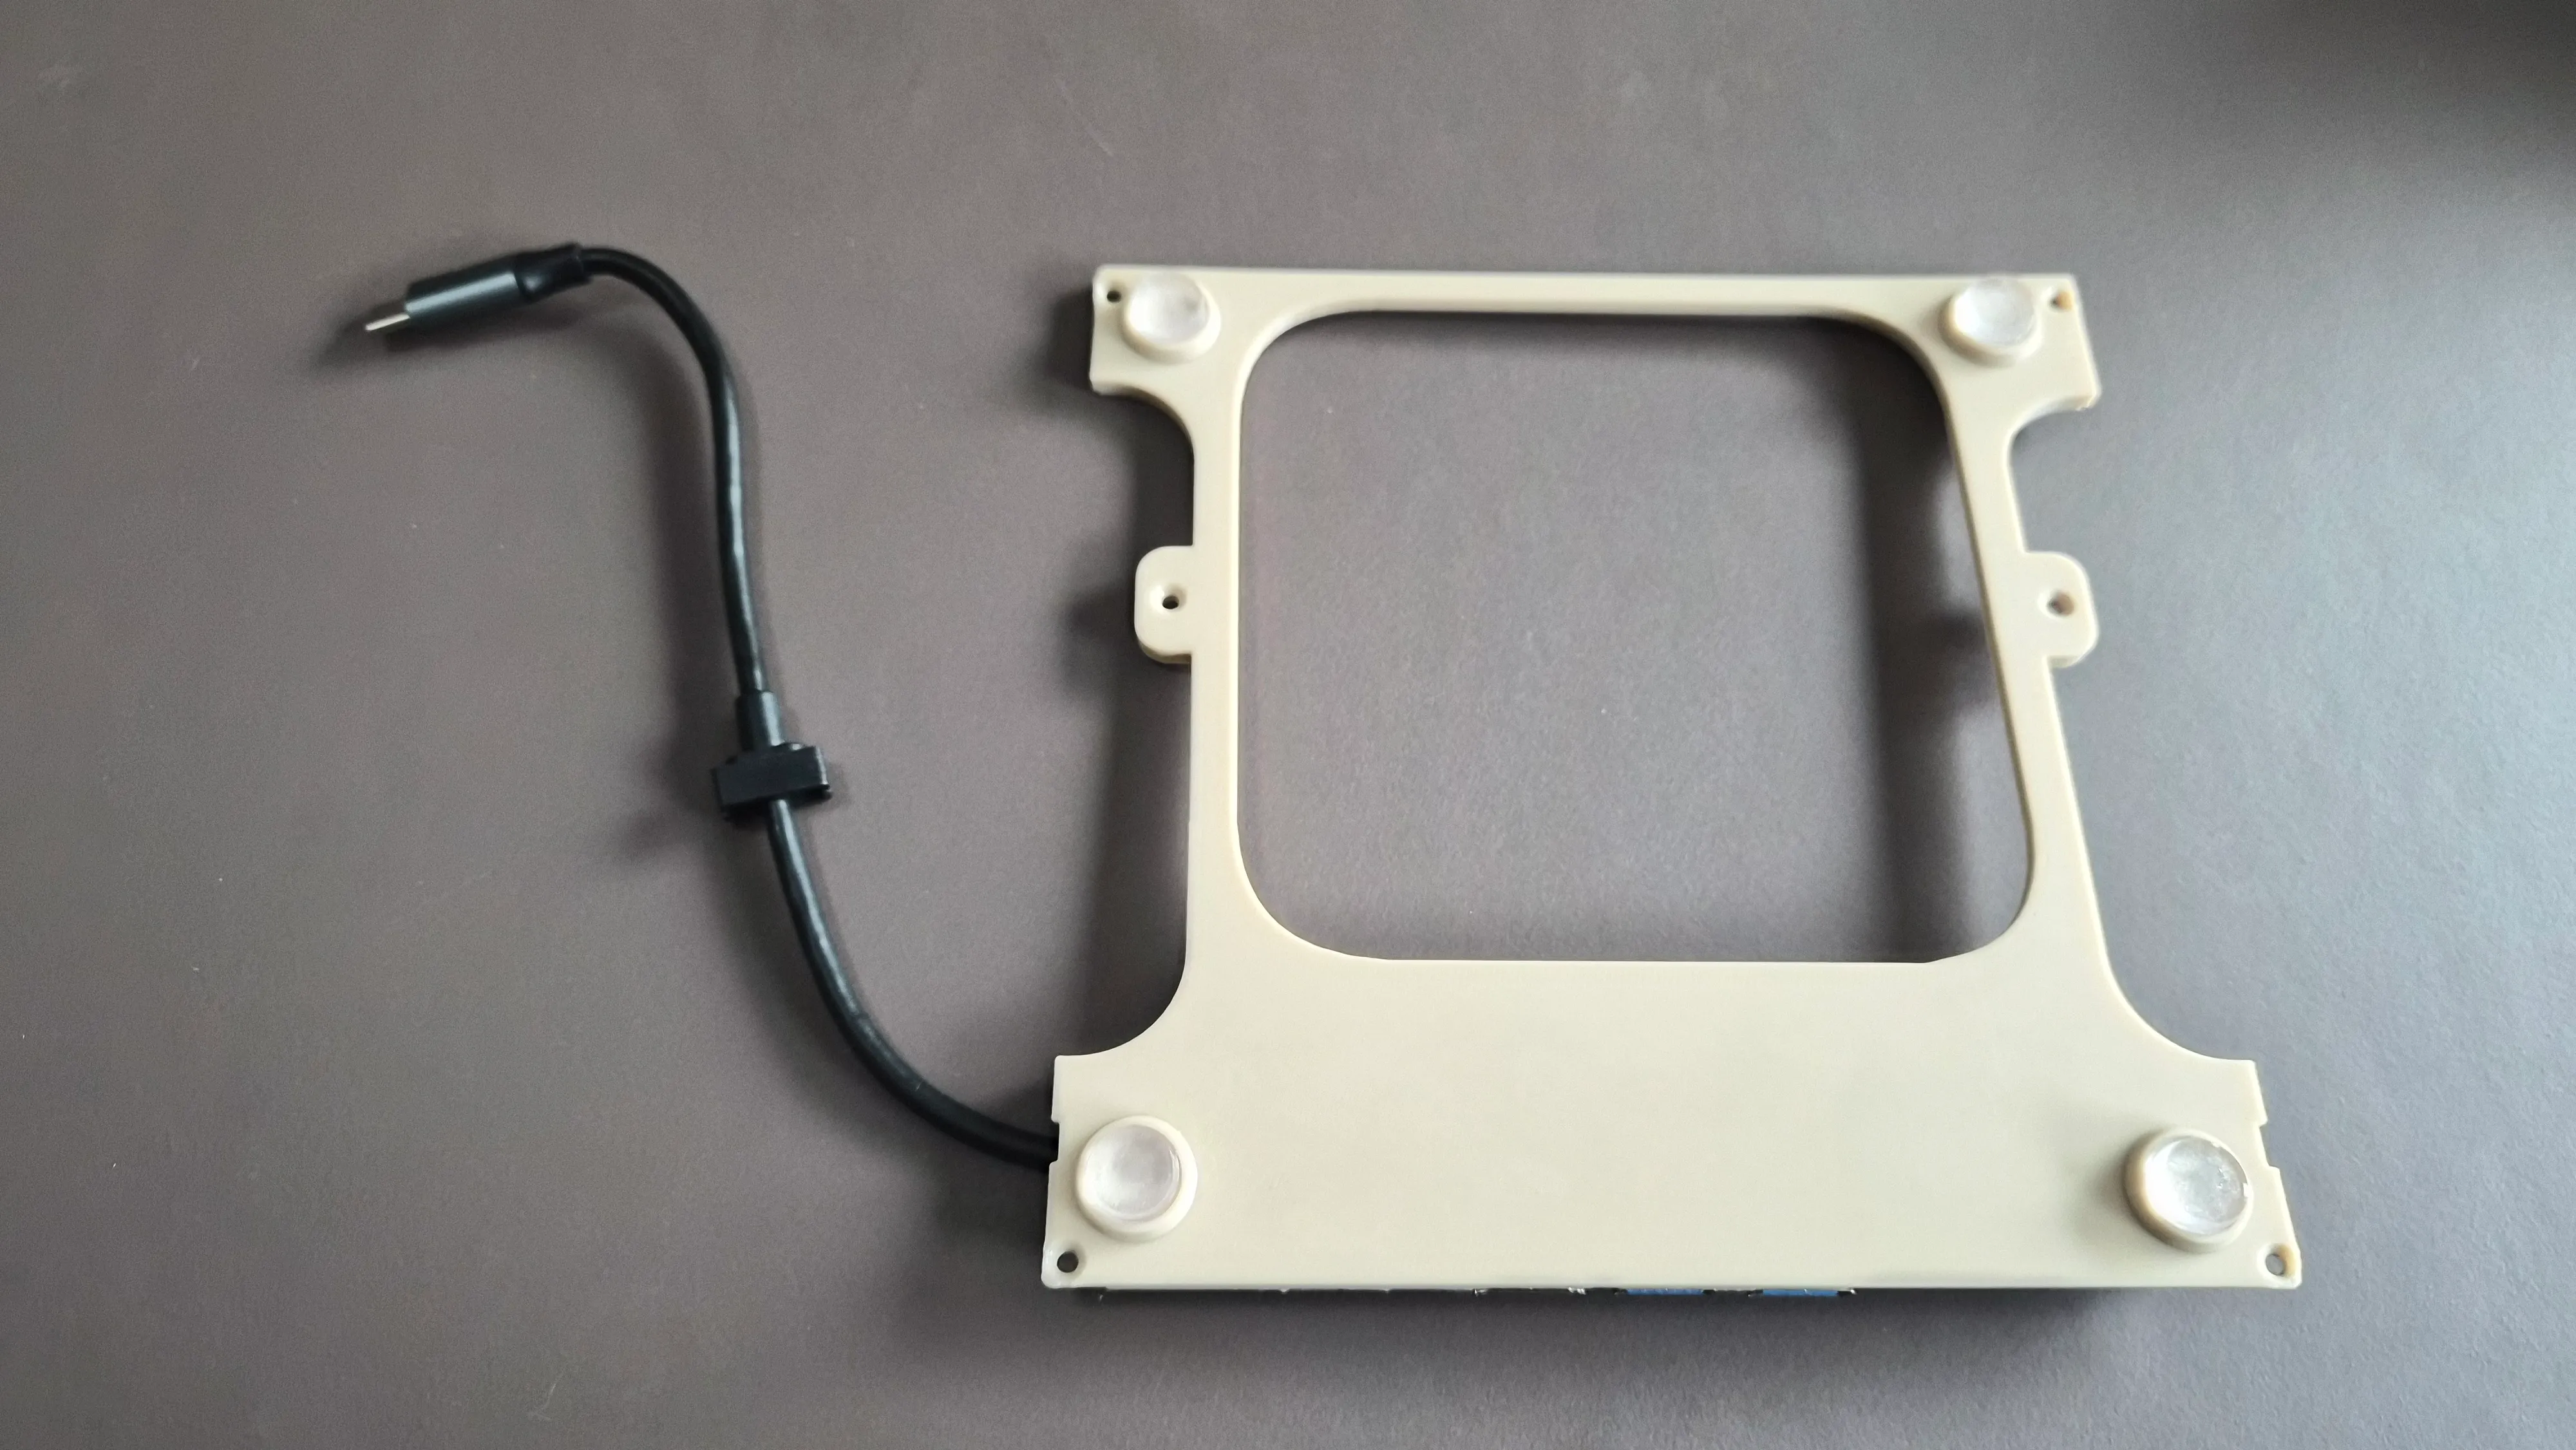
Remove the PCB of the USB-hub by pulling the black part around the ethernet-port sideways.
IX.
Slide the back of the PCB into the slot on the bottom of the case. Optionally add little drops of glue to the bottom of the ethernet and/or usb-ports to secure it into place.
X.
Slide the front of the case into the slots of the main body (friction-fit).
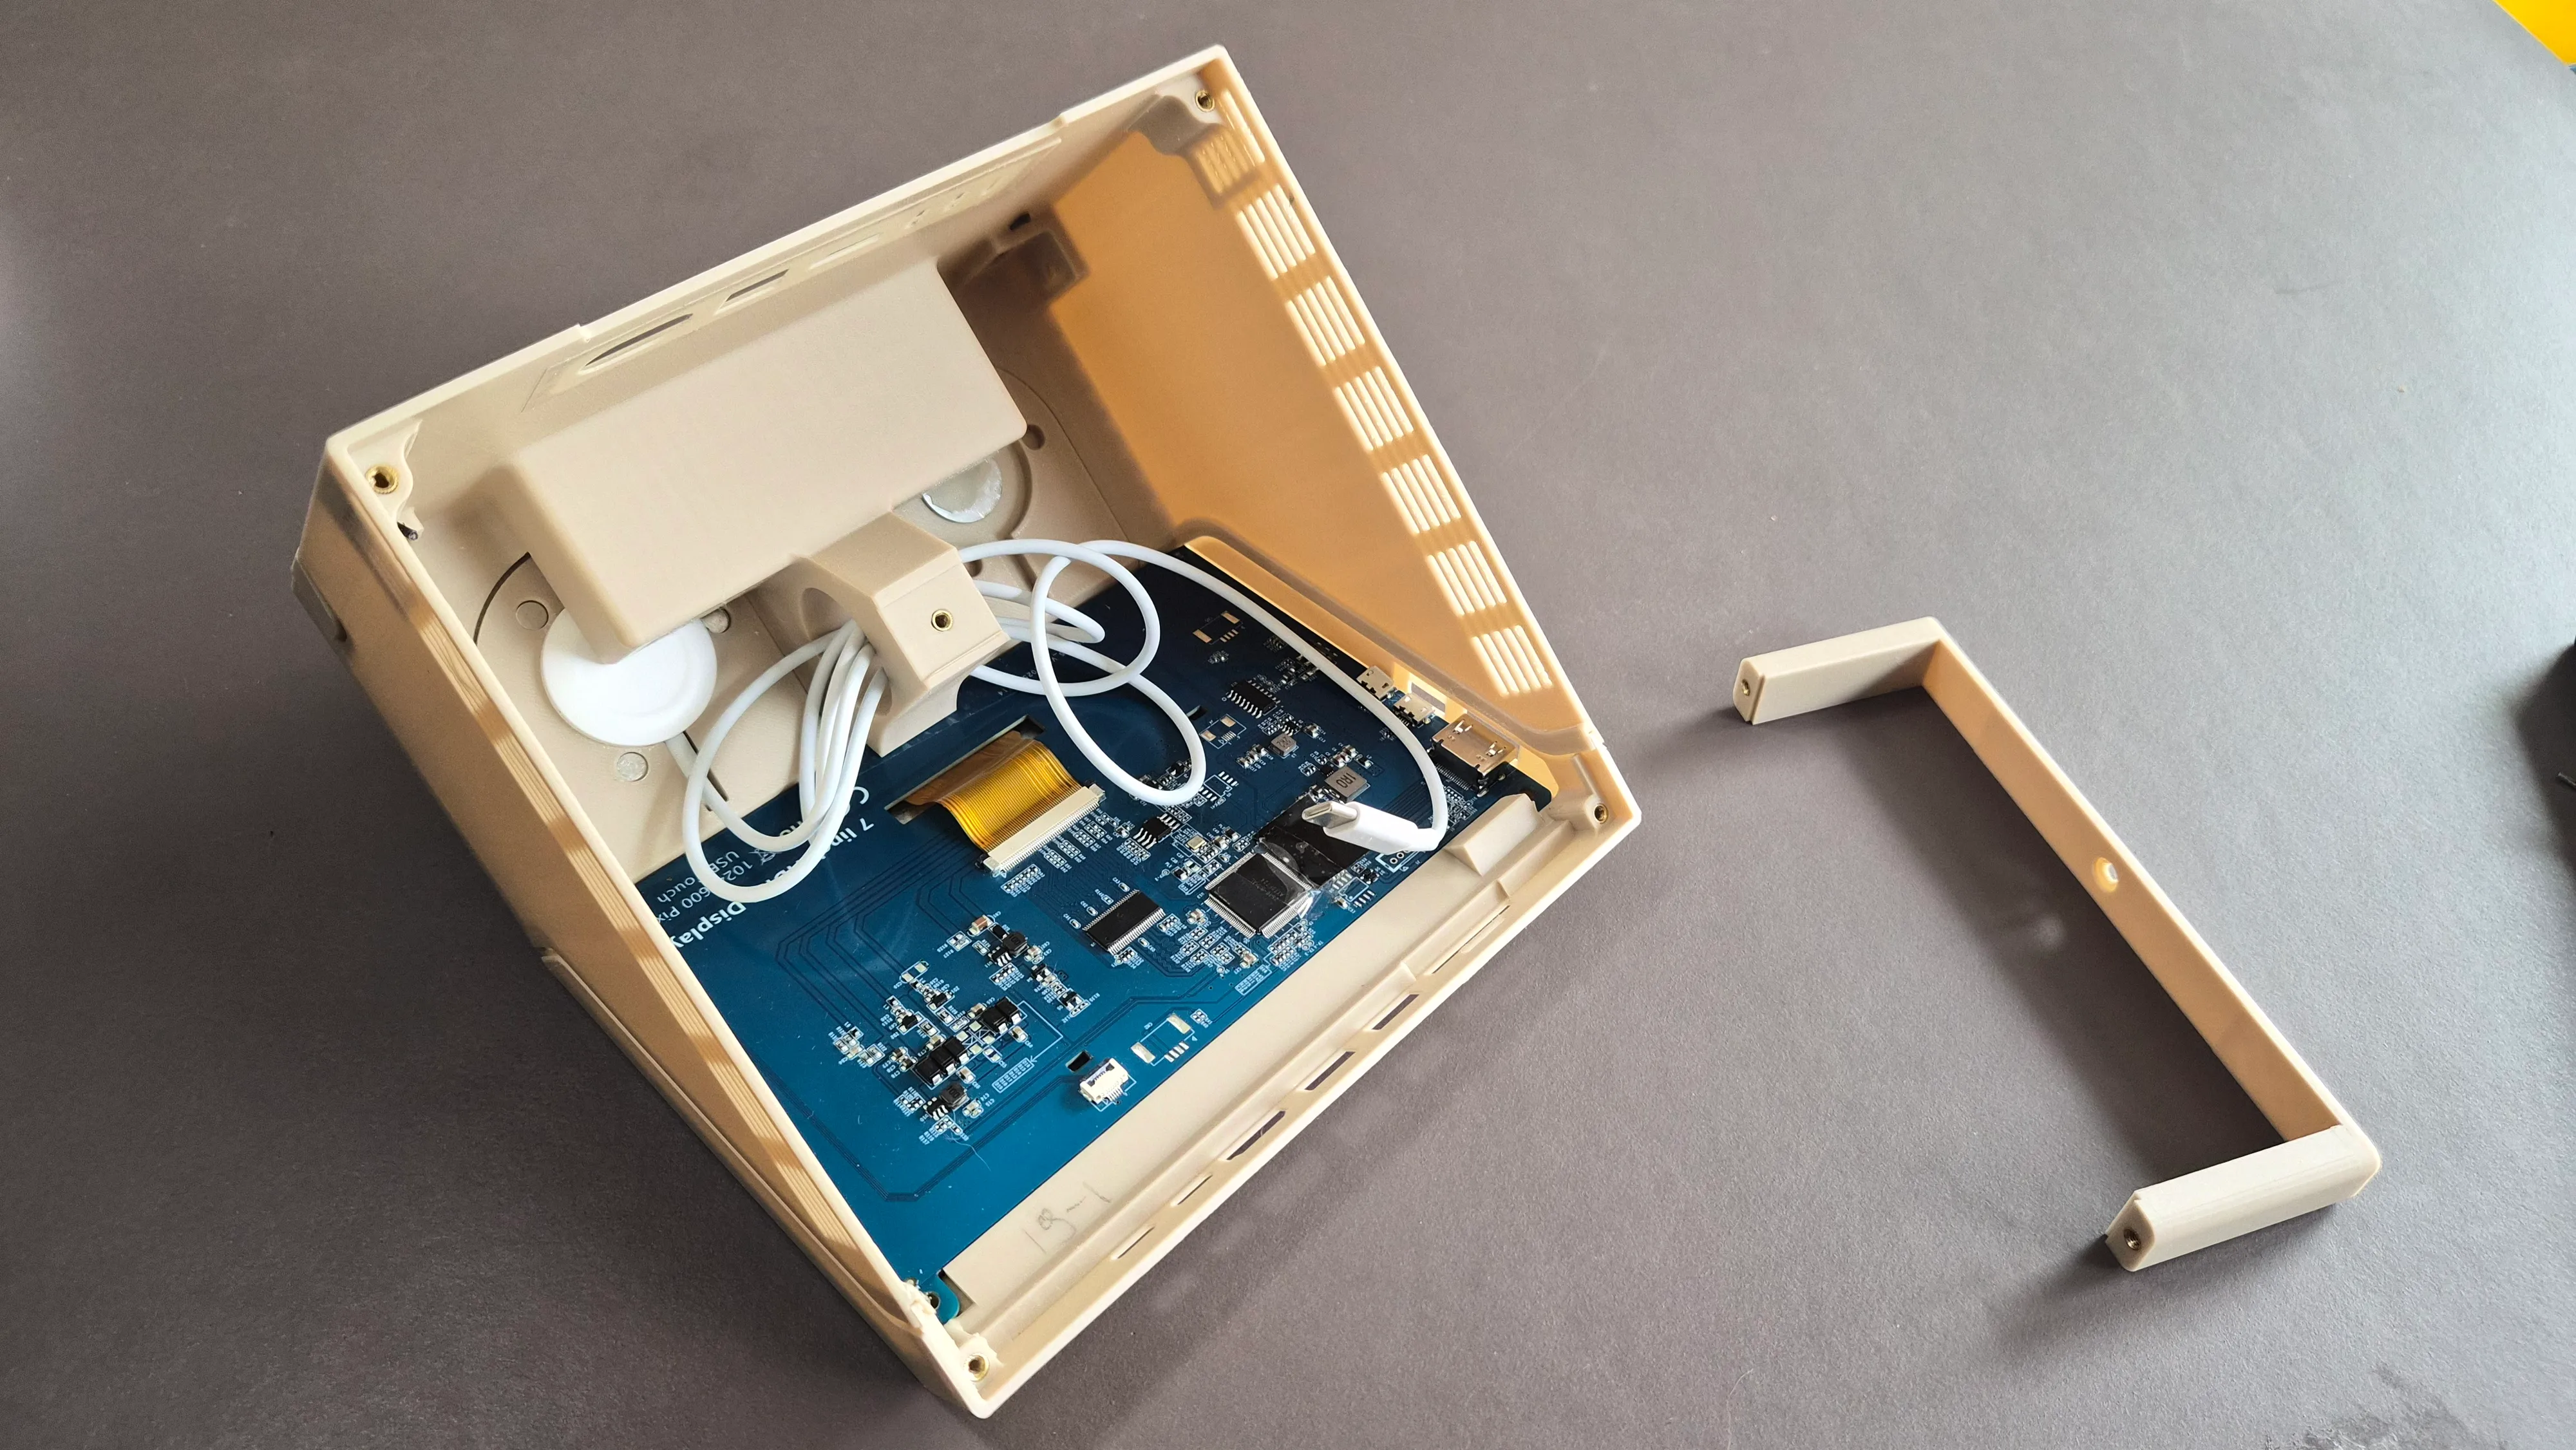
XI.
Place the case upside down and gently insert the Mac mini.
XII.
Connect the USB-cables of the USB-hub and/or the Qi-charger to the front ports of the Mac mini. It’s quite a tight fit and you might have to bend the cable a little bit.
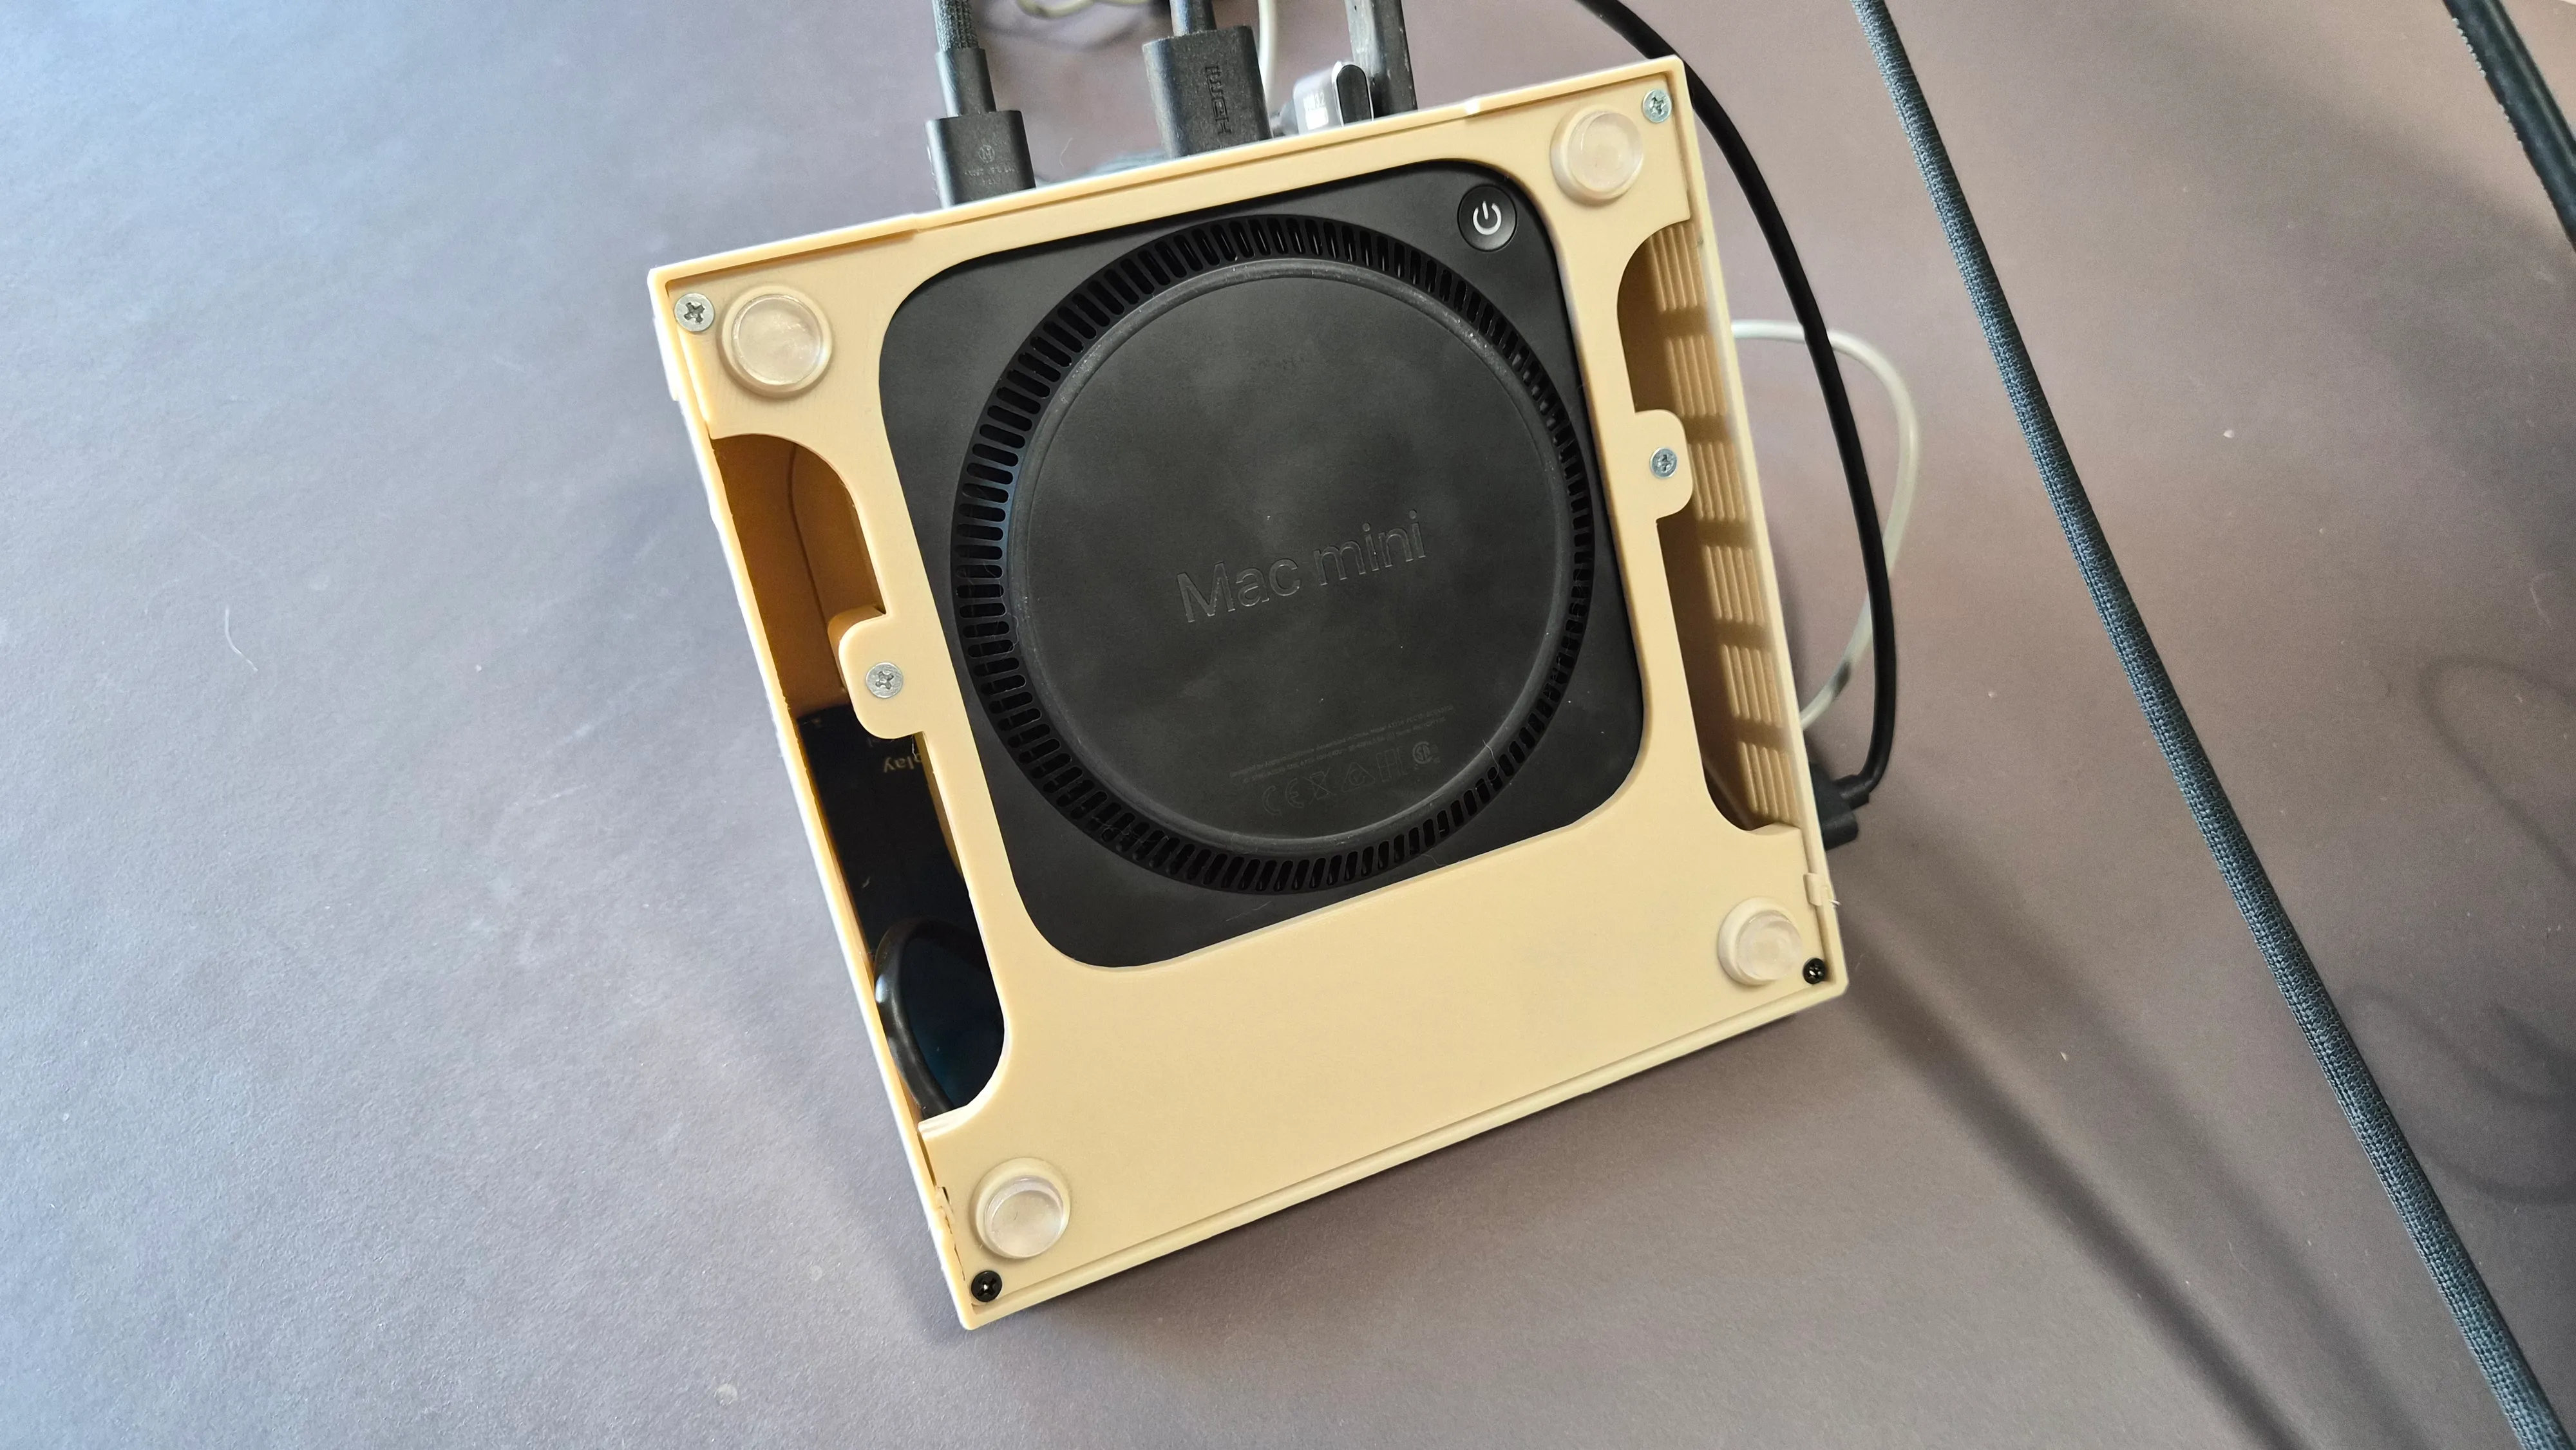
XIII.
Put the bottom plate into place and fasten the 4 screws to connect it to the body.
XIV.
To raise the Mac mini a bit and improve the airflow, you can attach the four circular discs with some glue.
XV.
Add some rubber feet to the discs.
XVI.
Turn over the case and magnetically attach the studs on top.
XVII.
Connect the power cable and see if everything works as expected.
XVIII.
All done! You now have your very own M2x2 command center!
×
Shopping List
REF: M2x2
- 7" IPS Touch Display€ 41,99
- eSUN PLA+ Filament (Bone white)€ 19,18
- Heat-set Inserts€ 3,03
- M3 Screws 6mm (Assorted)€ 2,74
- USB-C Hub€ 4,89
- Apple Watch / Airpods charging cable€ 3,39
Total Est.
€ 75,22
 THANK YOU FOR BUILDING
 "2026: The Year the Brick Grew Up. As LEGO introduces its most advanced sensor-packed brick yet, Watt IV realizes the 10:1 vision of a desk-side laboratory."
the Breakthrough
If our tools could look as playful as the things we built as kids, would we approach our work with more joy? The M2x2 is just the beginning of a workspace that feels less like an office and more like a laboratory for breakthroughs.
All design files and documentation are open-source and free to use. If you enjoy this project or plan to build your own, consider supporting the studio.
You can support our work by making a donation or by purchasing one of our products from our store. Your contribution directly funds the materials and coffee needed for the next prototype.
Watt IV is an independent creative technology studio. LEGO® is a trademark of the LEGO
Group of companies. Macintosh and Apple are trademarks of Apple Inc. WATT IV is not
affiliated with, sponsored by, or endorsed by the LEGO Group or Apple Inc.